15 KiB
Project Deployment Tutorial
Hello, I'm Programmer Yupi.
In previous articles, we learned how to develop various projects. However, if a project can only run locally, it would be a pity. In this article, I will teach you how to deploy a project to the internet, making it accessible to people worldwide.
First, it's important to note that if you're using AI zero-code platforms like Bolt.new, Lovable, Meituan NoCode, or Baidu Miaoda, they usually come with built-in deployment features. You can simply click the publish button to go live, which is very convenient. However, if you want more flexible deployment options, such as using your own domain, choosing different servers, or deploying more complex full-stack projects, you'll need to learn more deployment methods.
Below, I'll introduce multiple deployment methods, from the latest AI auto-deployment to the popular Vercel one-click deployment, and even professional server deployment. You can choose the appropriate deployment method based on your project type and needs.
Overview of Deployment Methods
Before we start, let's take a look at the available deployment methods.
For frontend projects (static websites, single-page applications, etc.), the simplest way is to use hosting platforms like Vercel, GitHub Pages, EdgeOne Pages, etc. These platforms offer free hosting services. You just need to upload your code, and they will automatically deploy it and generate an access link.
For full-stack projects (including both frontend and backend), you can choose containerized deployment (Docker), cloud server deployment (Alibaba Cloud, Tencent Cloud, etc.), or Serverless deployment. These methods are relatively more complex but offer more powerful features.
Below, I'll detail each deployment method.
Let AI Auto-Deploy (Latest and Coolest)
First, let's share the latest technique: letting AI deploy your website for you.
In the past, developing a website required proposing requirements, designing a solution, writing code, and finally deploying it. We all know that AI is getting better at writing code, gradually taking over some of the programmers' coding tasks. However, AI's capabilities go beyond that. Using MCP, it can even directly deploy our websites for us!
Alright, so I just need to propose a one-sentence requirement, and I don't even need to write code or deploy it myself. Are you trying to make me obsolete?

Let's walk through a practical example of letting AI generate and deploy a personal blog website.
Preparation Tools
The tools we need include:
- Cursor: An AI programming tool responsible for calling AI to generate code
- EdgeOne Pages MCP: A service that can quickly deploy websites to CDN and generate public access links
What is EdgeOne Pages MCP? Let's break down the words.
EdgeOne is a CDN acceleration service provided by Tencent Cloud, which caches website resources to edge nodes closest to users, improving website performance.
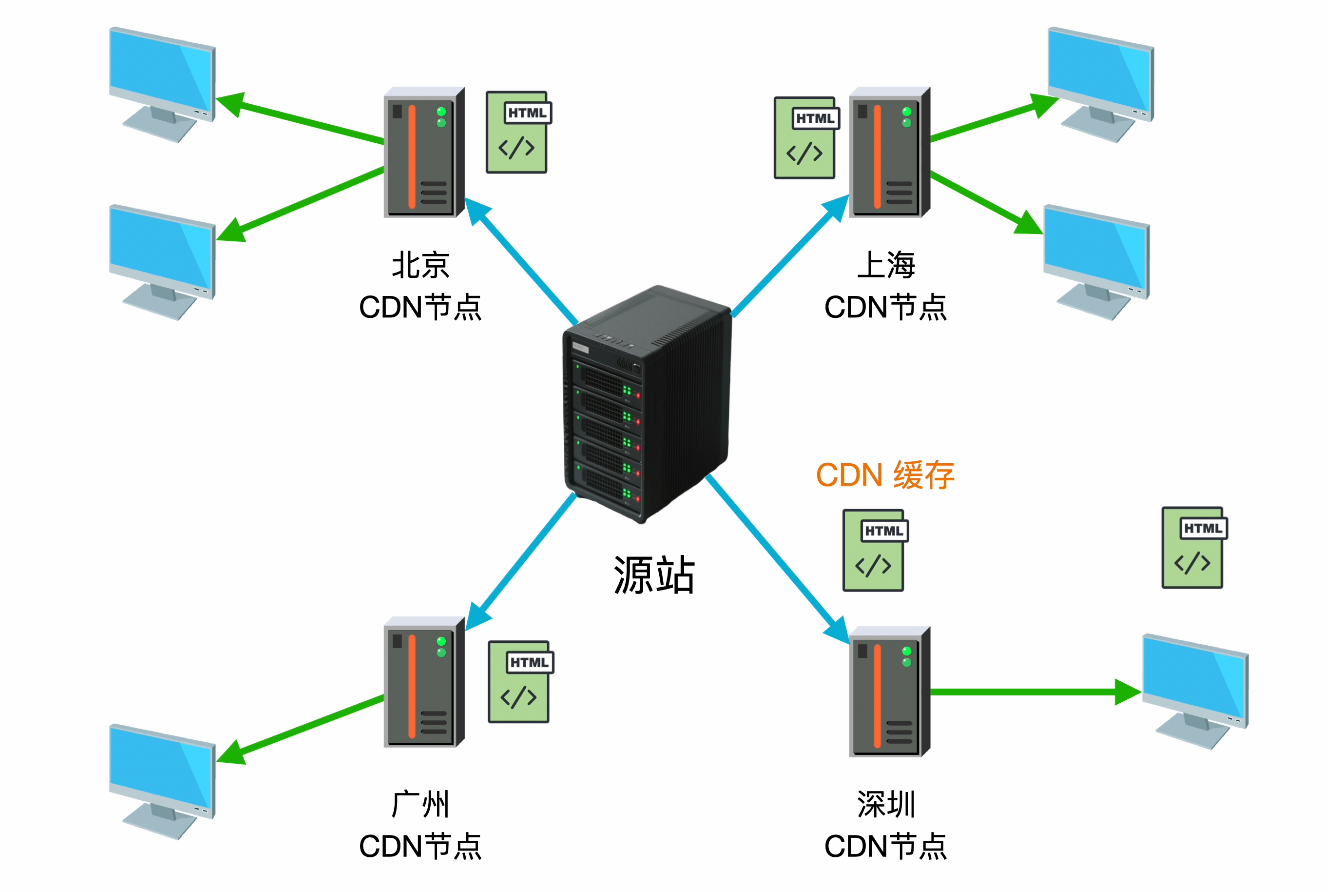
EdgeOne Pages is a website deployment service based on this CDN, allowing you to easily deploy websites to CDN and obtain public access addresses without needing to set up your own server.
MCP is the currently popular Model Context Protocol, enabling AI models to easily use various tools to enhance capabilities and complete more complex tasks.
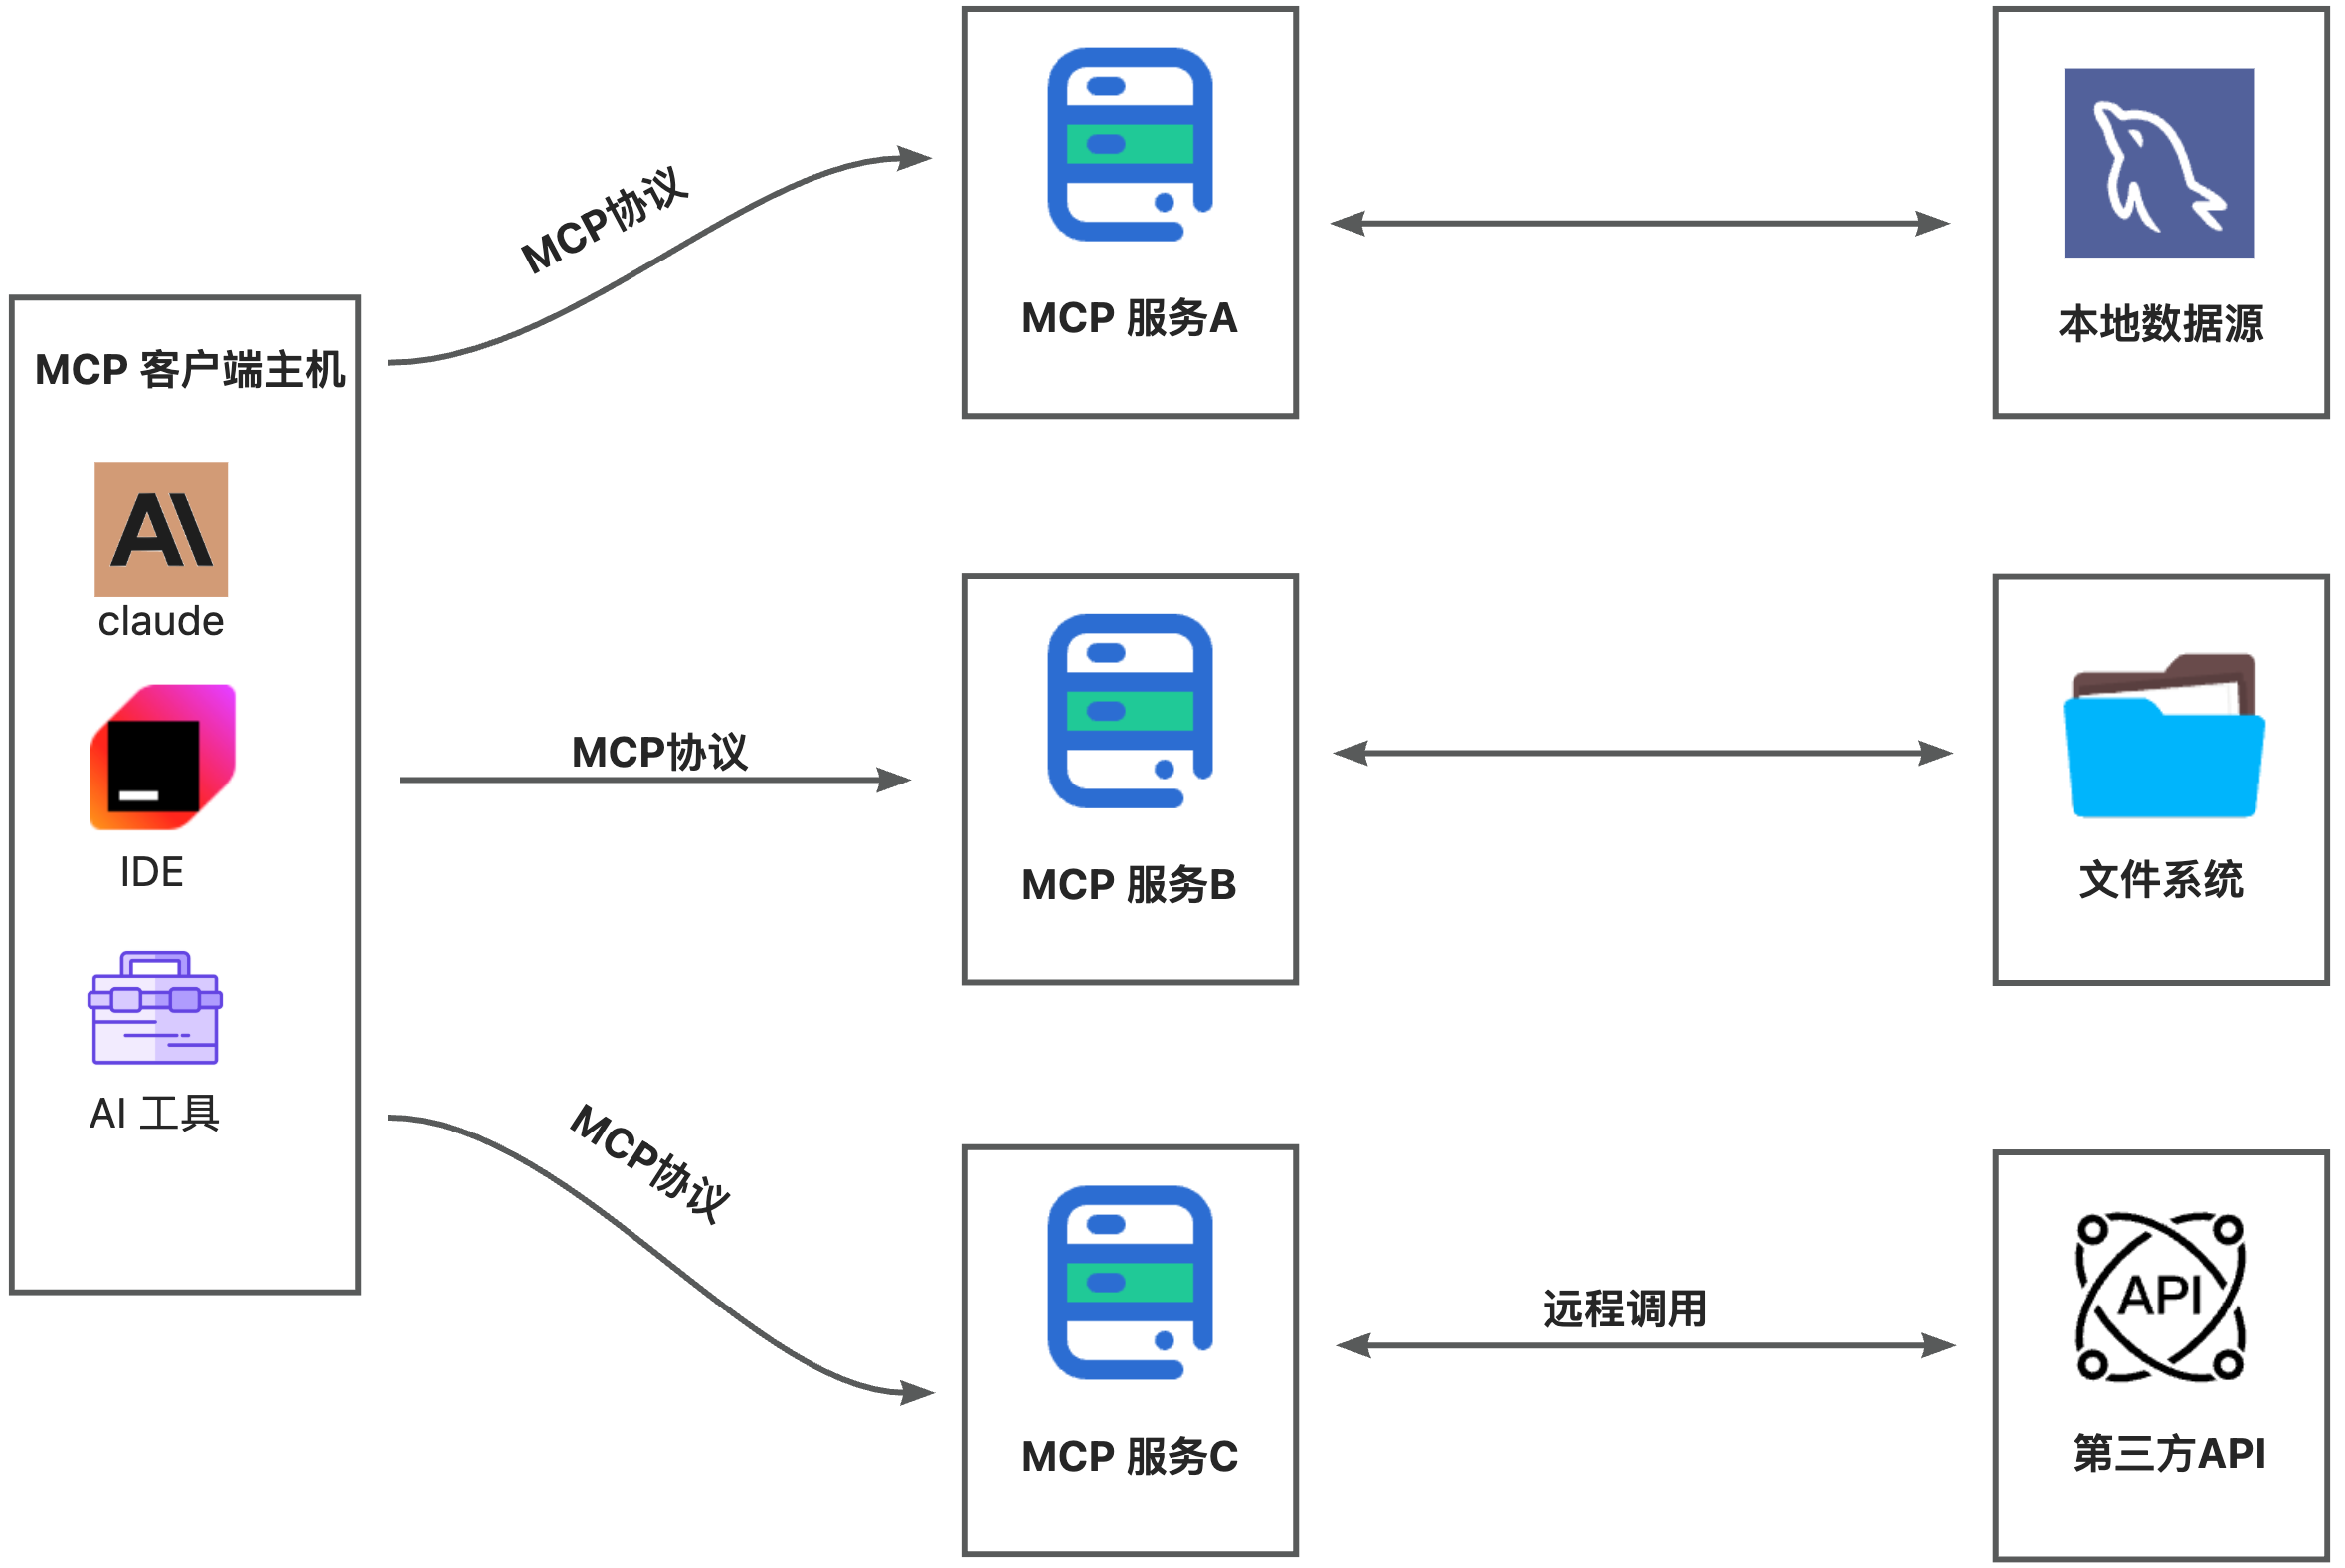
The role of EdgeOne Pages MCP is obvious — providing AI with website deployment tools, which is a popular MCP.
Quick Practice
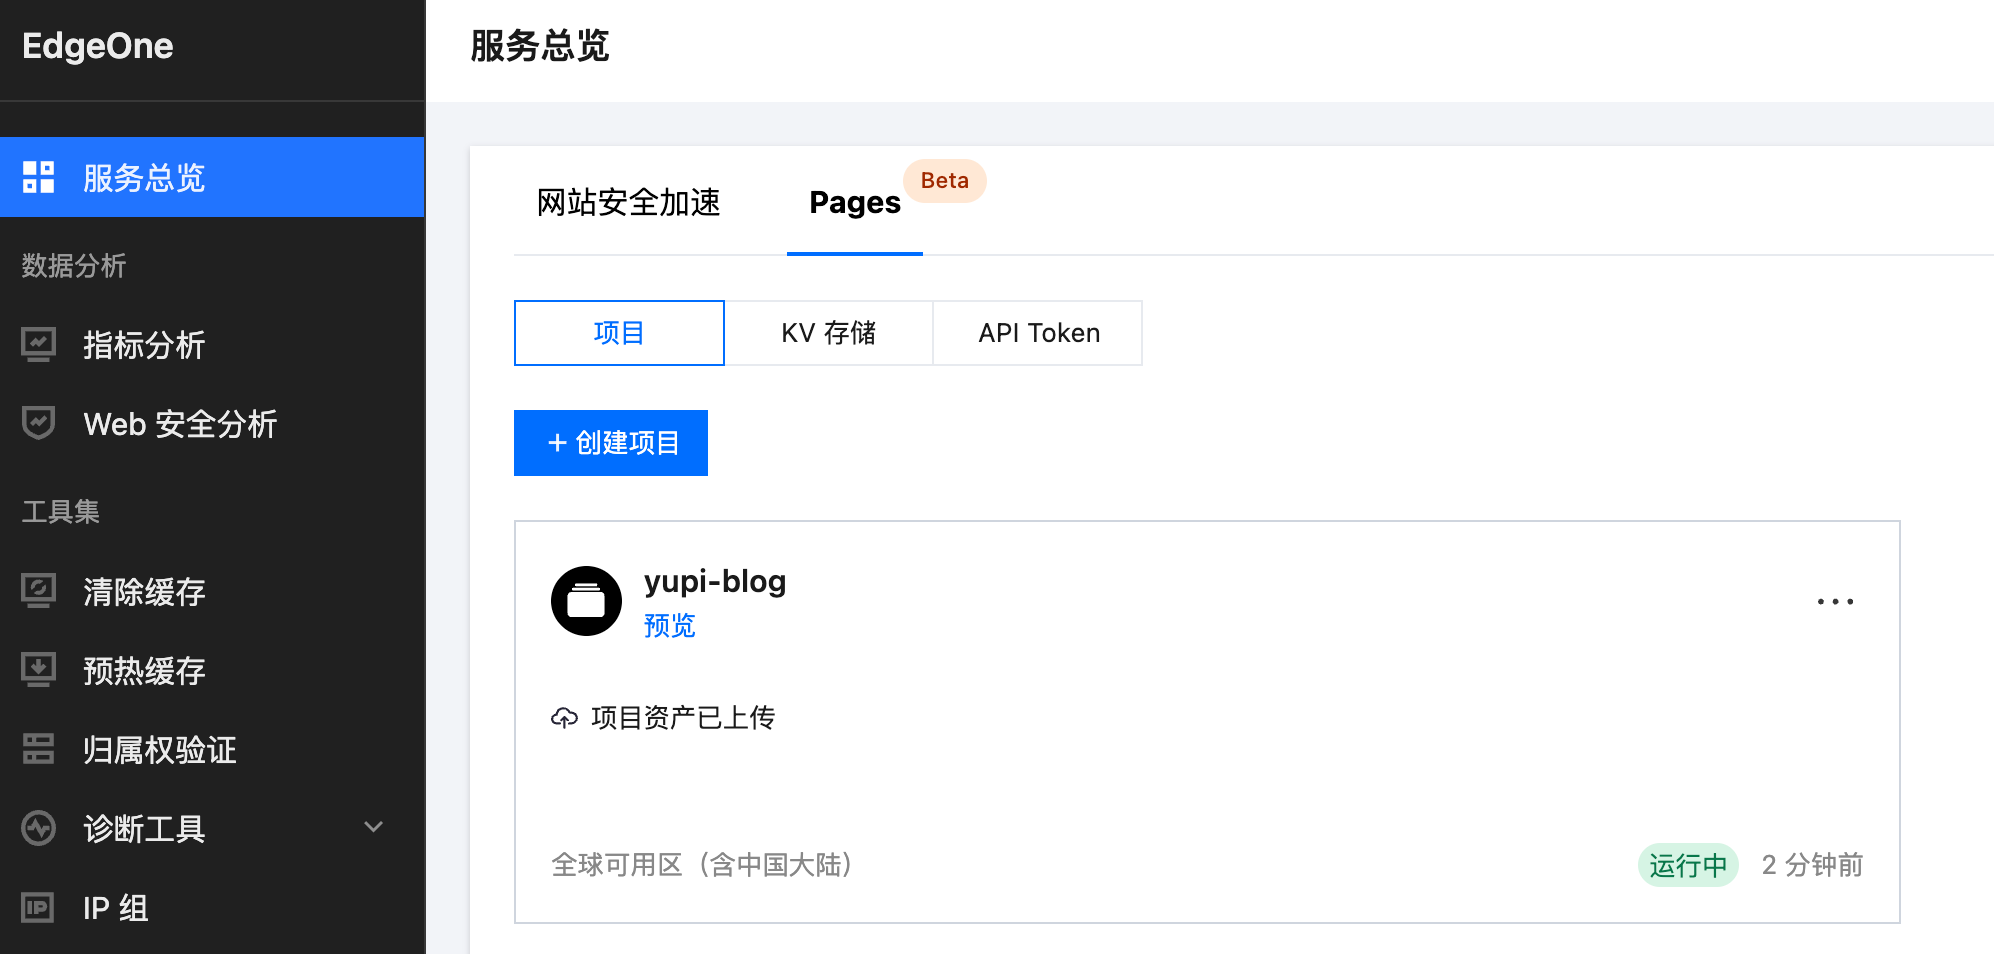
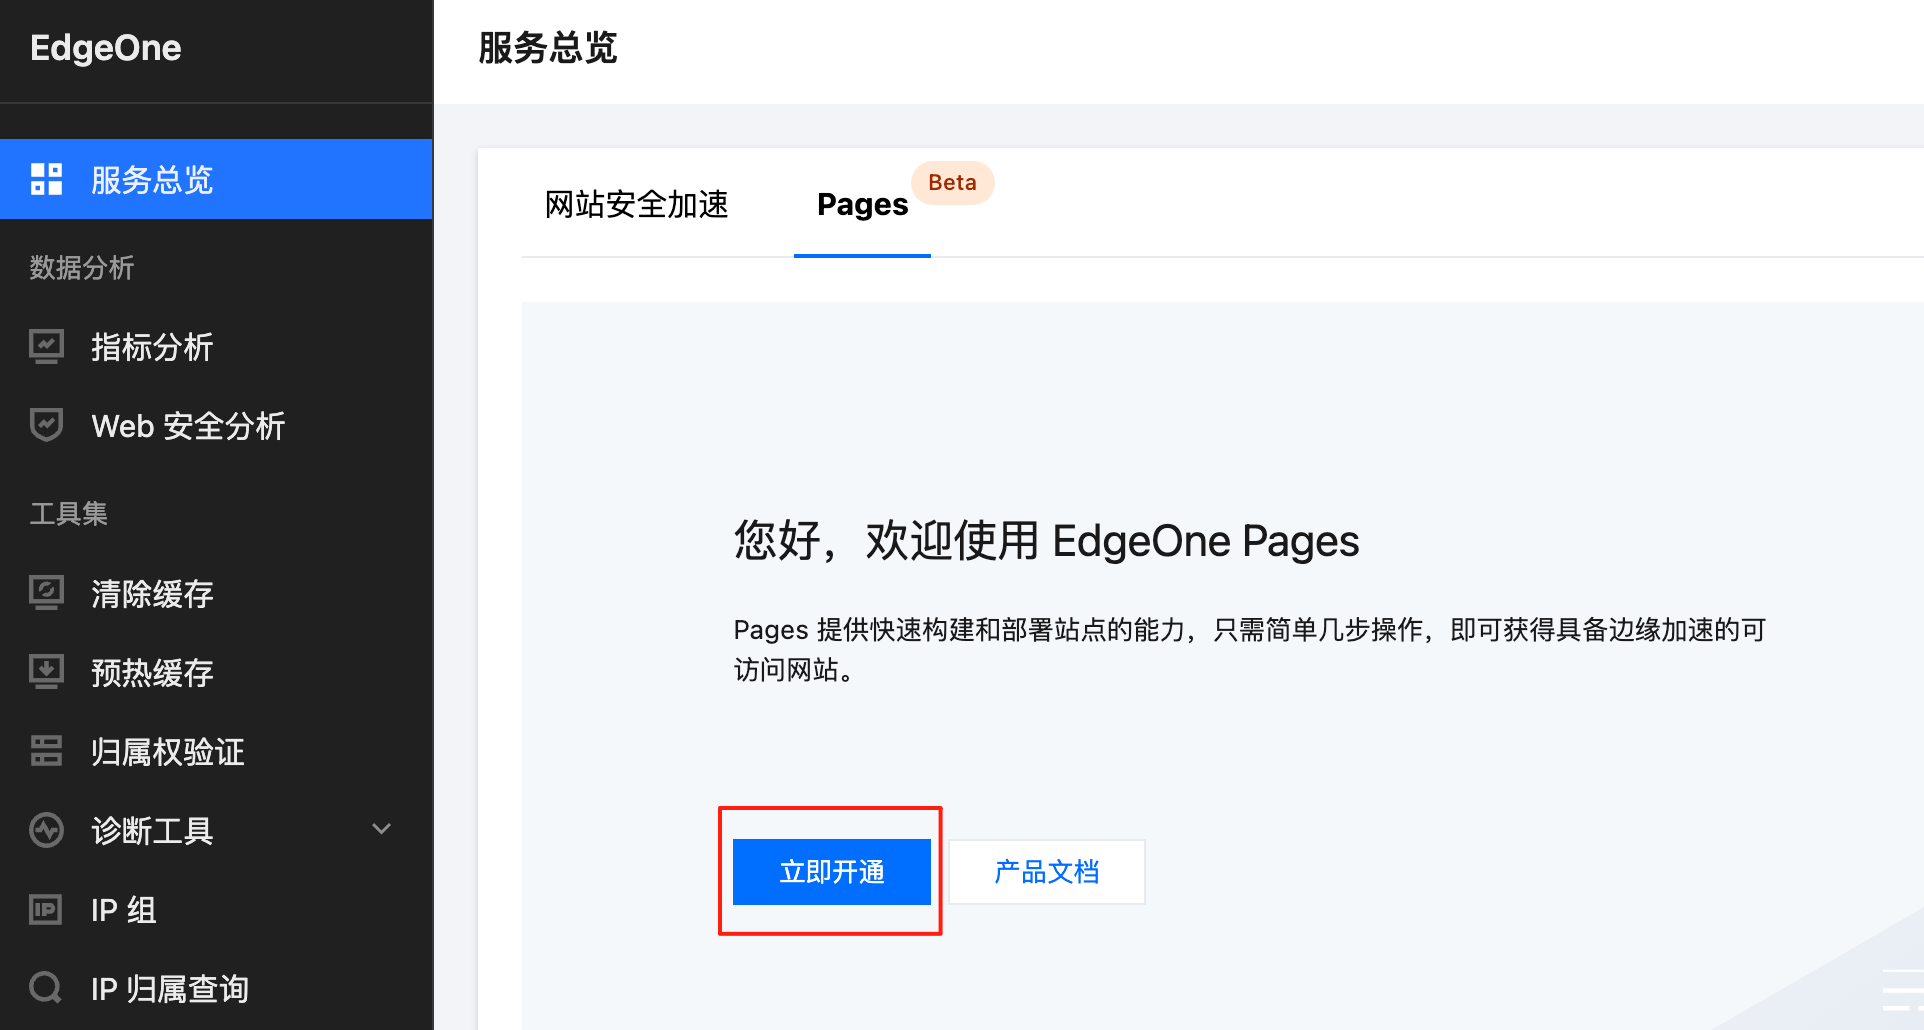
- Enable Pages Service
First, go to the EdgeOne Console to enable the Pages service:
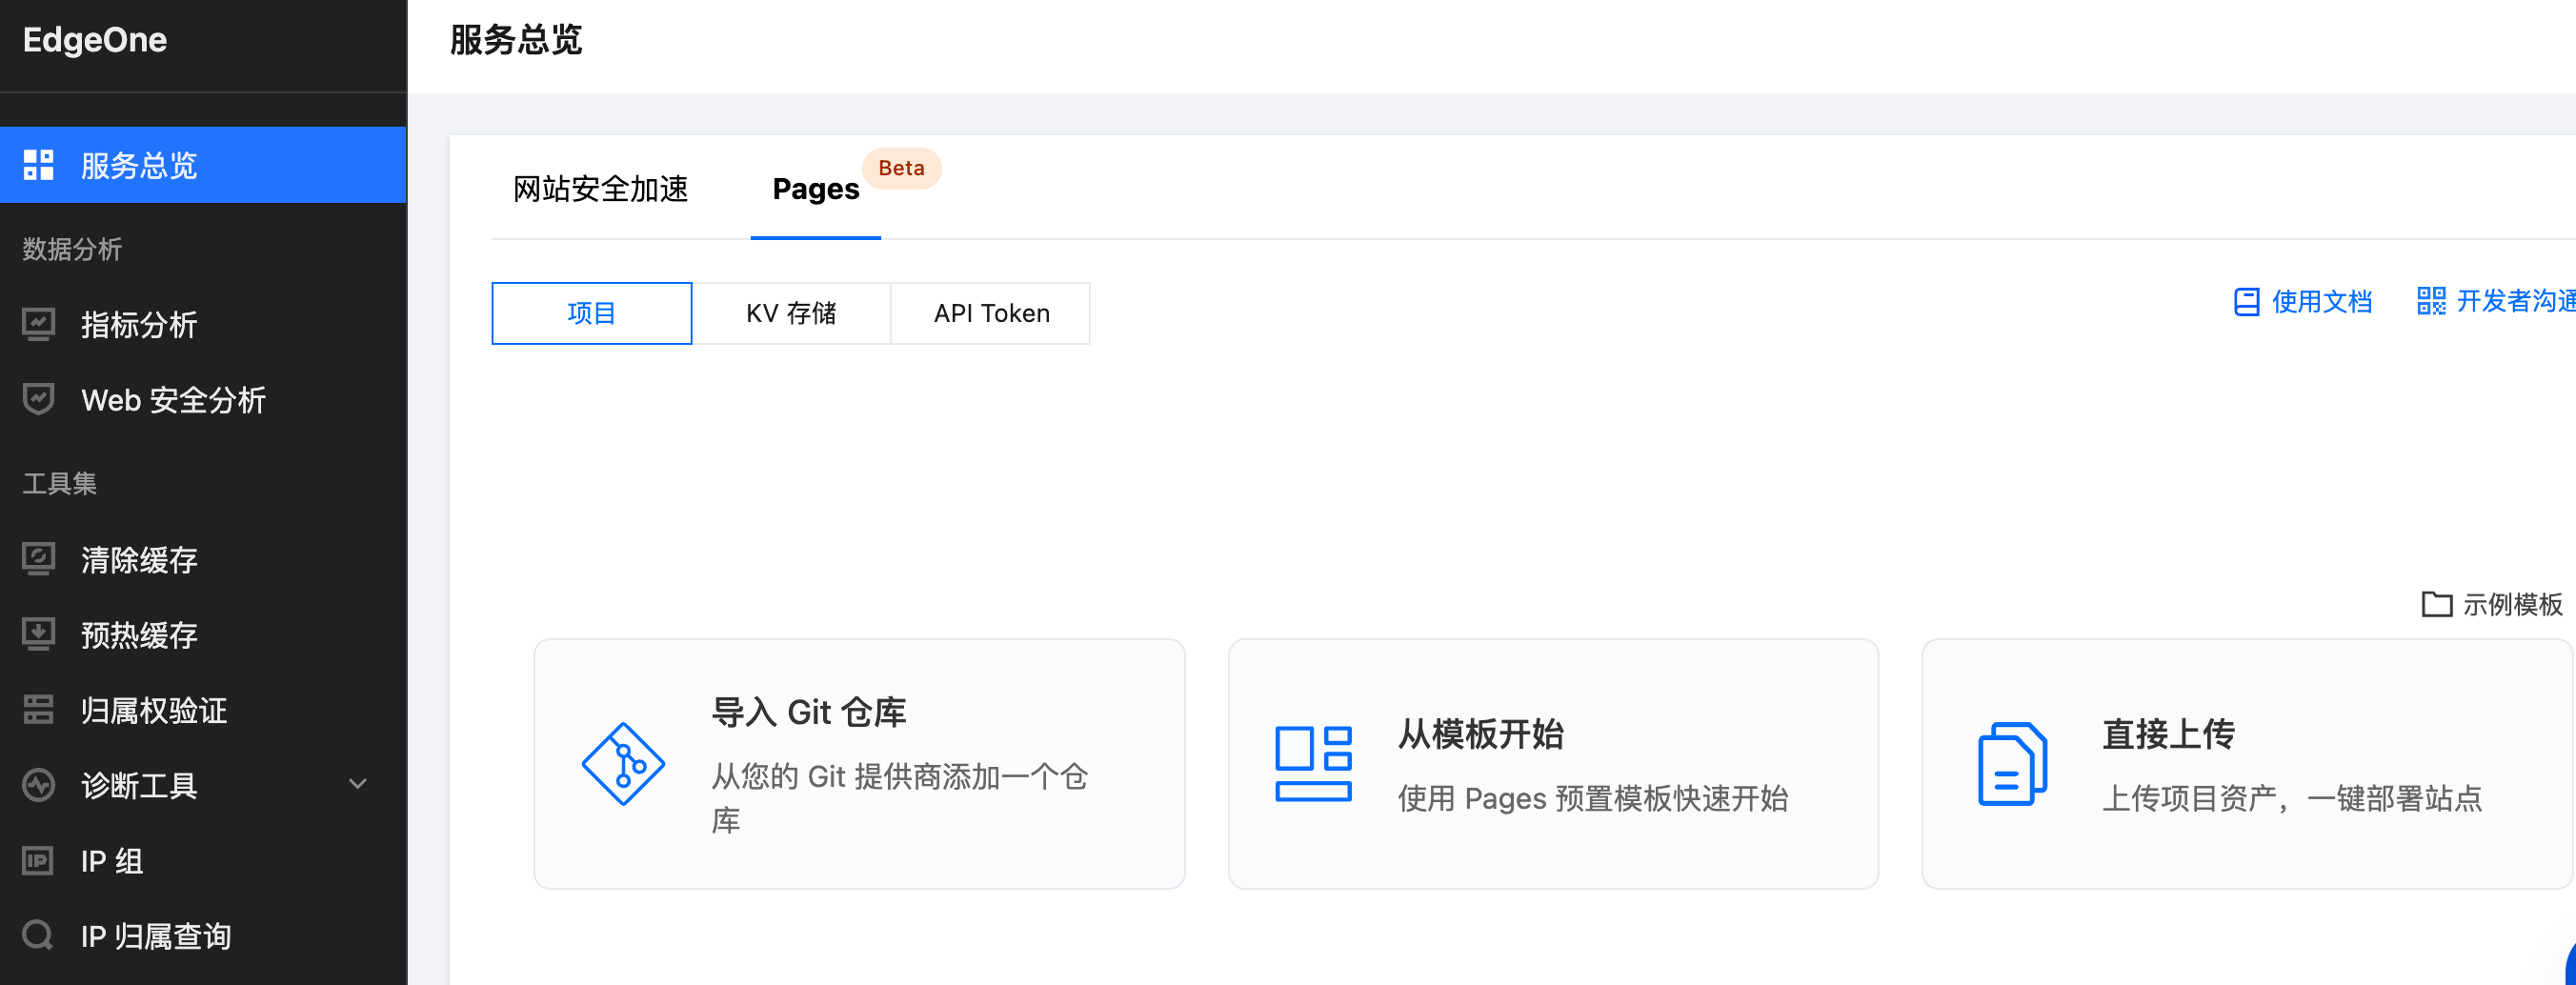
After enabling the service, you'll be directed to the project management page by default. Let's not rush to create a project yet:
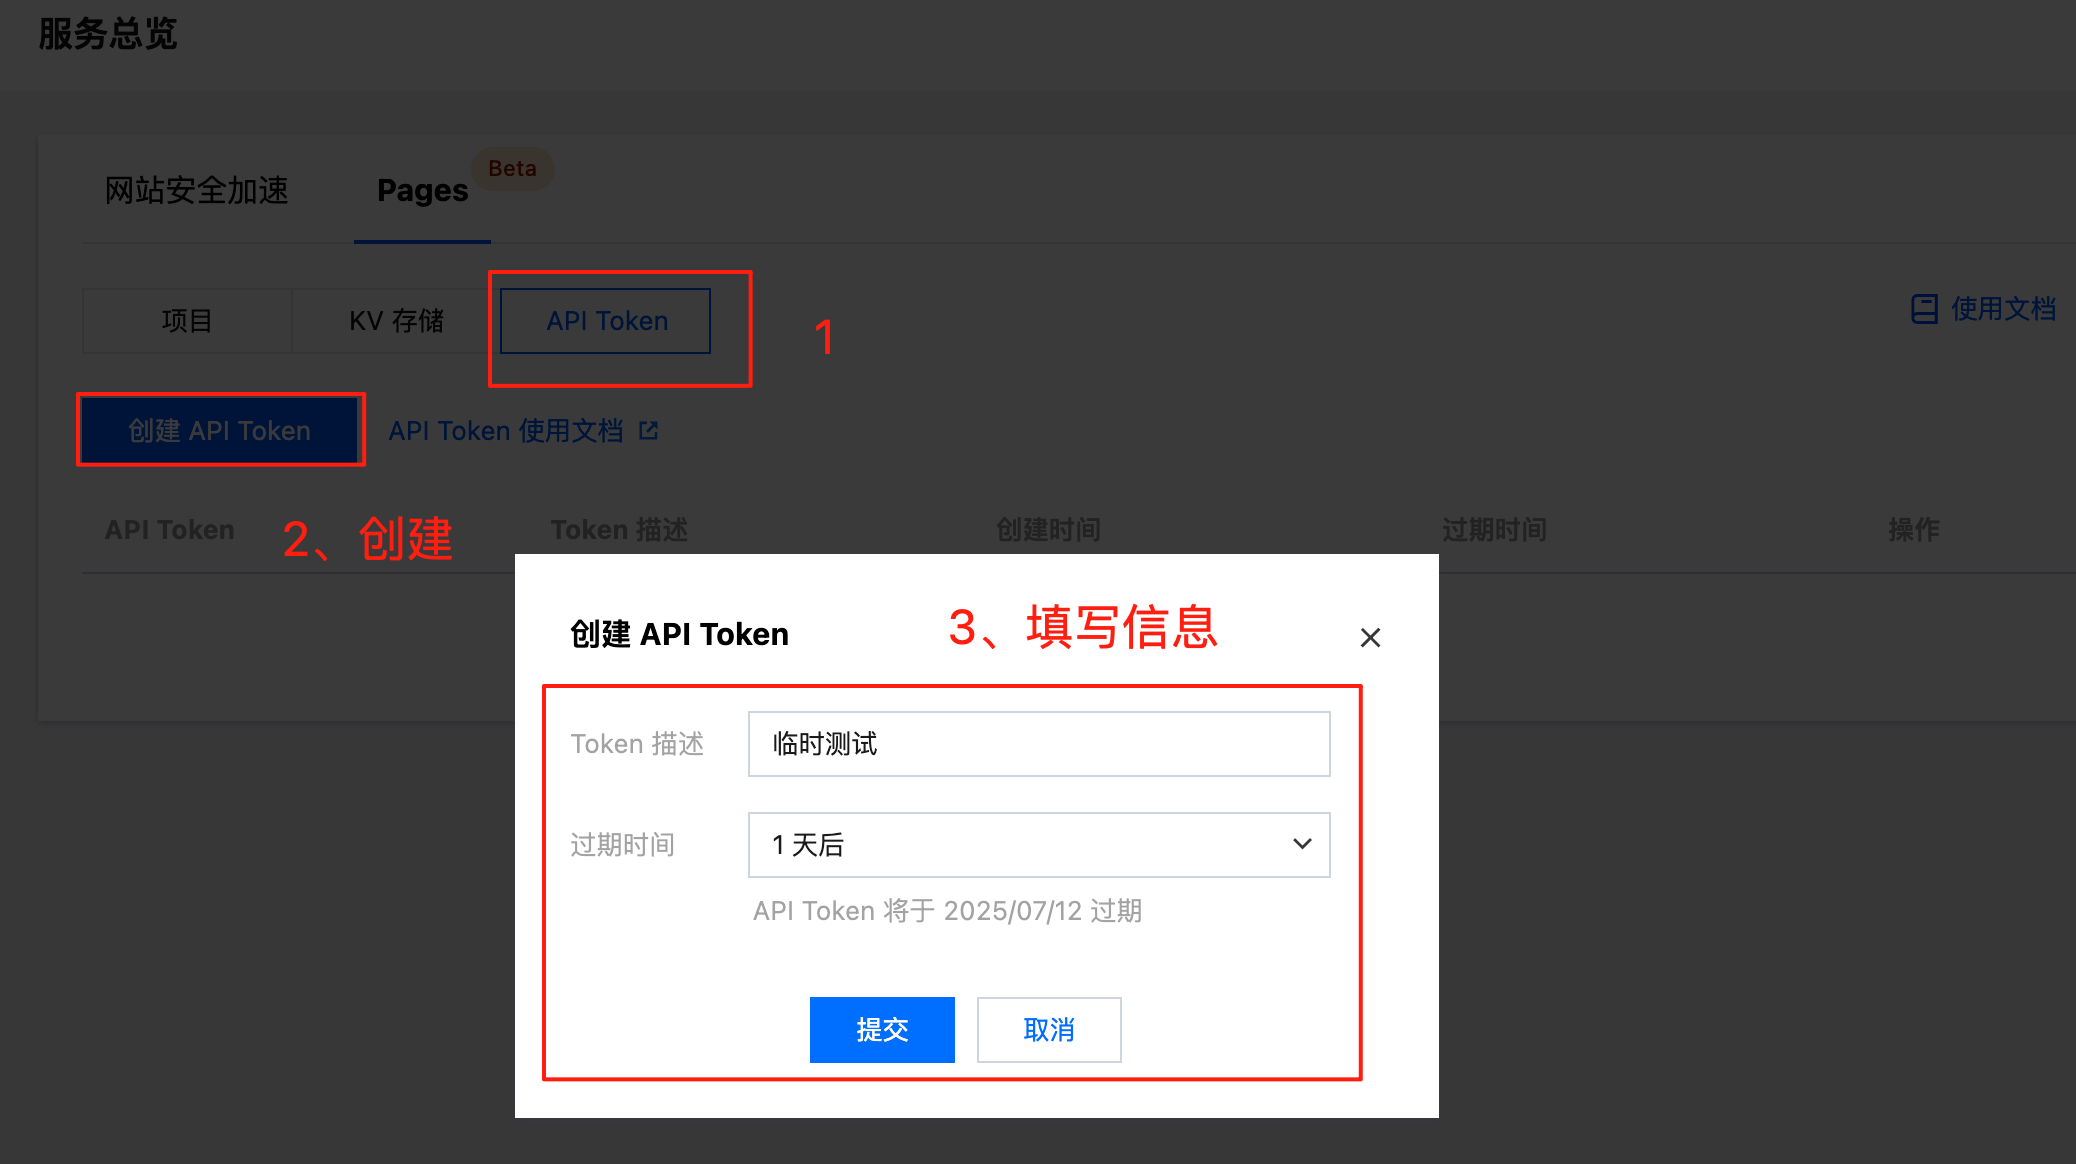
Since we'll be using MCP to complete the website deployment, we need to obtain an API Token first as the credential for calling the service:
- Configure MCP
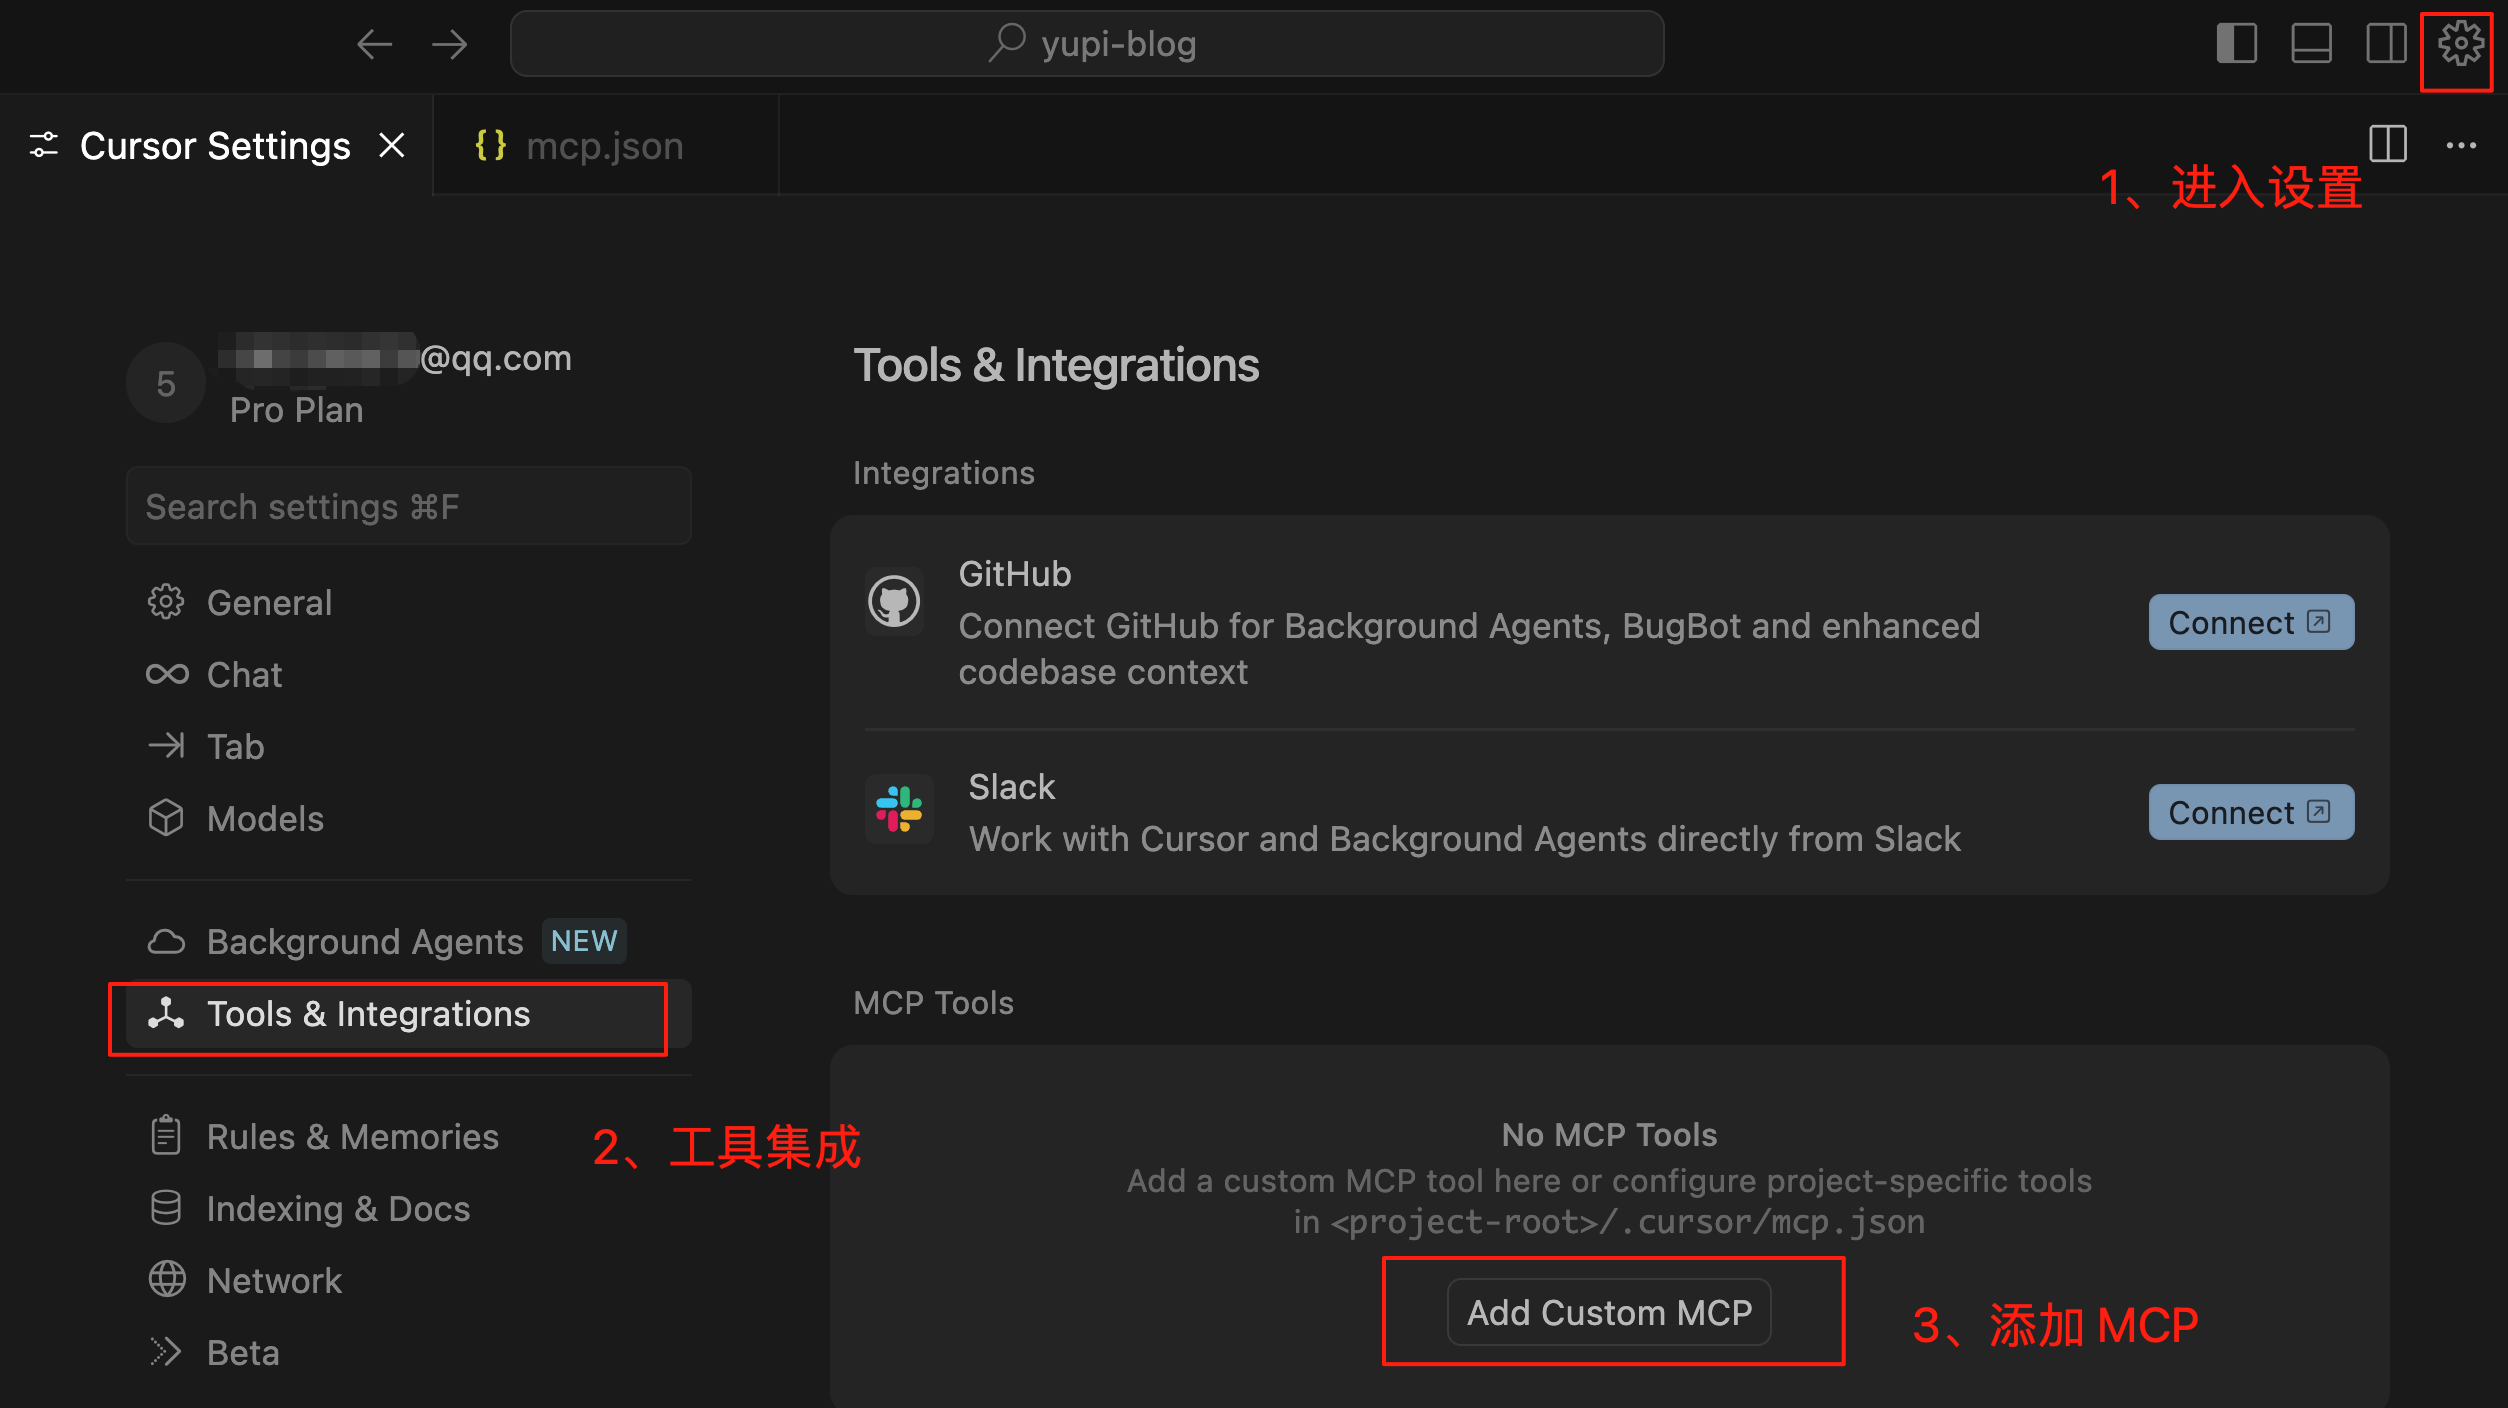
Create a new project folder yupi-blog, open it in Cursor, then go to settings and add the MCP service:
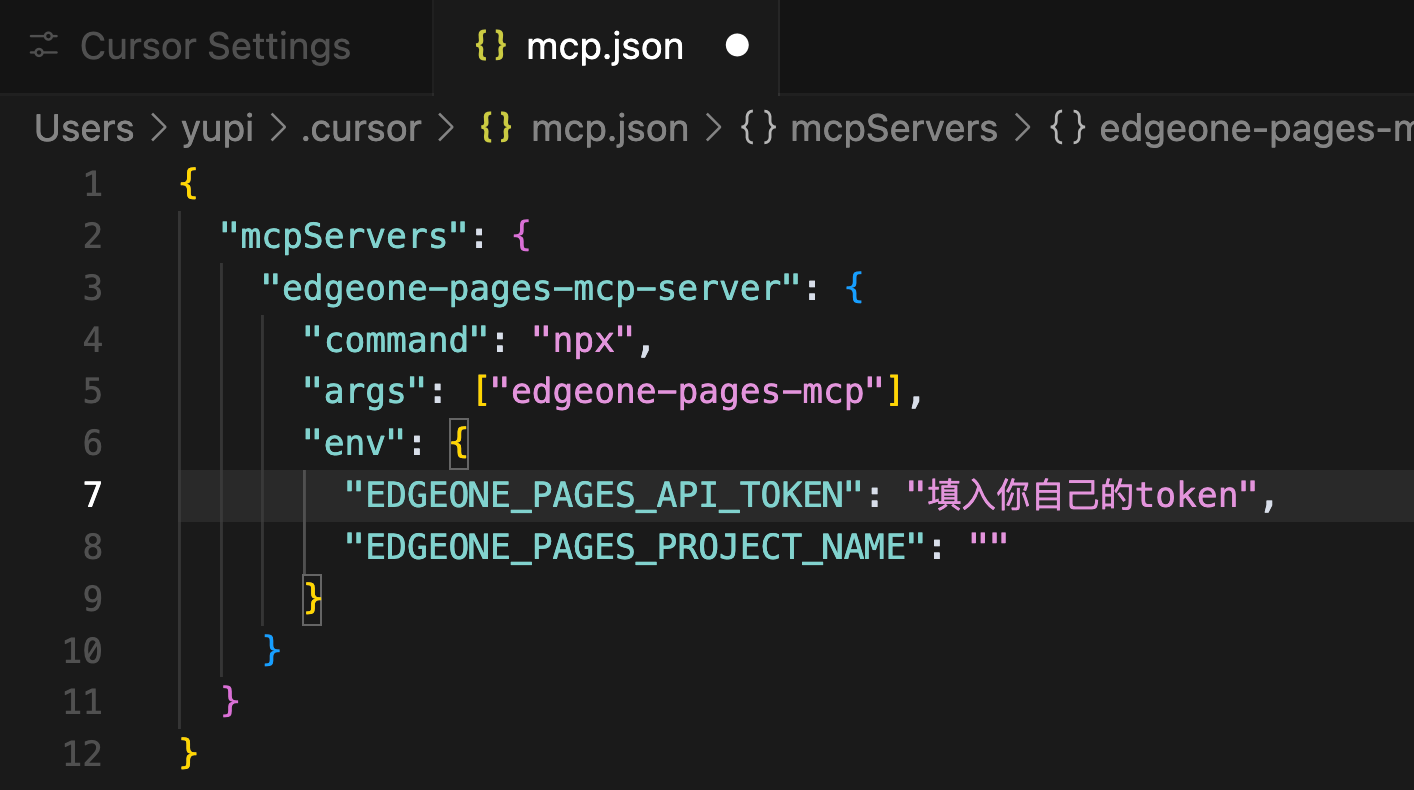
Copy and paste this configuration into the MCP configuration file:
{
  "mcpServers": {
    "edgeone-pages-mcp-server": {
      "command": "npx",
      "args": ["edgeone-pages-mcp"],
      "env": {
        "EDGEONE_PAGES_API_TOKEN": "Your API Token",
        "EDGEONE_PAGES_PROJECT_NAME": ""
      }
    }
  }
}
Make sure to replace the API Token with your own and delete the comments, otherwise, it will cause errors:
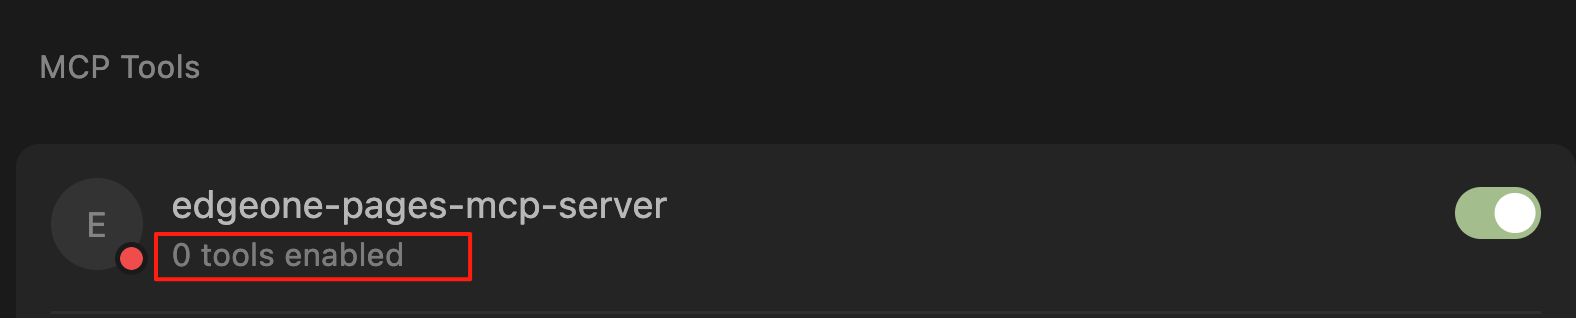
Normally, you'll see the MCP service successfully loaded, turning green!

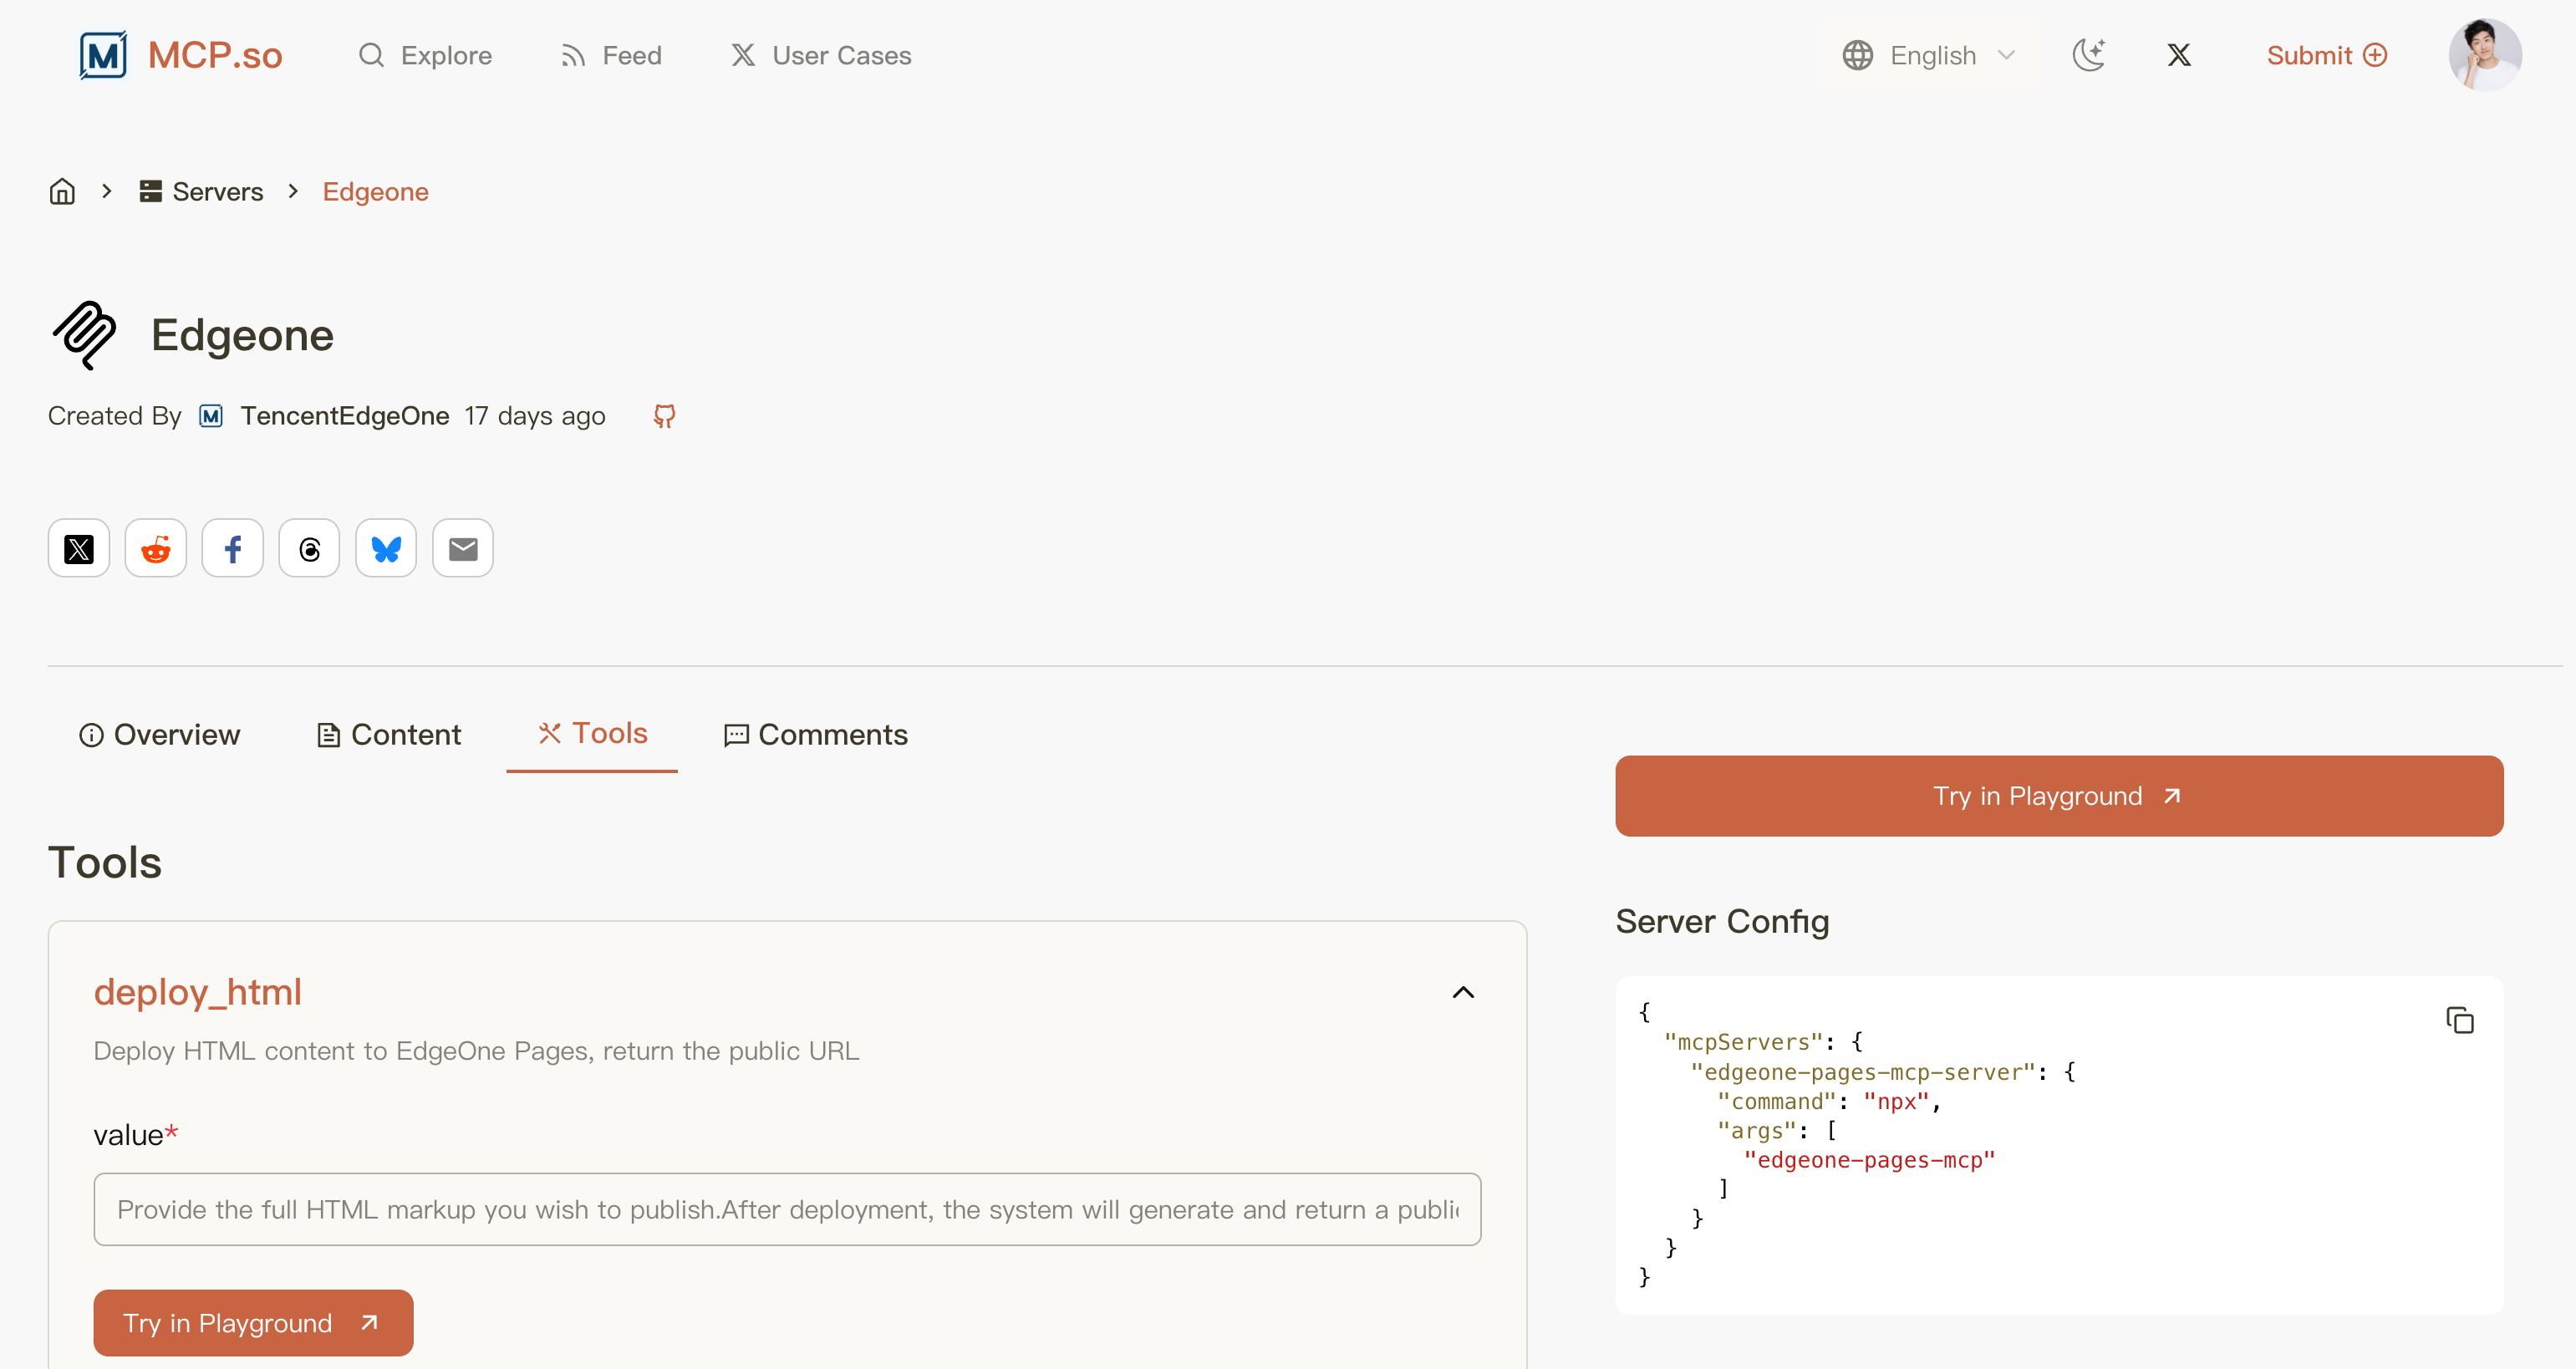
This service provides two tools:
- deploy_html: Deploys HTML content to EdgeOne Pages and returns a public access URL
- deploy_folder_or_zip: Deploys a folder or ZIP file to EdgeOne Pages and returns a public access URL
Note that this MCP service requires the NPX tool to start successfully locally. NPX can directly run commands from NPM packages without global installation, commonly used for scaffolding tools and one-time commands.
If you don't have the NPX command or if your Node.js version is too low (preferably not below 20), the tool will fail to load.
In this case, you just need to install Node.js from the official website, which will automatically install NPM and NPX tools for you:
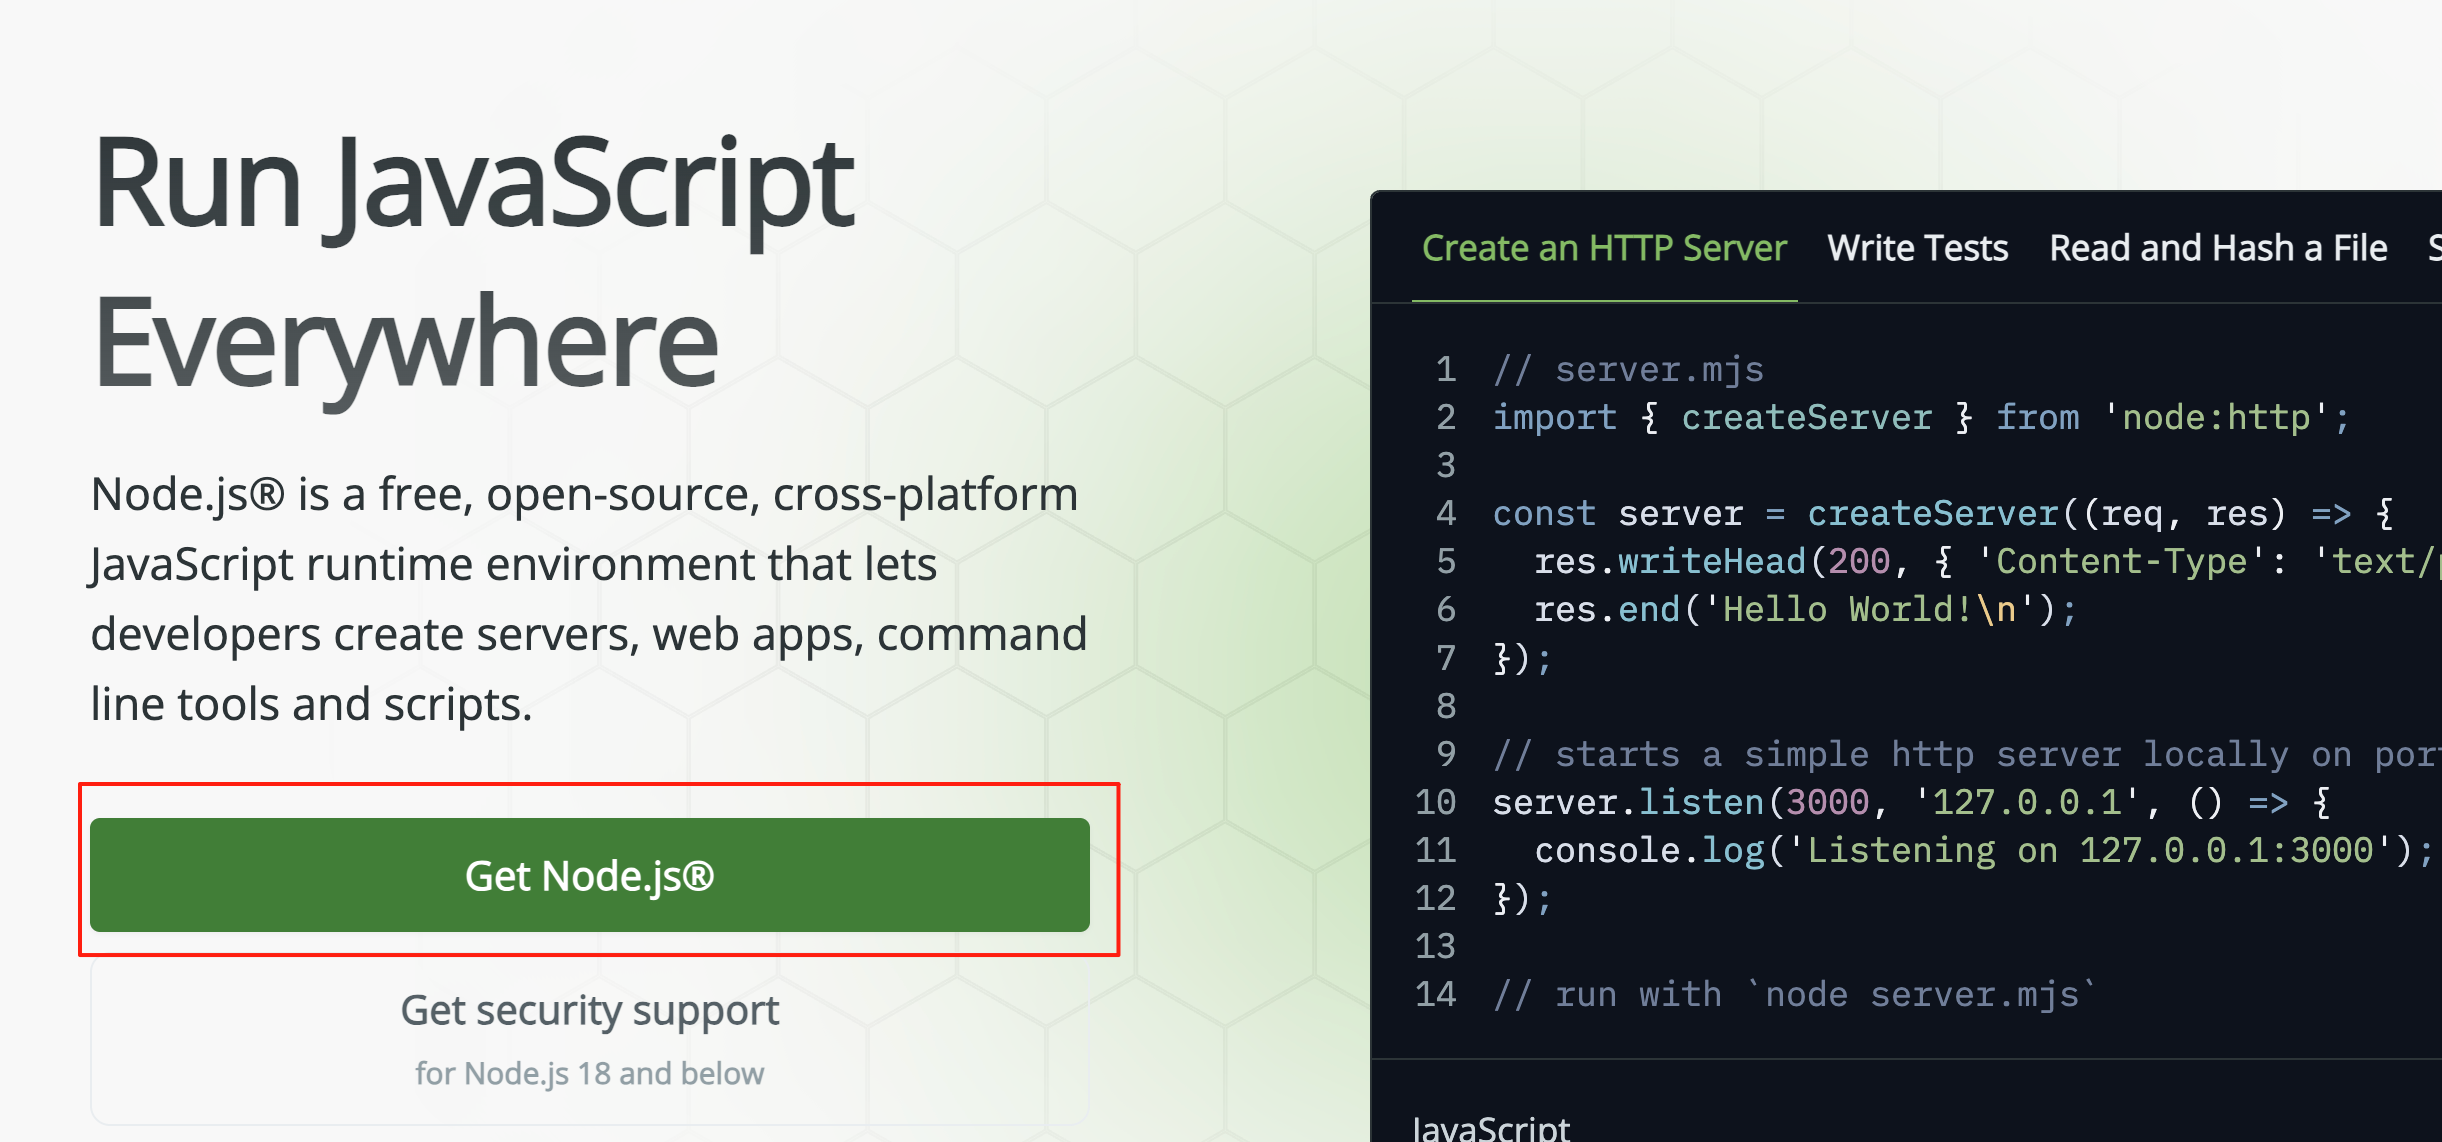
If NPX is not automatically installed, use the NPM package manager to install NPX:
npm i -g npx
- Generate and Deploy Website
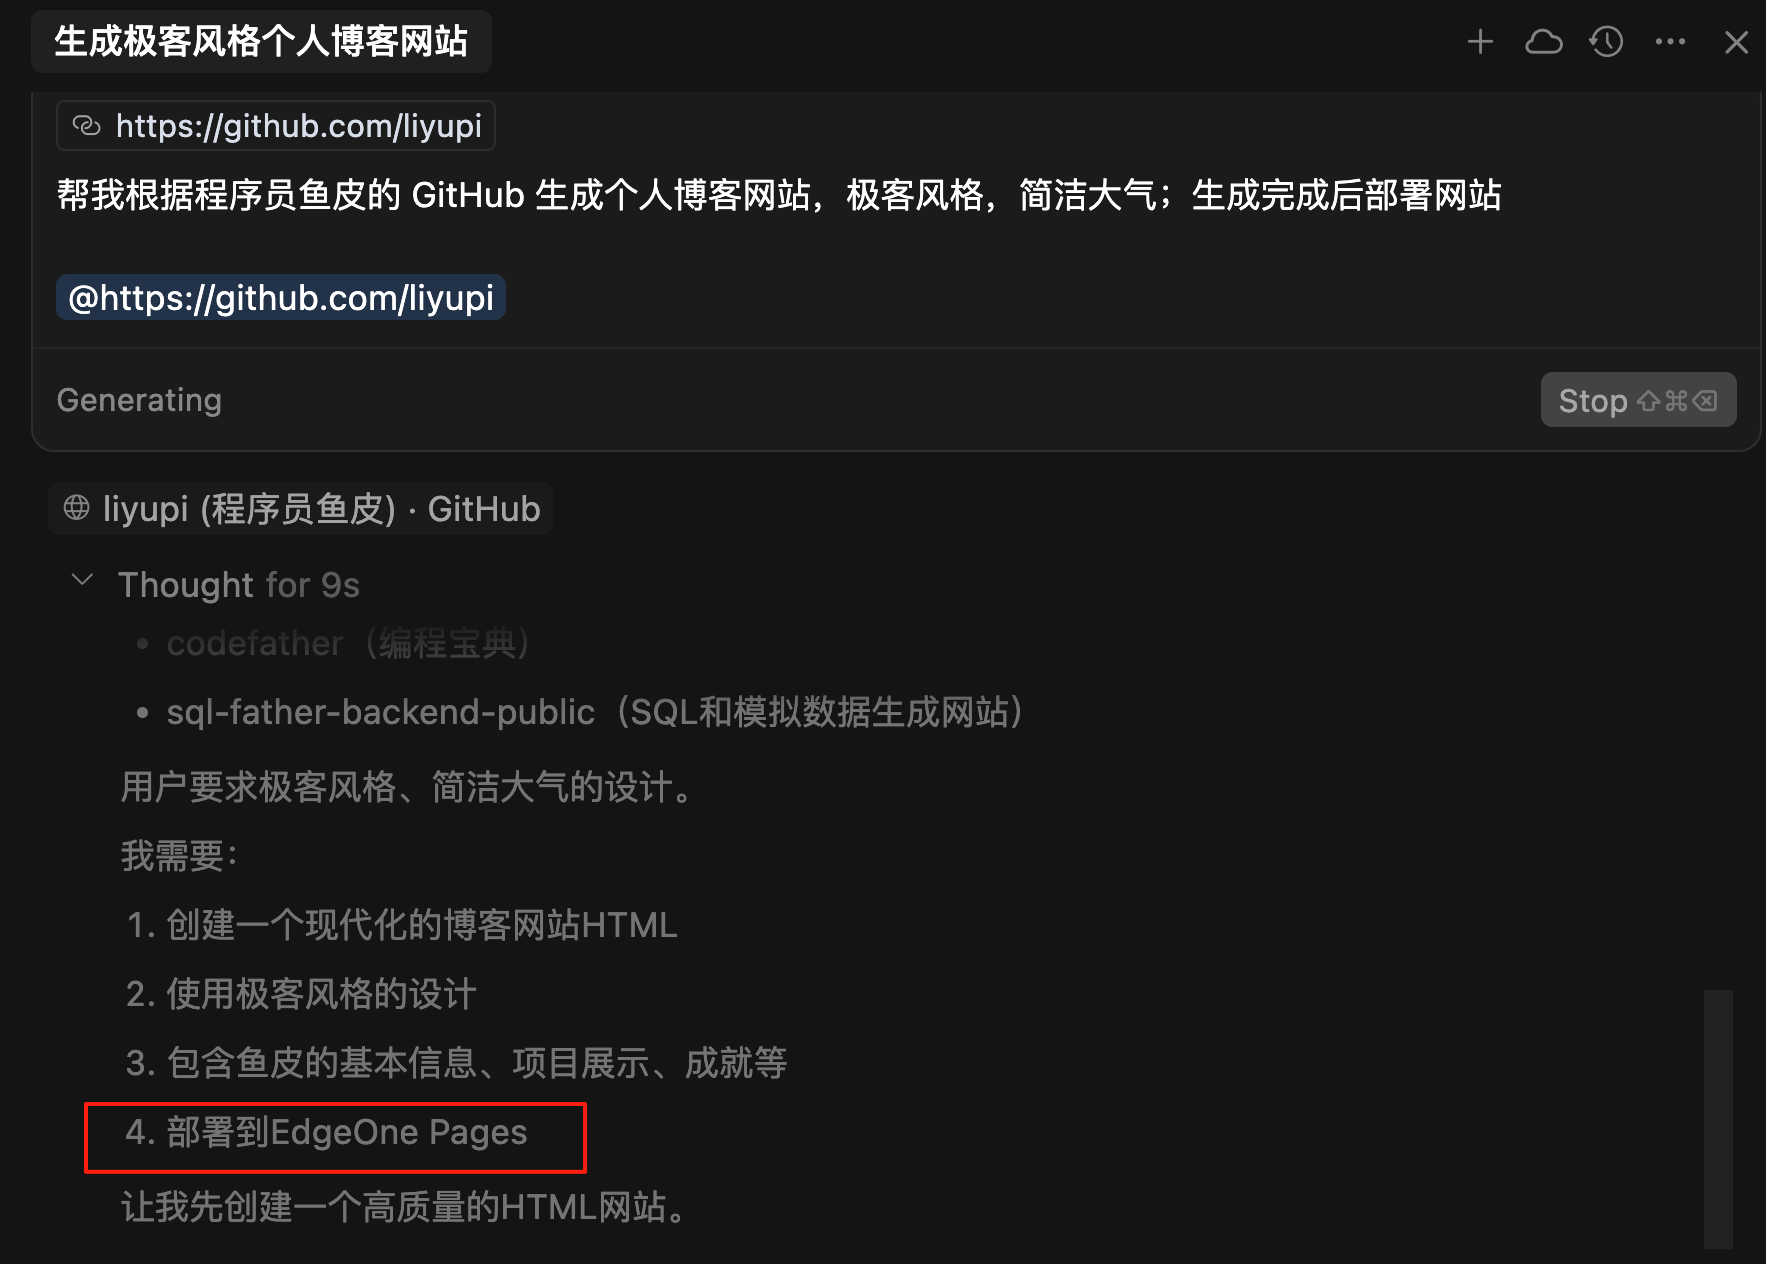
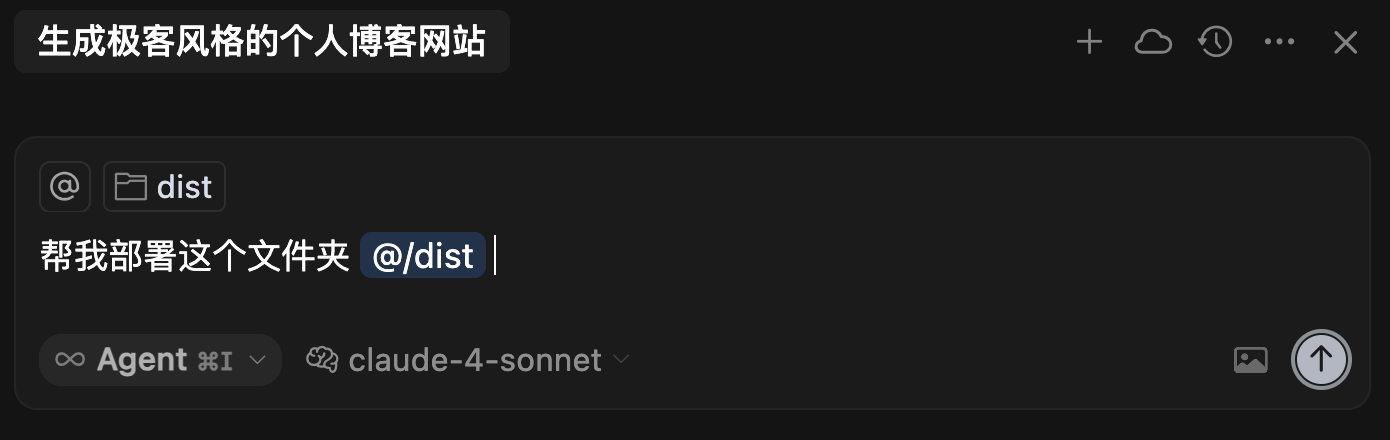
With the MCP service ready, let's generate the website. Enter the following prompt to let AI generate a personal blog website for me:
Help me generate a personal blog website based on Programmer Yupi's GitHub, with a geeky style, simple and elegant; deploy the website after generation
@https://github.com/liyupi
Looking at AI's thought process, it has already considered using EdgeOne Pages to deploy the website:
Soon, the website is generated and deployed. You can see that AI called the MCP tool to deploy HTML and obtained the access URL:
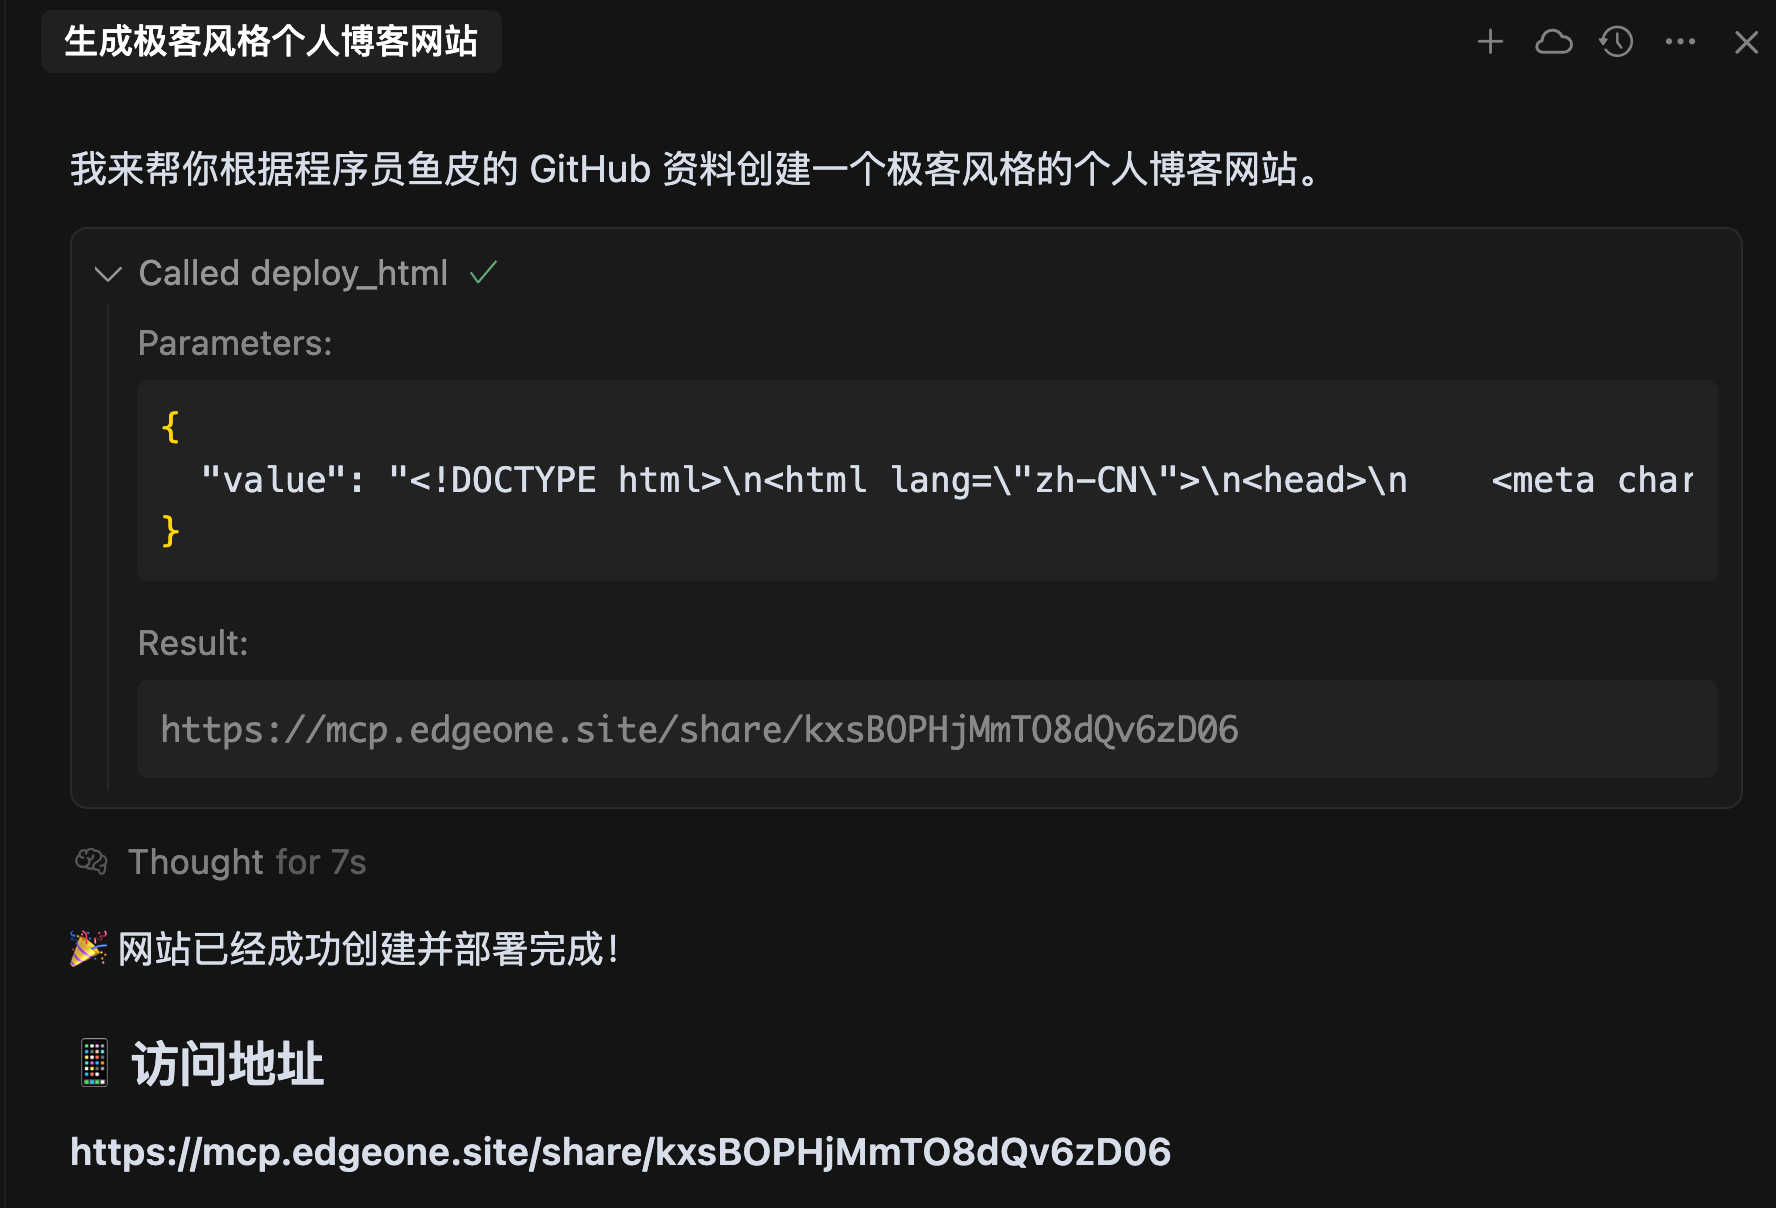
Opening the URL directly shows the effect, so convenient!
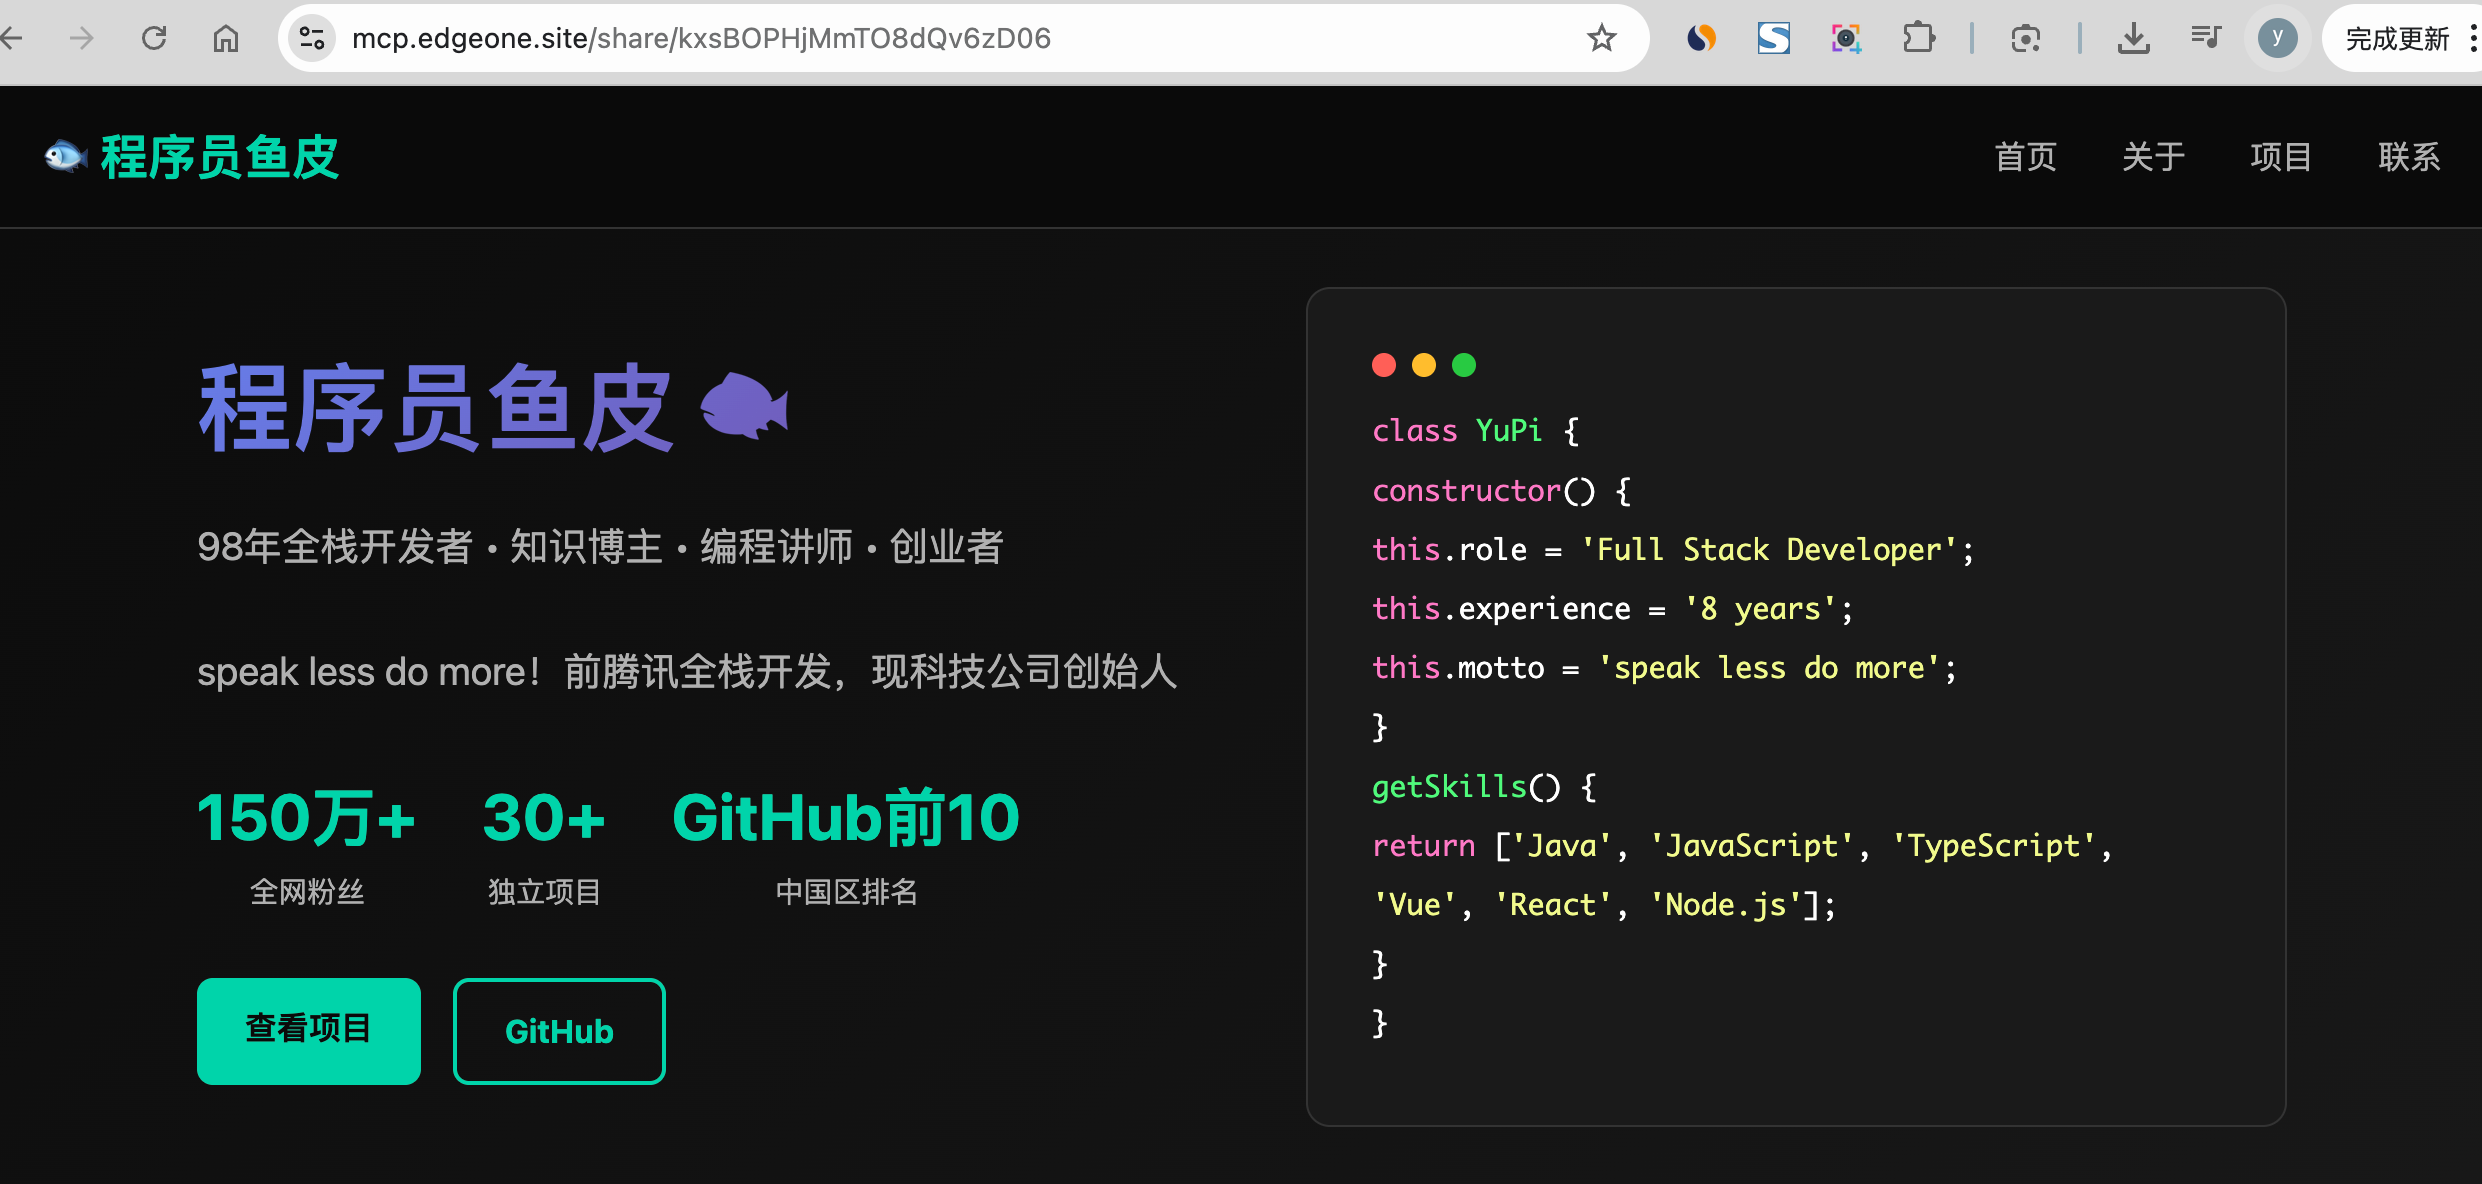
However, the generated website is currently quite simple, just a single HTML page, without even creating local code files.
- Deploy Website Directory
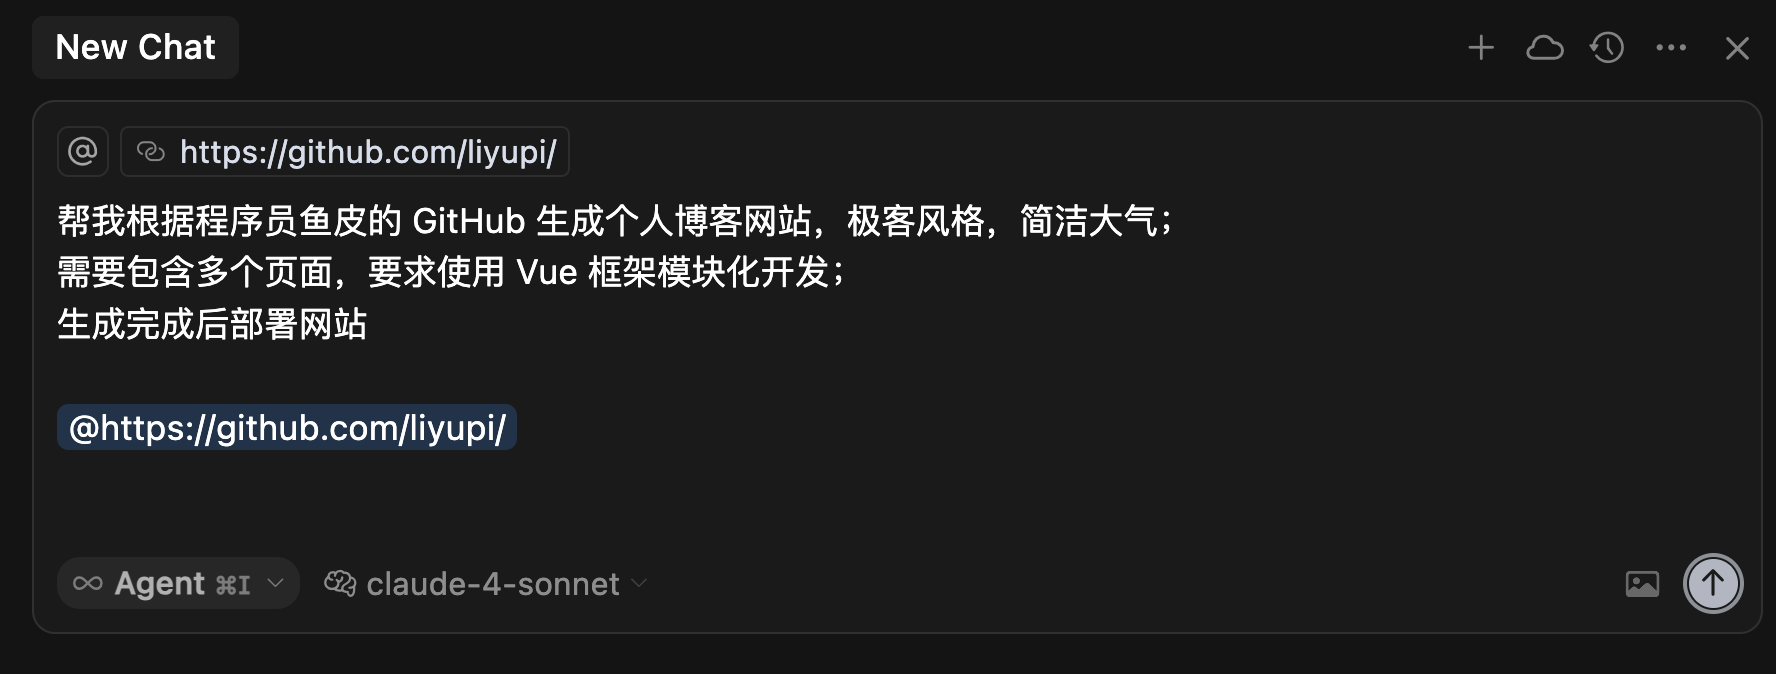
Let's try a more complex project. Use the following prompt to let AI develop a multi-page website using a frontend framework:
Help me generate a personal blog website based on Programmer Yupi's GitHub, with a geeky style, simple and elegant;
Include multiple pages, require modular development using Vue framework;
Deploy the website after generation
@https://github.com/liyupi/
This time, the waiting time will be longer. Yupi suggests everyone take this time to grab a glass of water and stretch. Recently, sitting for long periods, I feel my shoulders have become as hard as stone.

We'll notice that although a lot of code is generated, it's not automatically deployed, only deployment suggestions are provided:
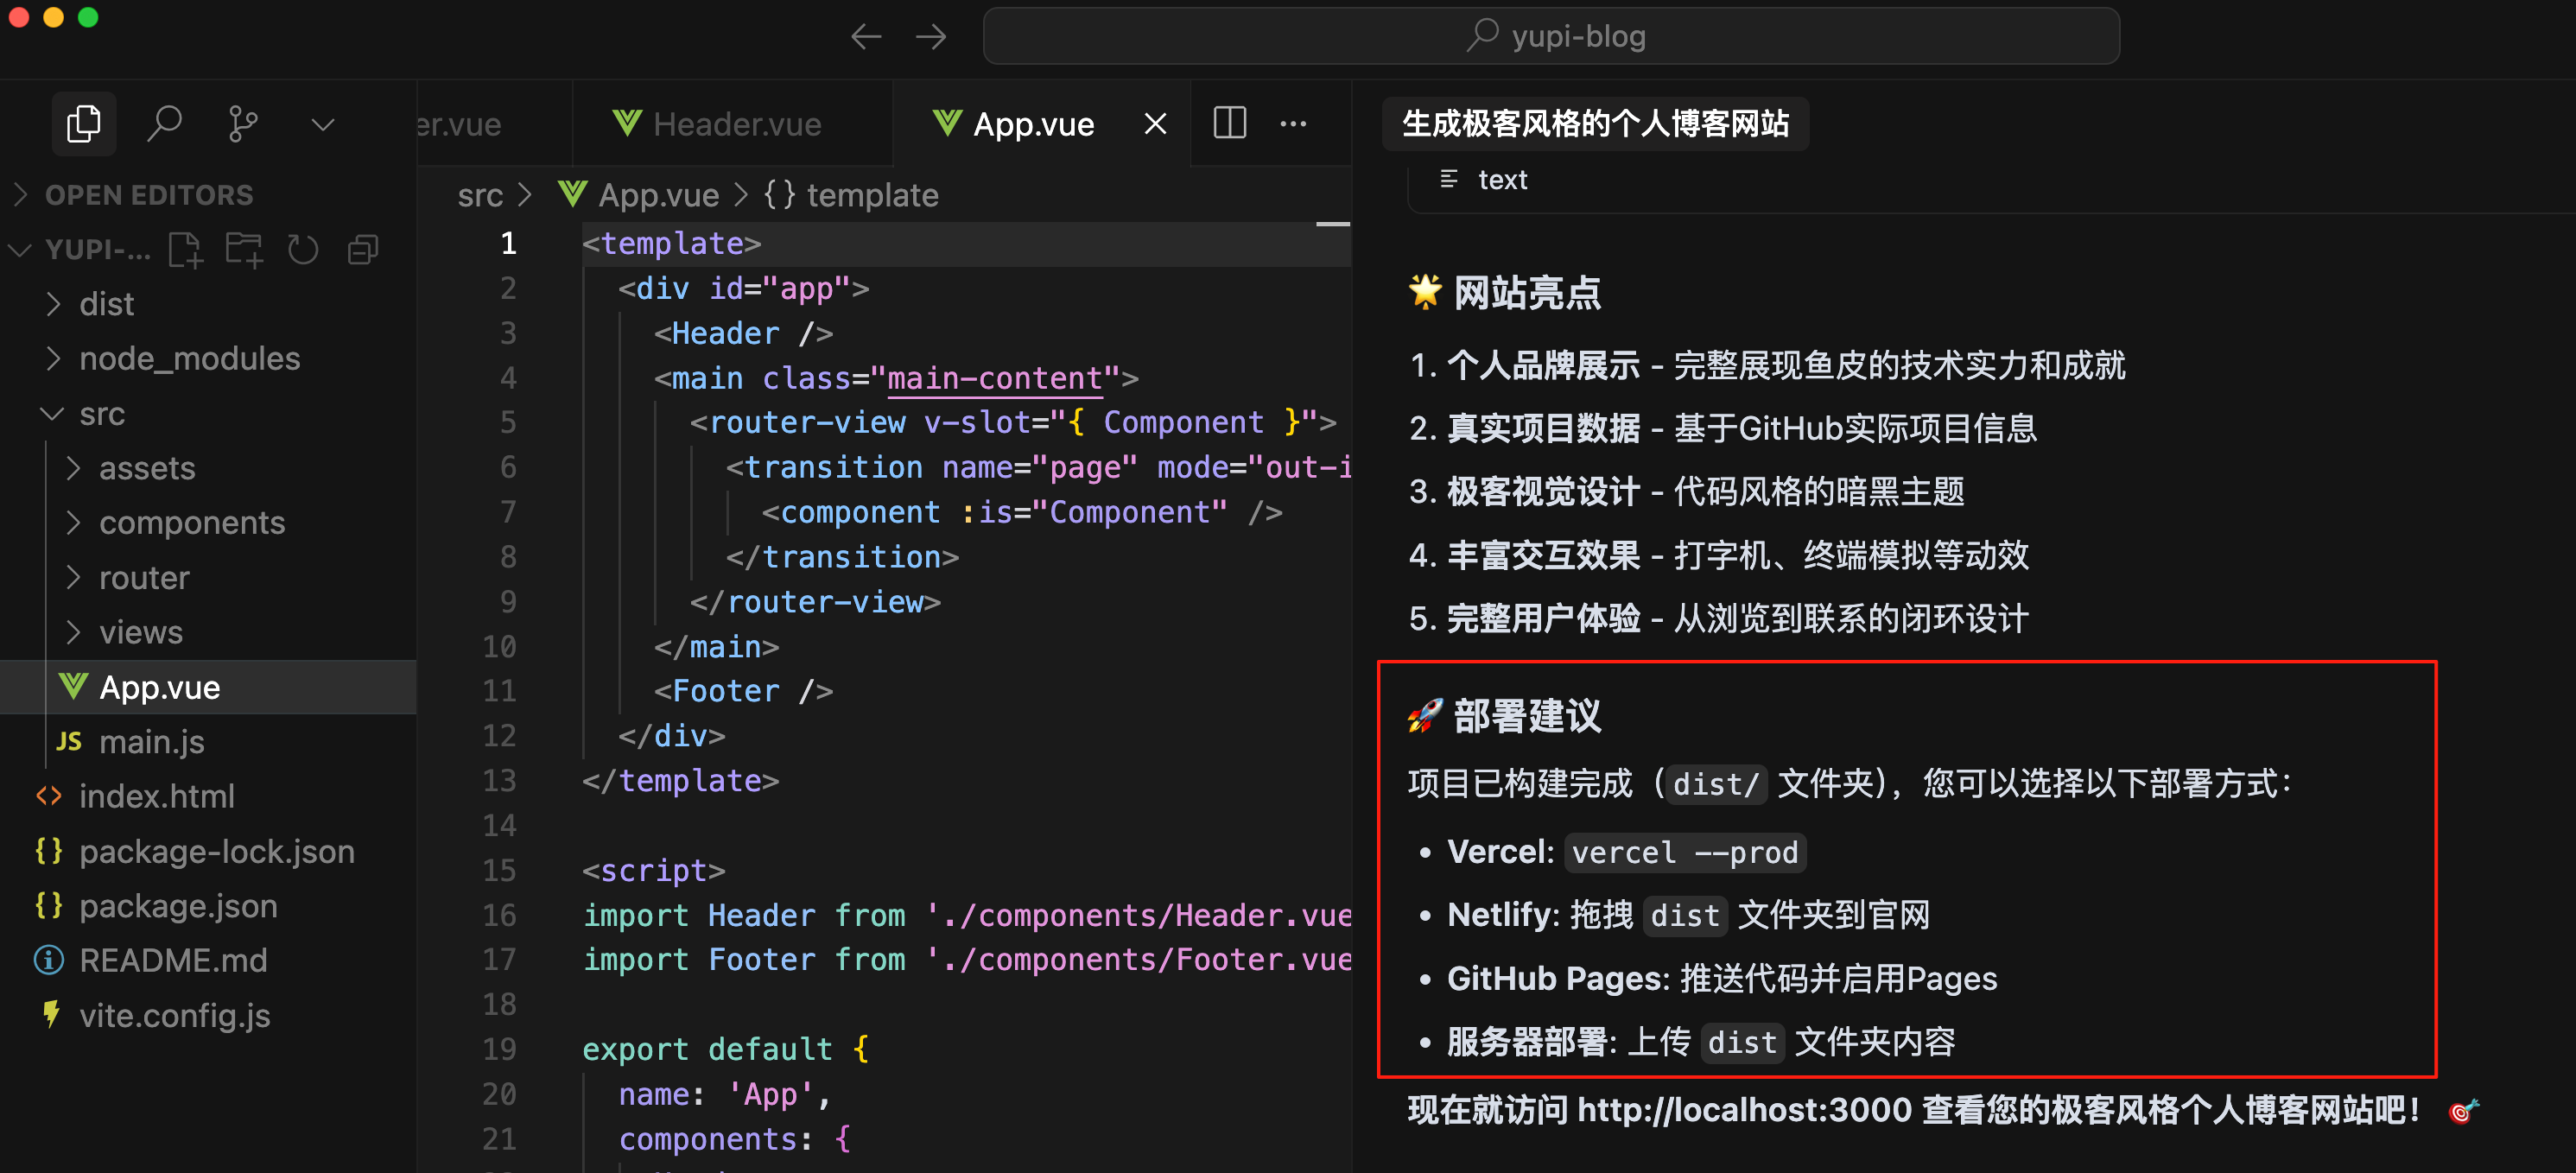
Looking at AI's thought process, it turns out that using the deployment tool failed:
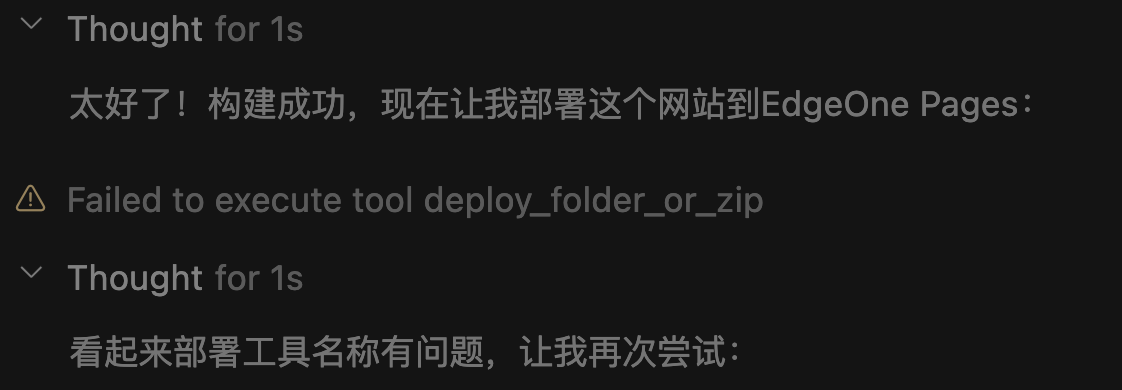
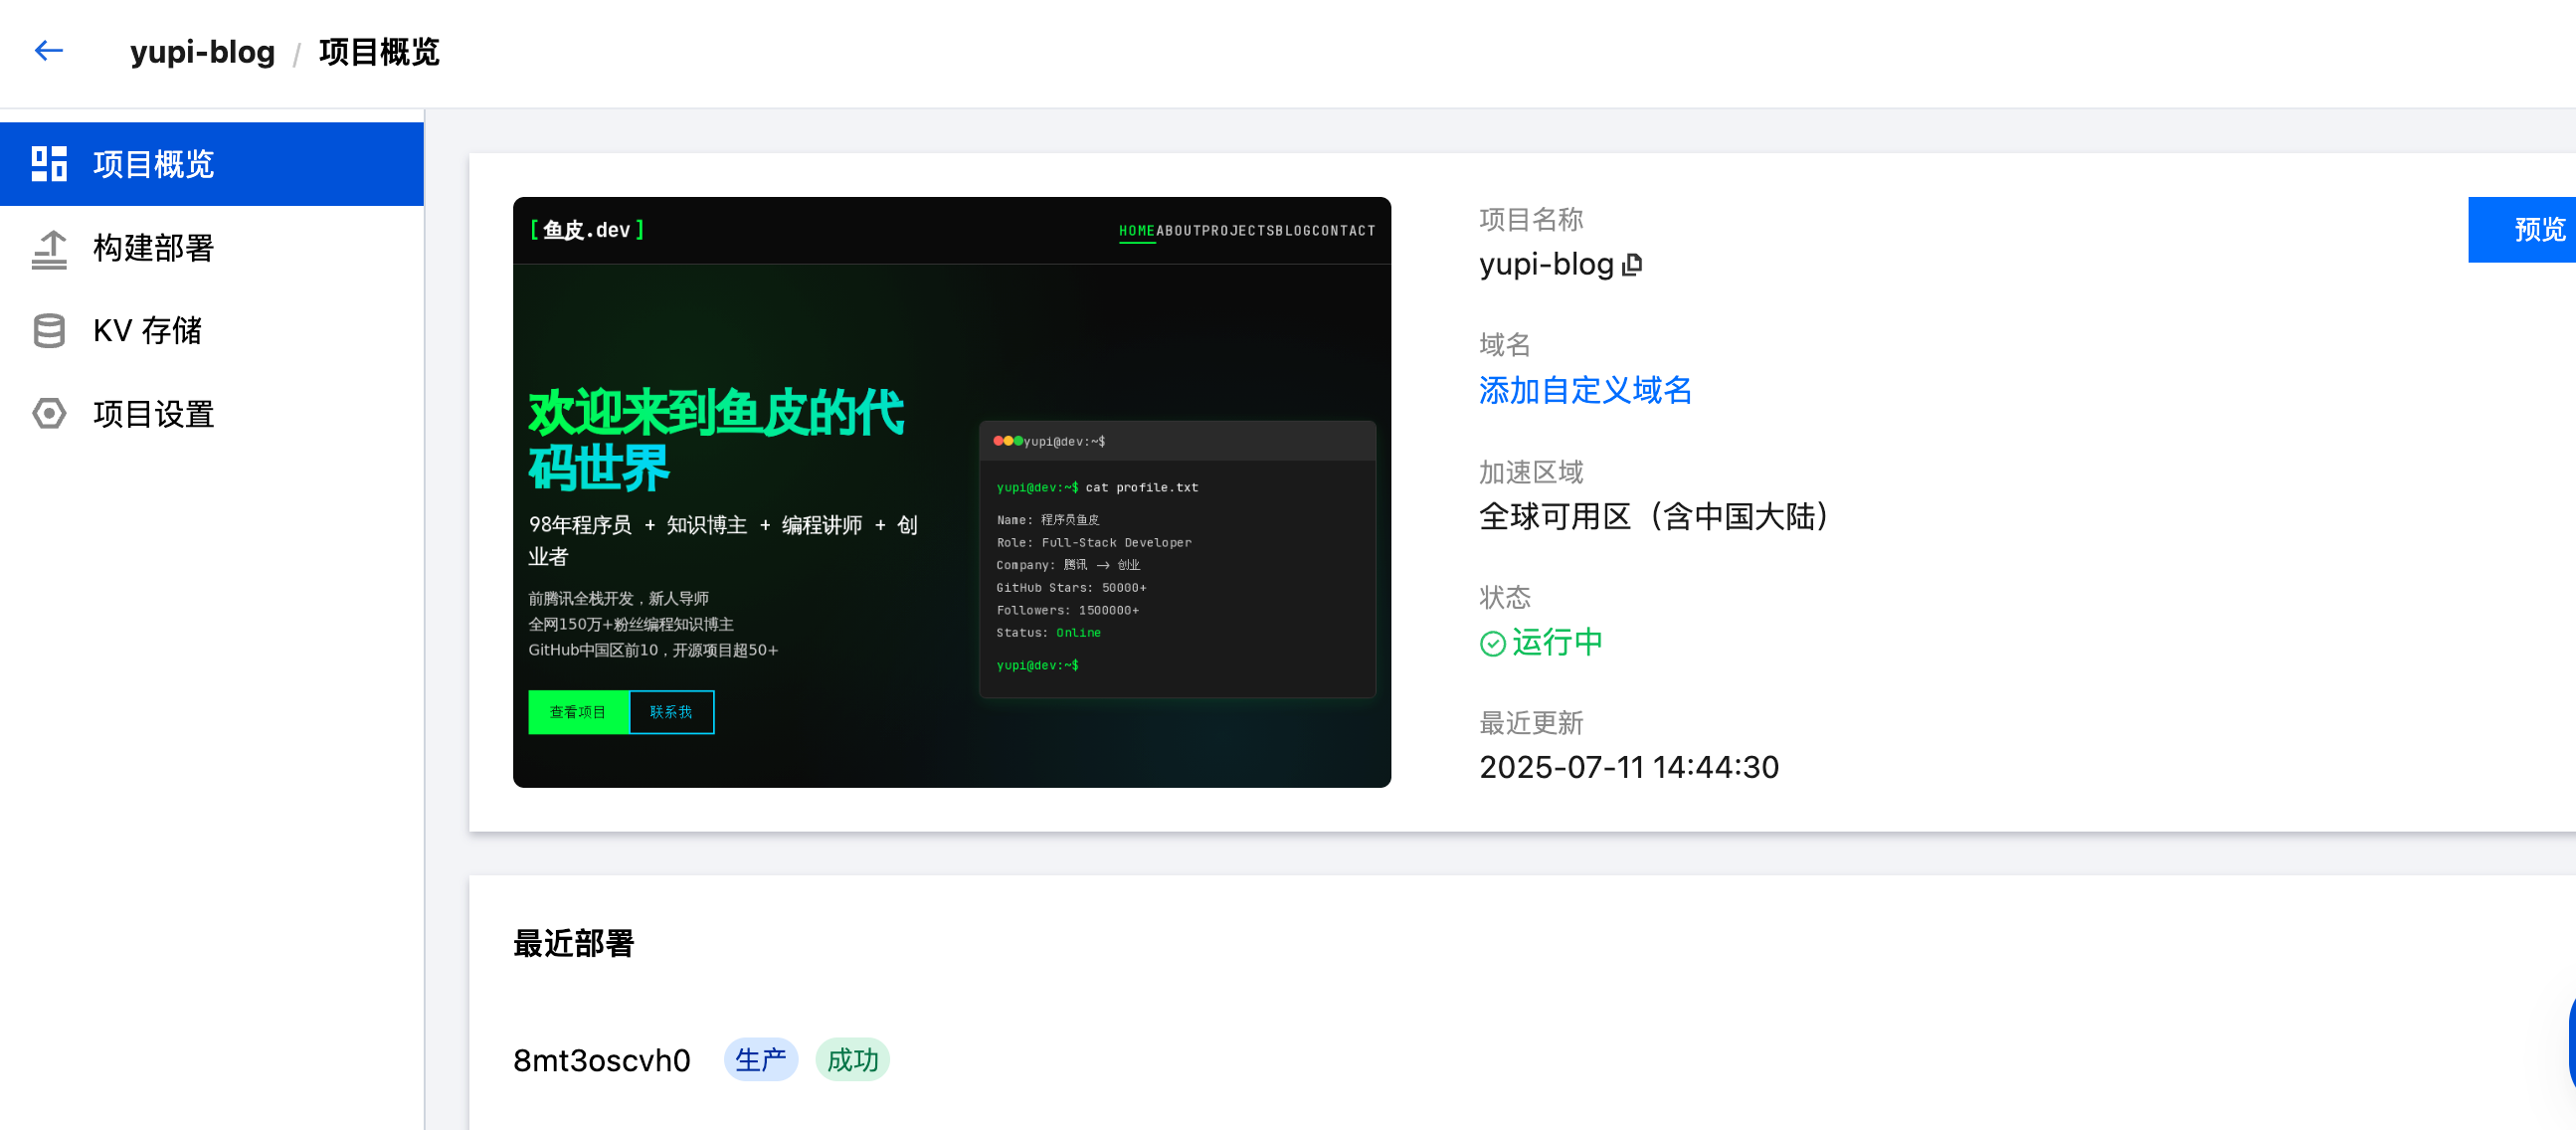
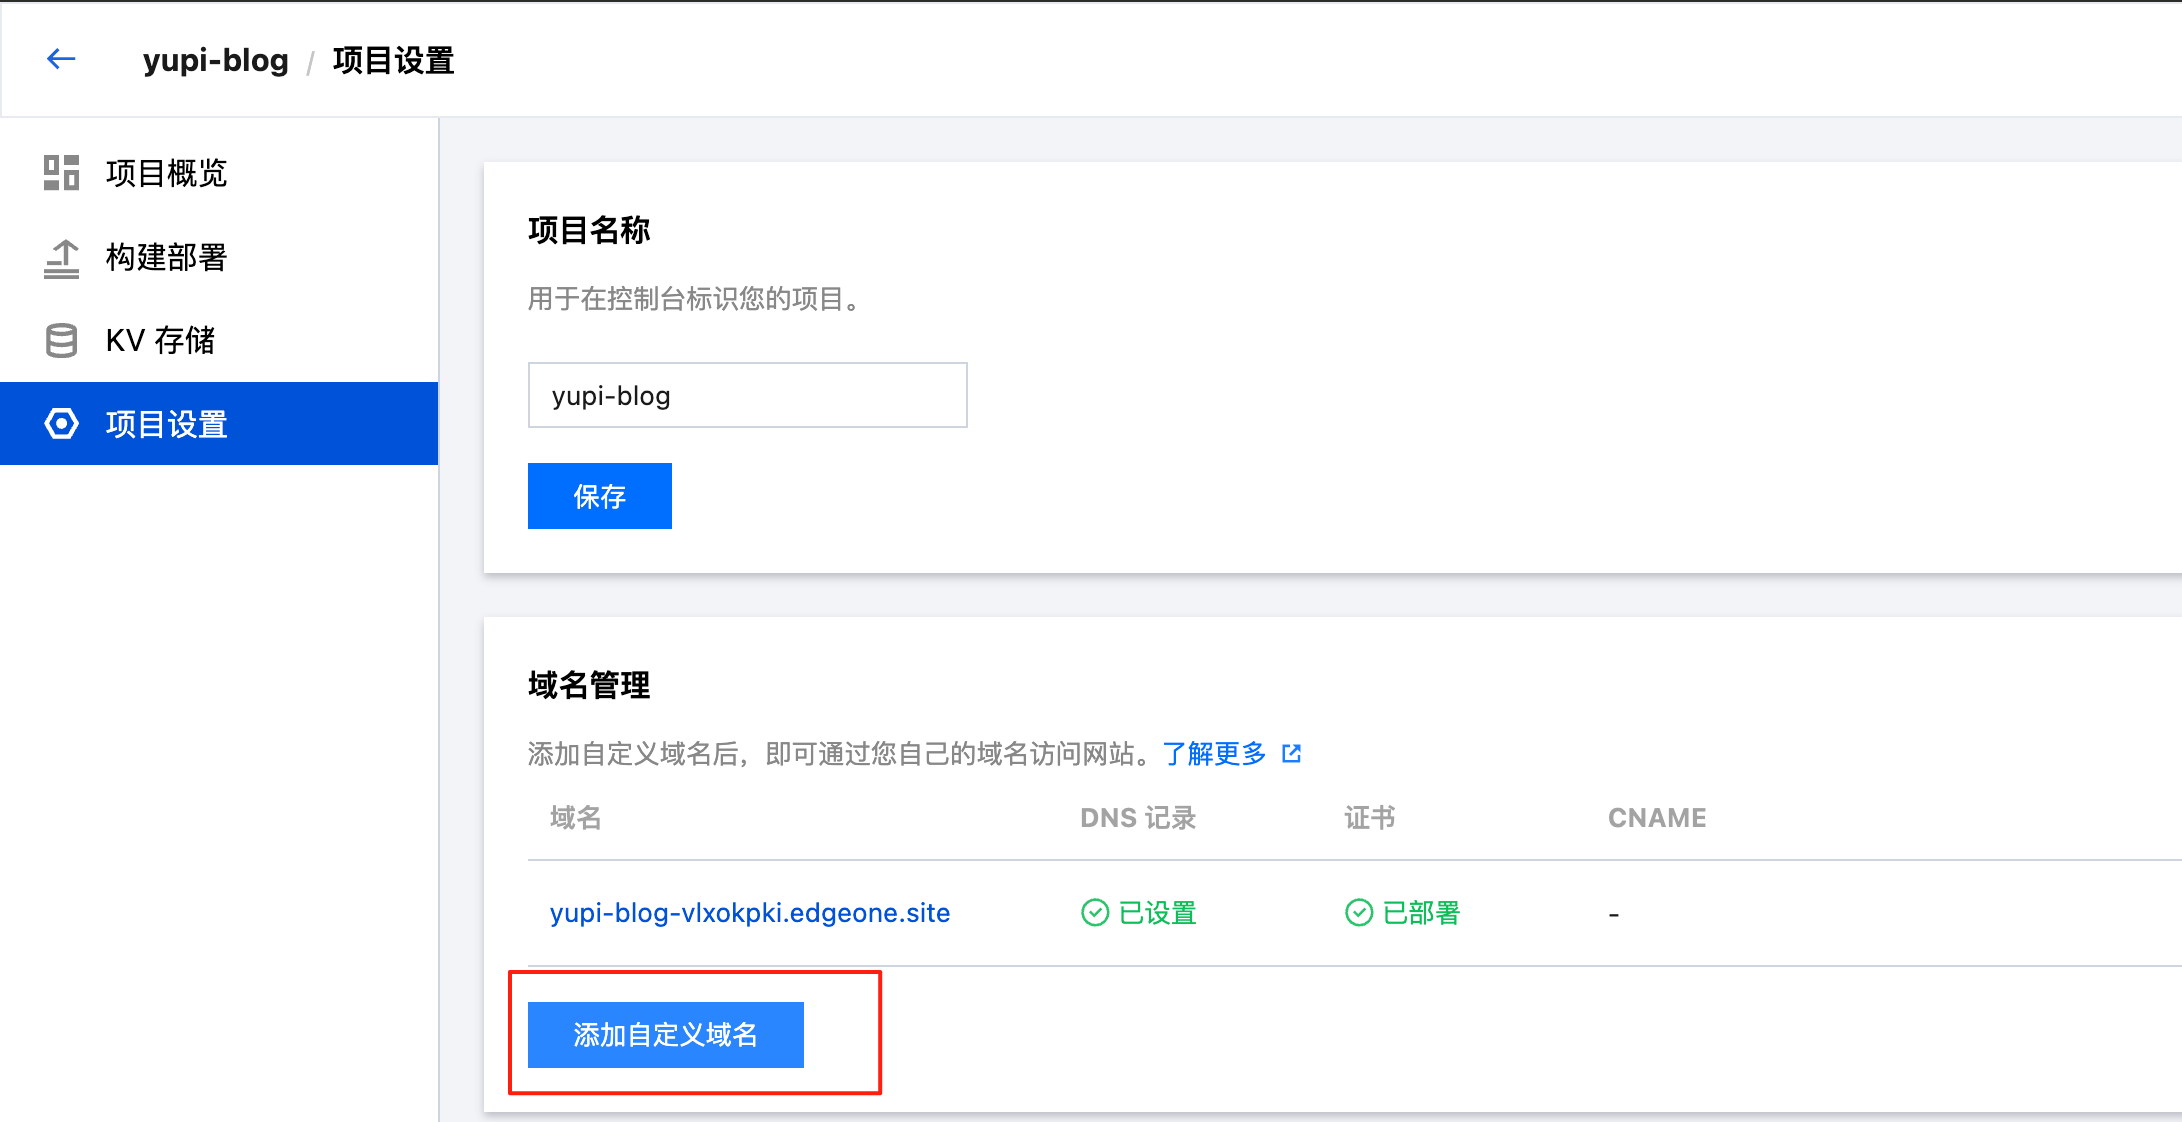
After testing, I found that if you want to deploy a website directory or ZIP file, it's best to first create a project on the Pages web version, then let MCP upload the website files to this project.
So, let's use the official example to deploy a website randomly:

Modify the project name to yupi-blog and click "Start Deployment":
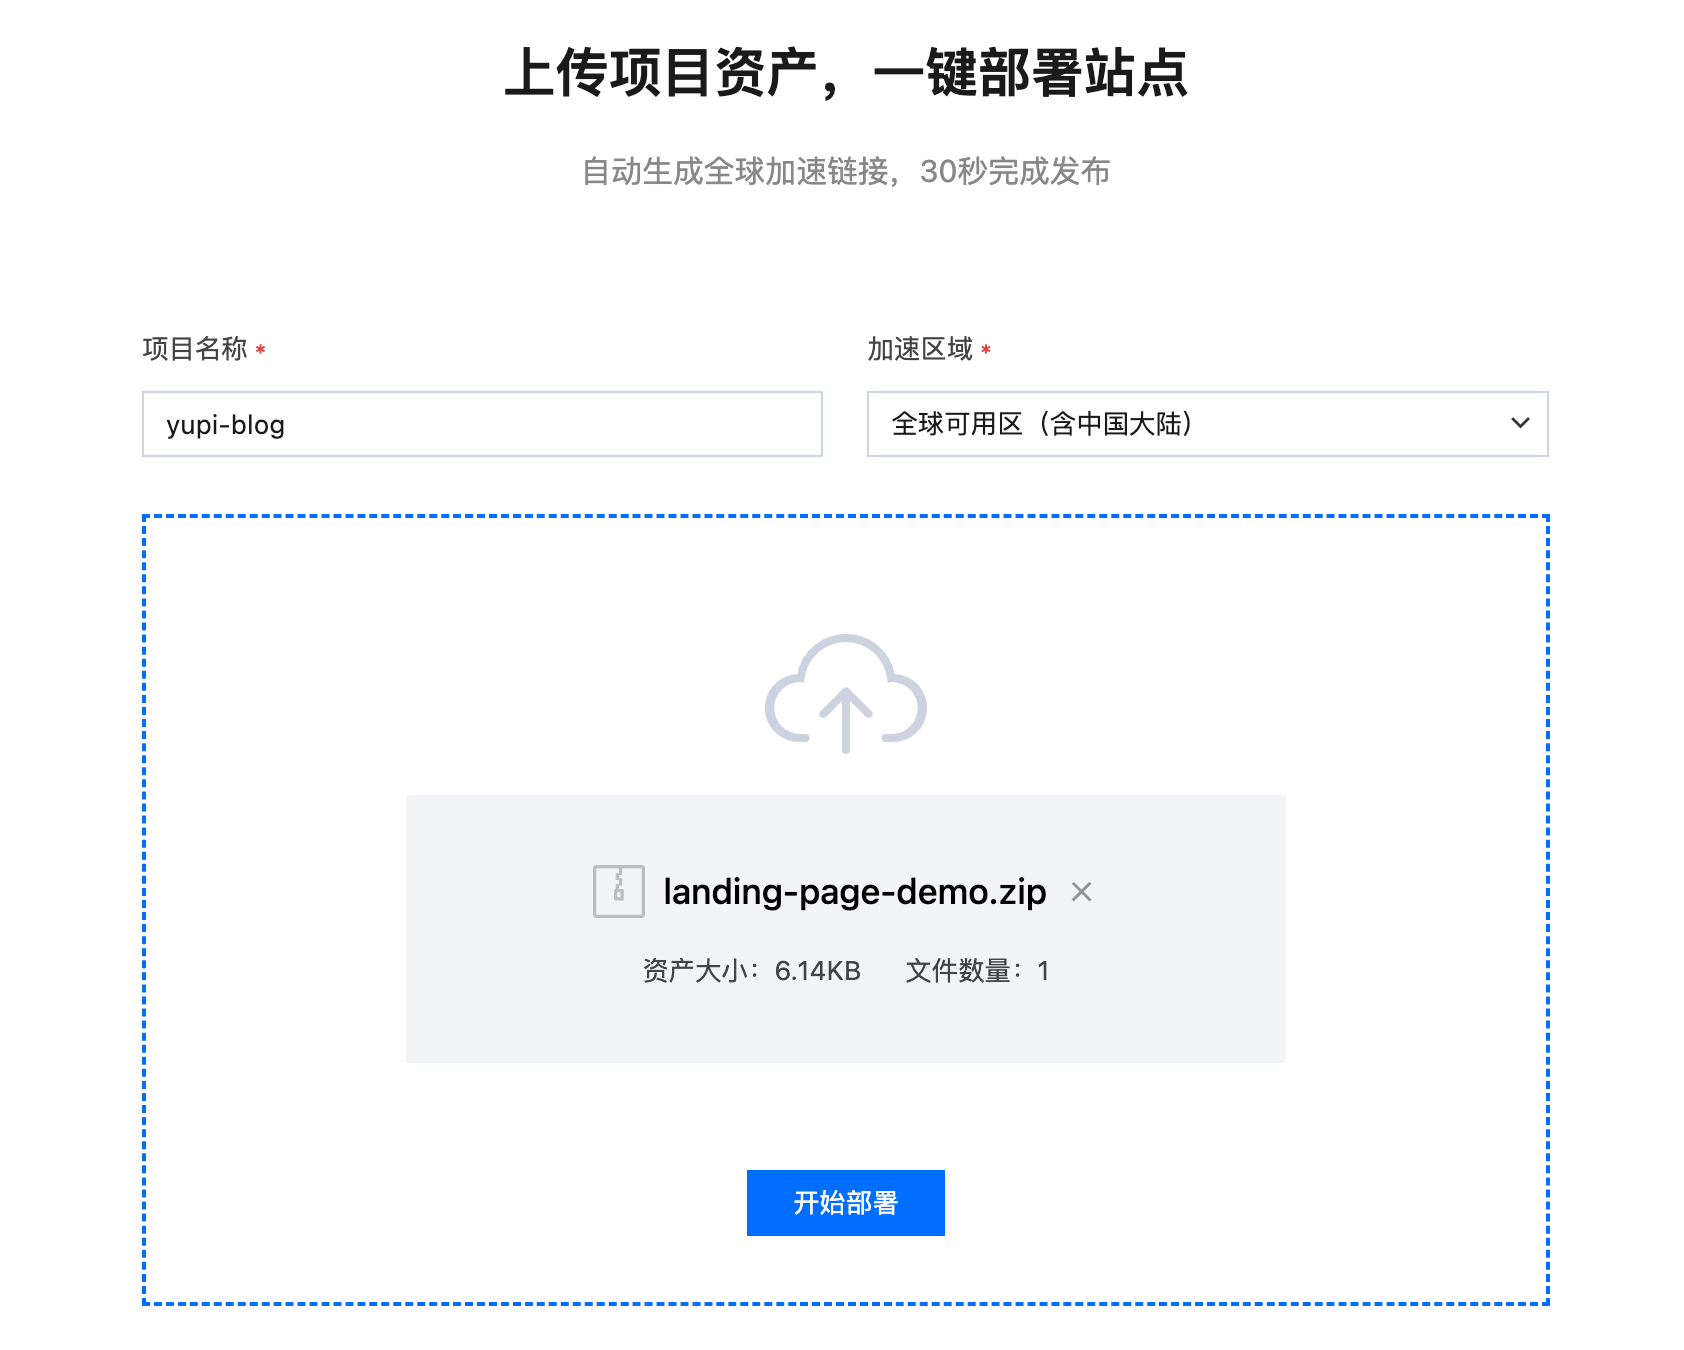
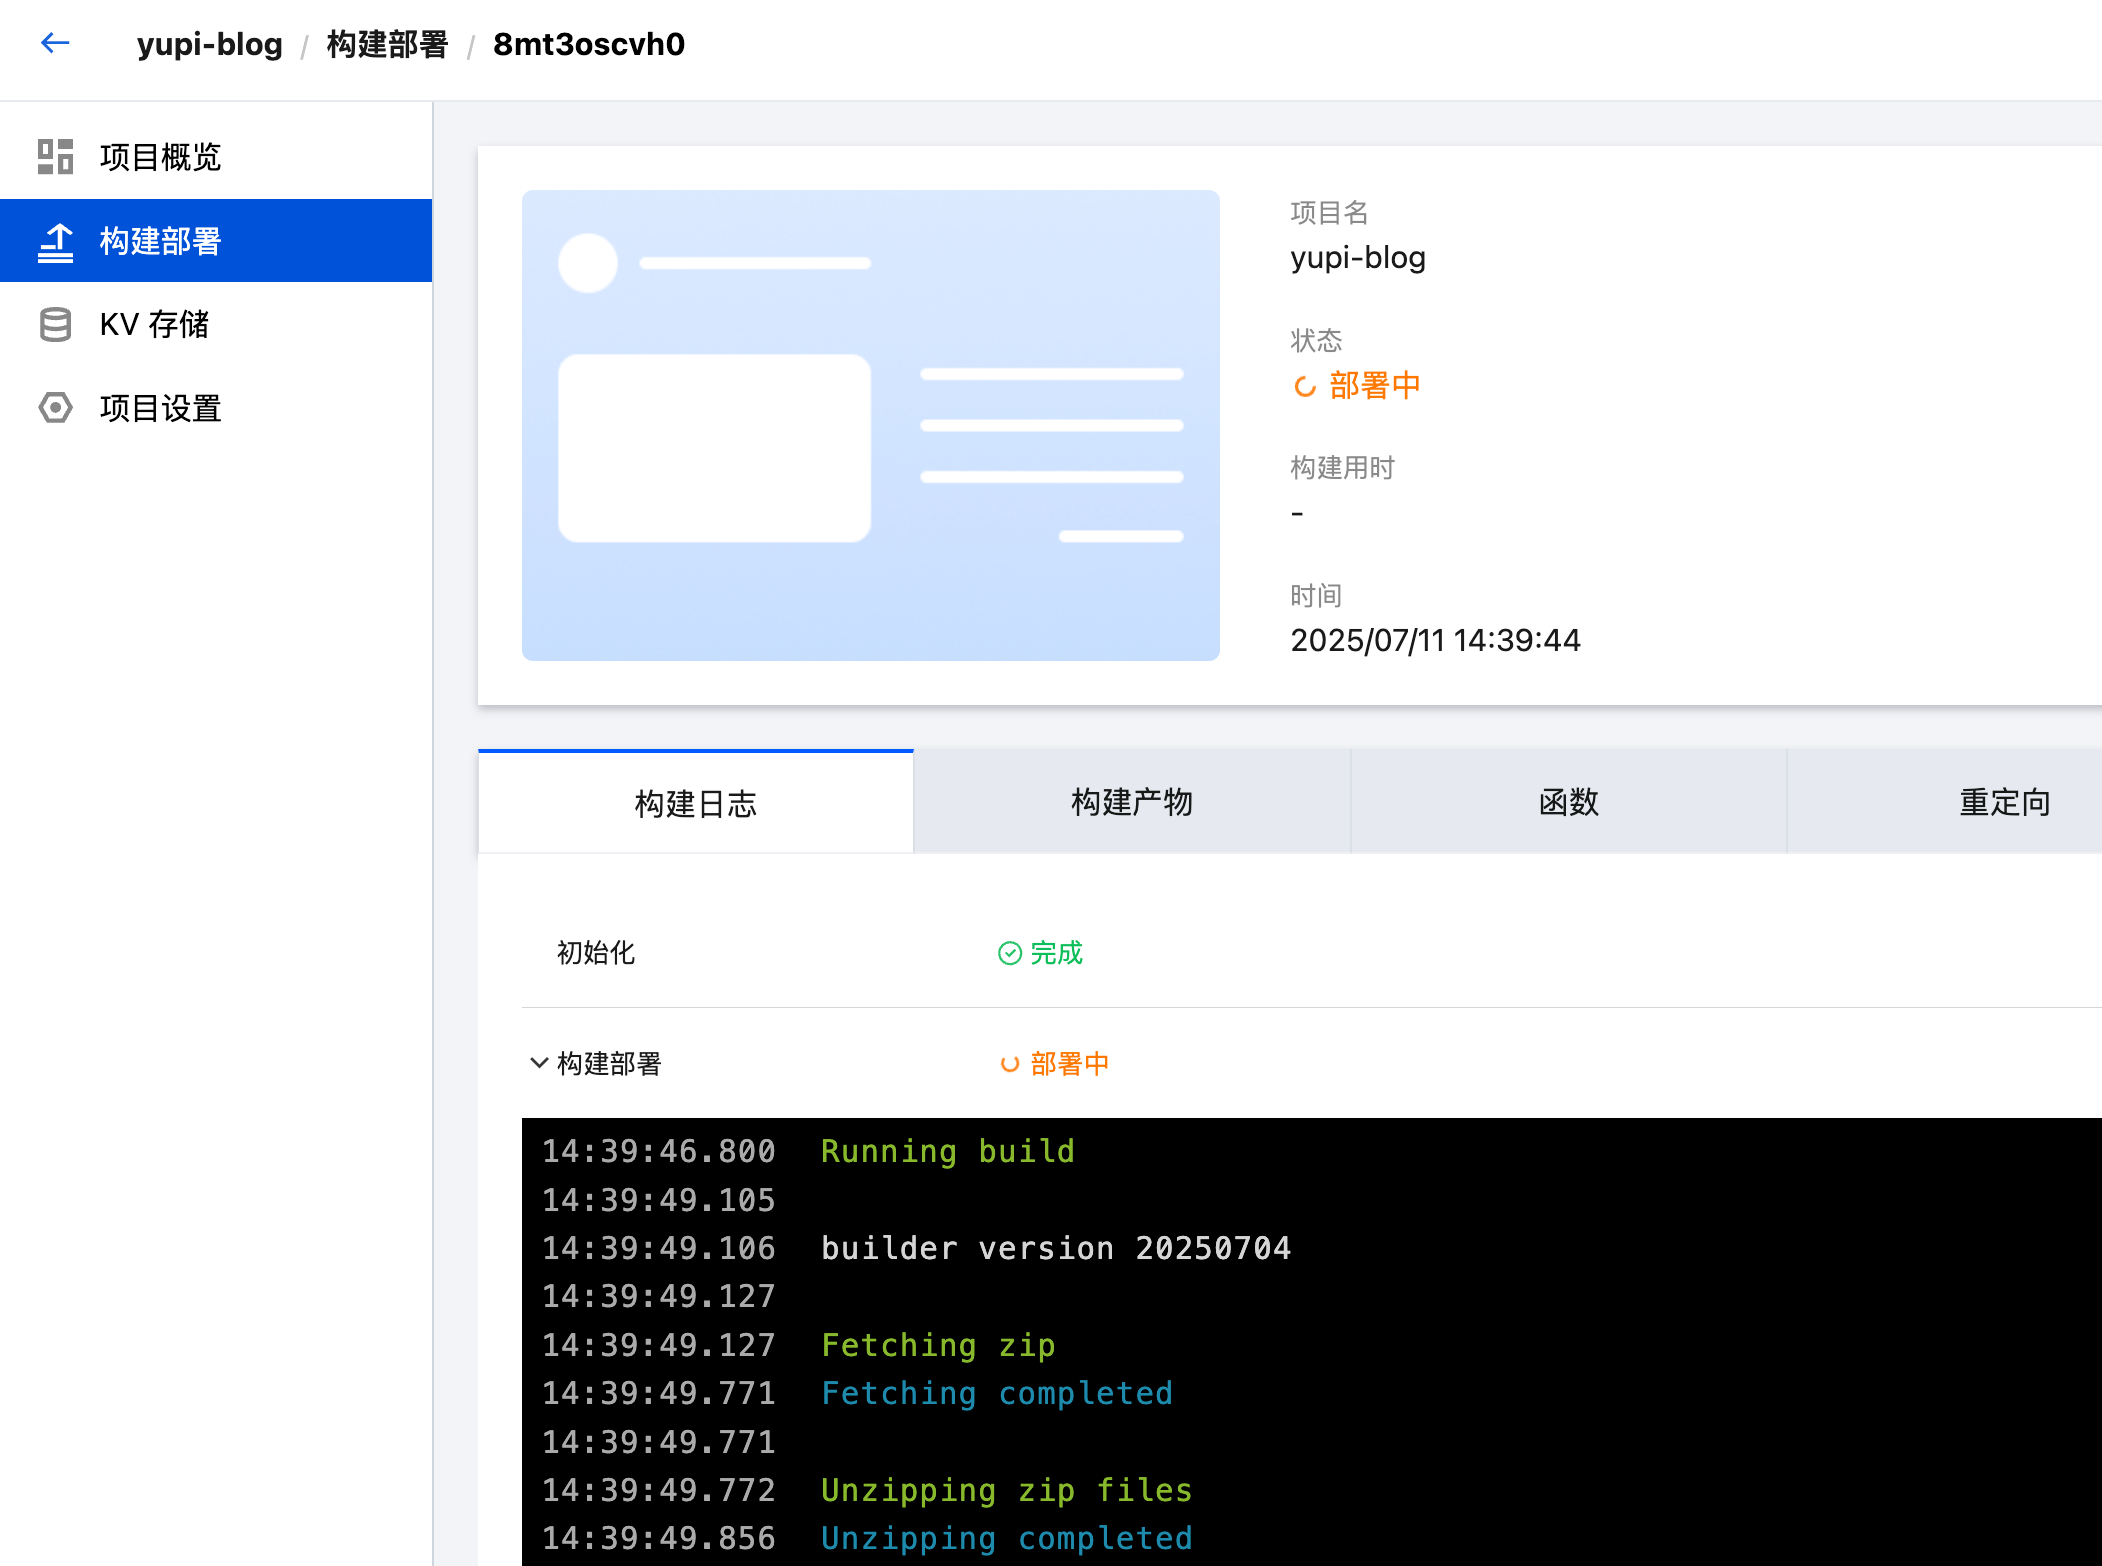
Waiting for deployment, it should take about 30 seconds:
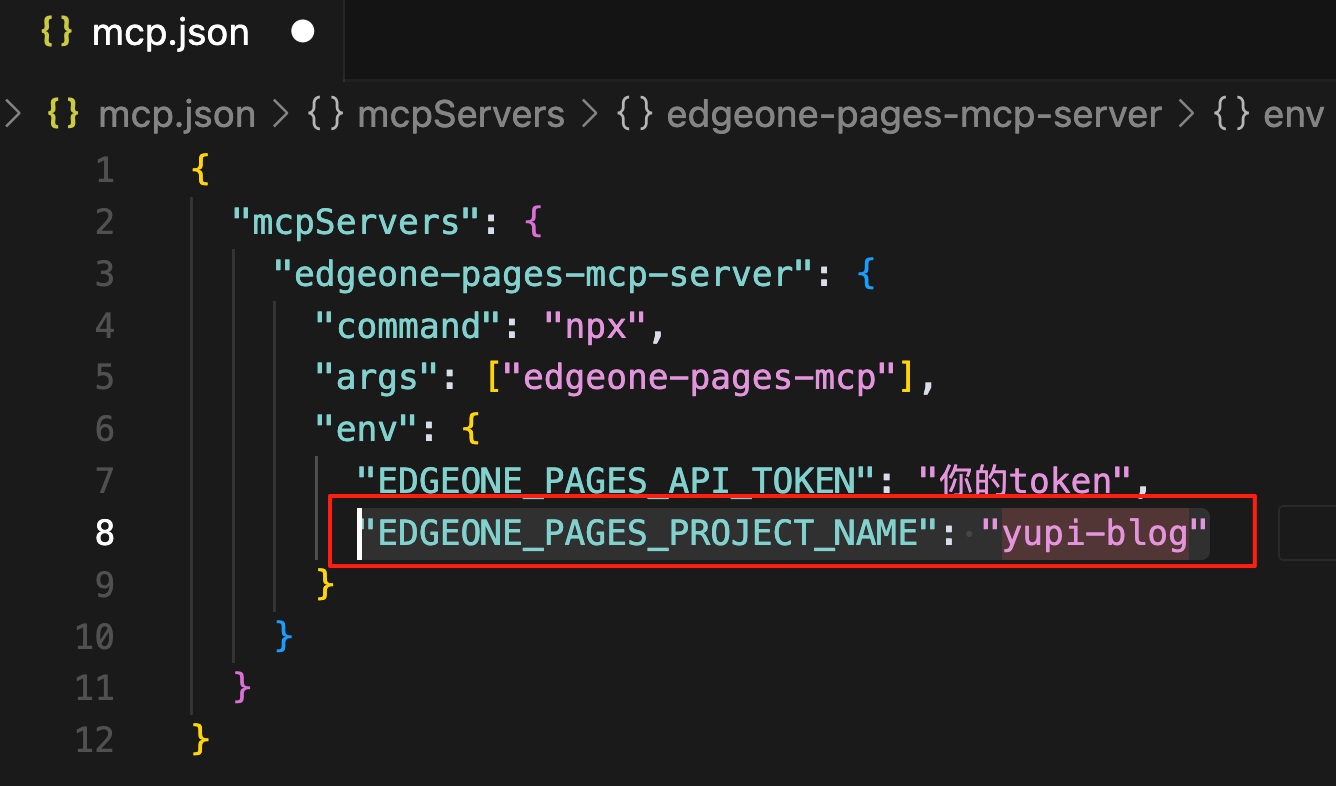
After the project is successfully deployed, modify the Cursor MCP configuration and fill in the newly created project name:
Then, talk to AI again and let it help deploy the website directory:
This time, you can see that AI successfully executed the deployment tool and obtained the access URL:
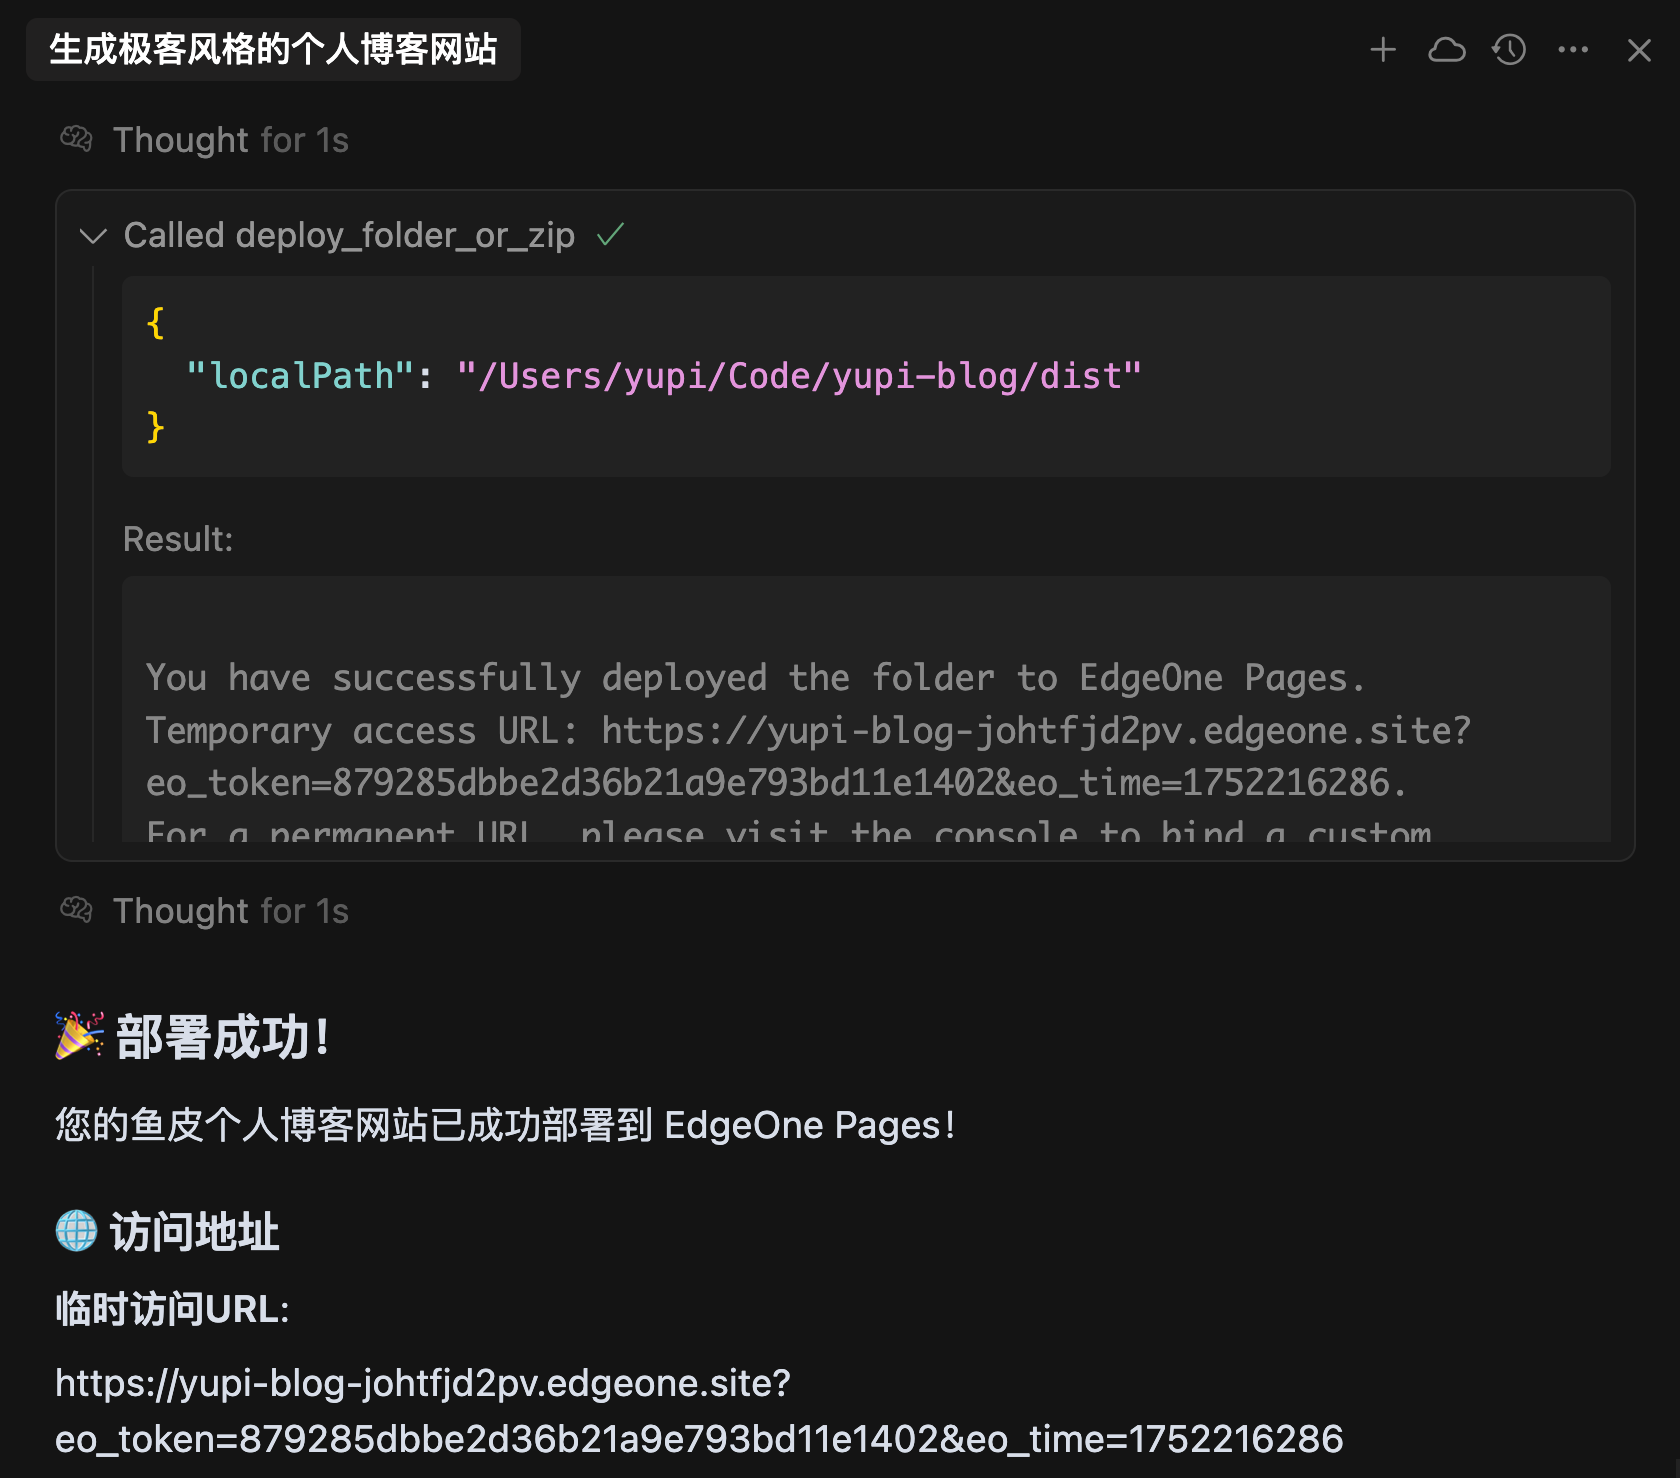
Check out the website effect, not bad, quite techy!
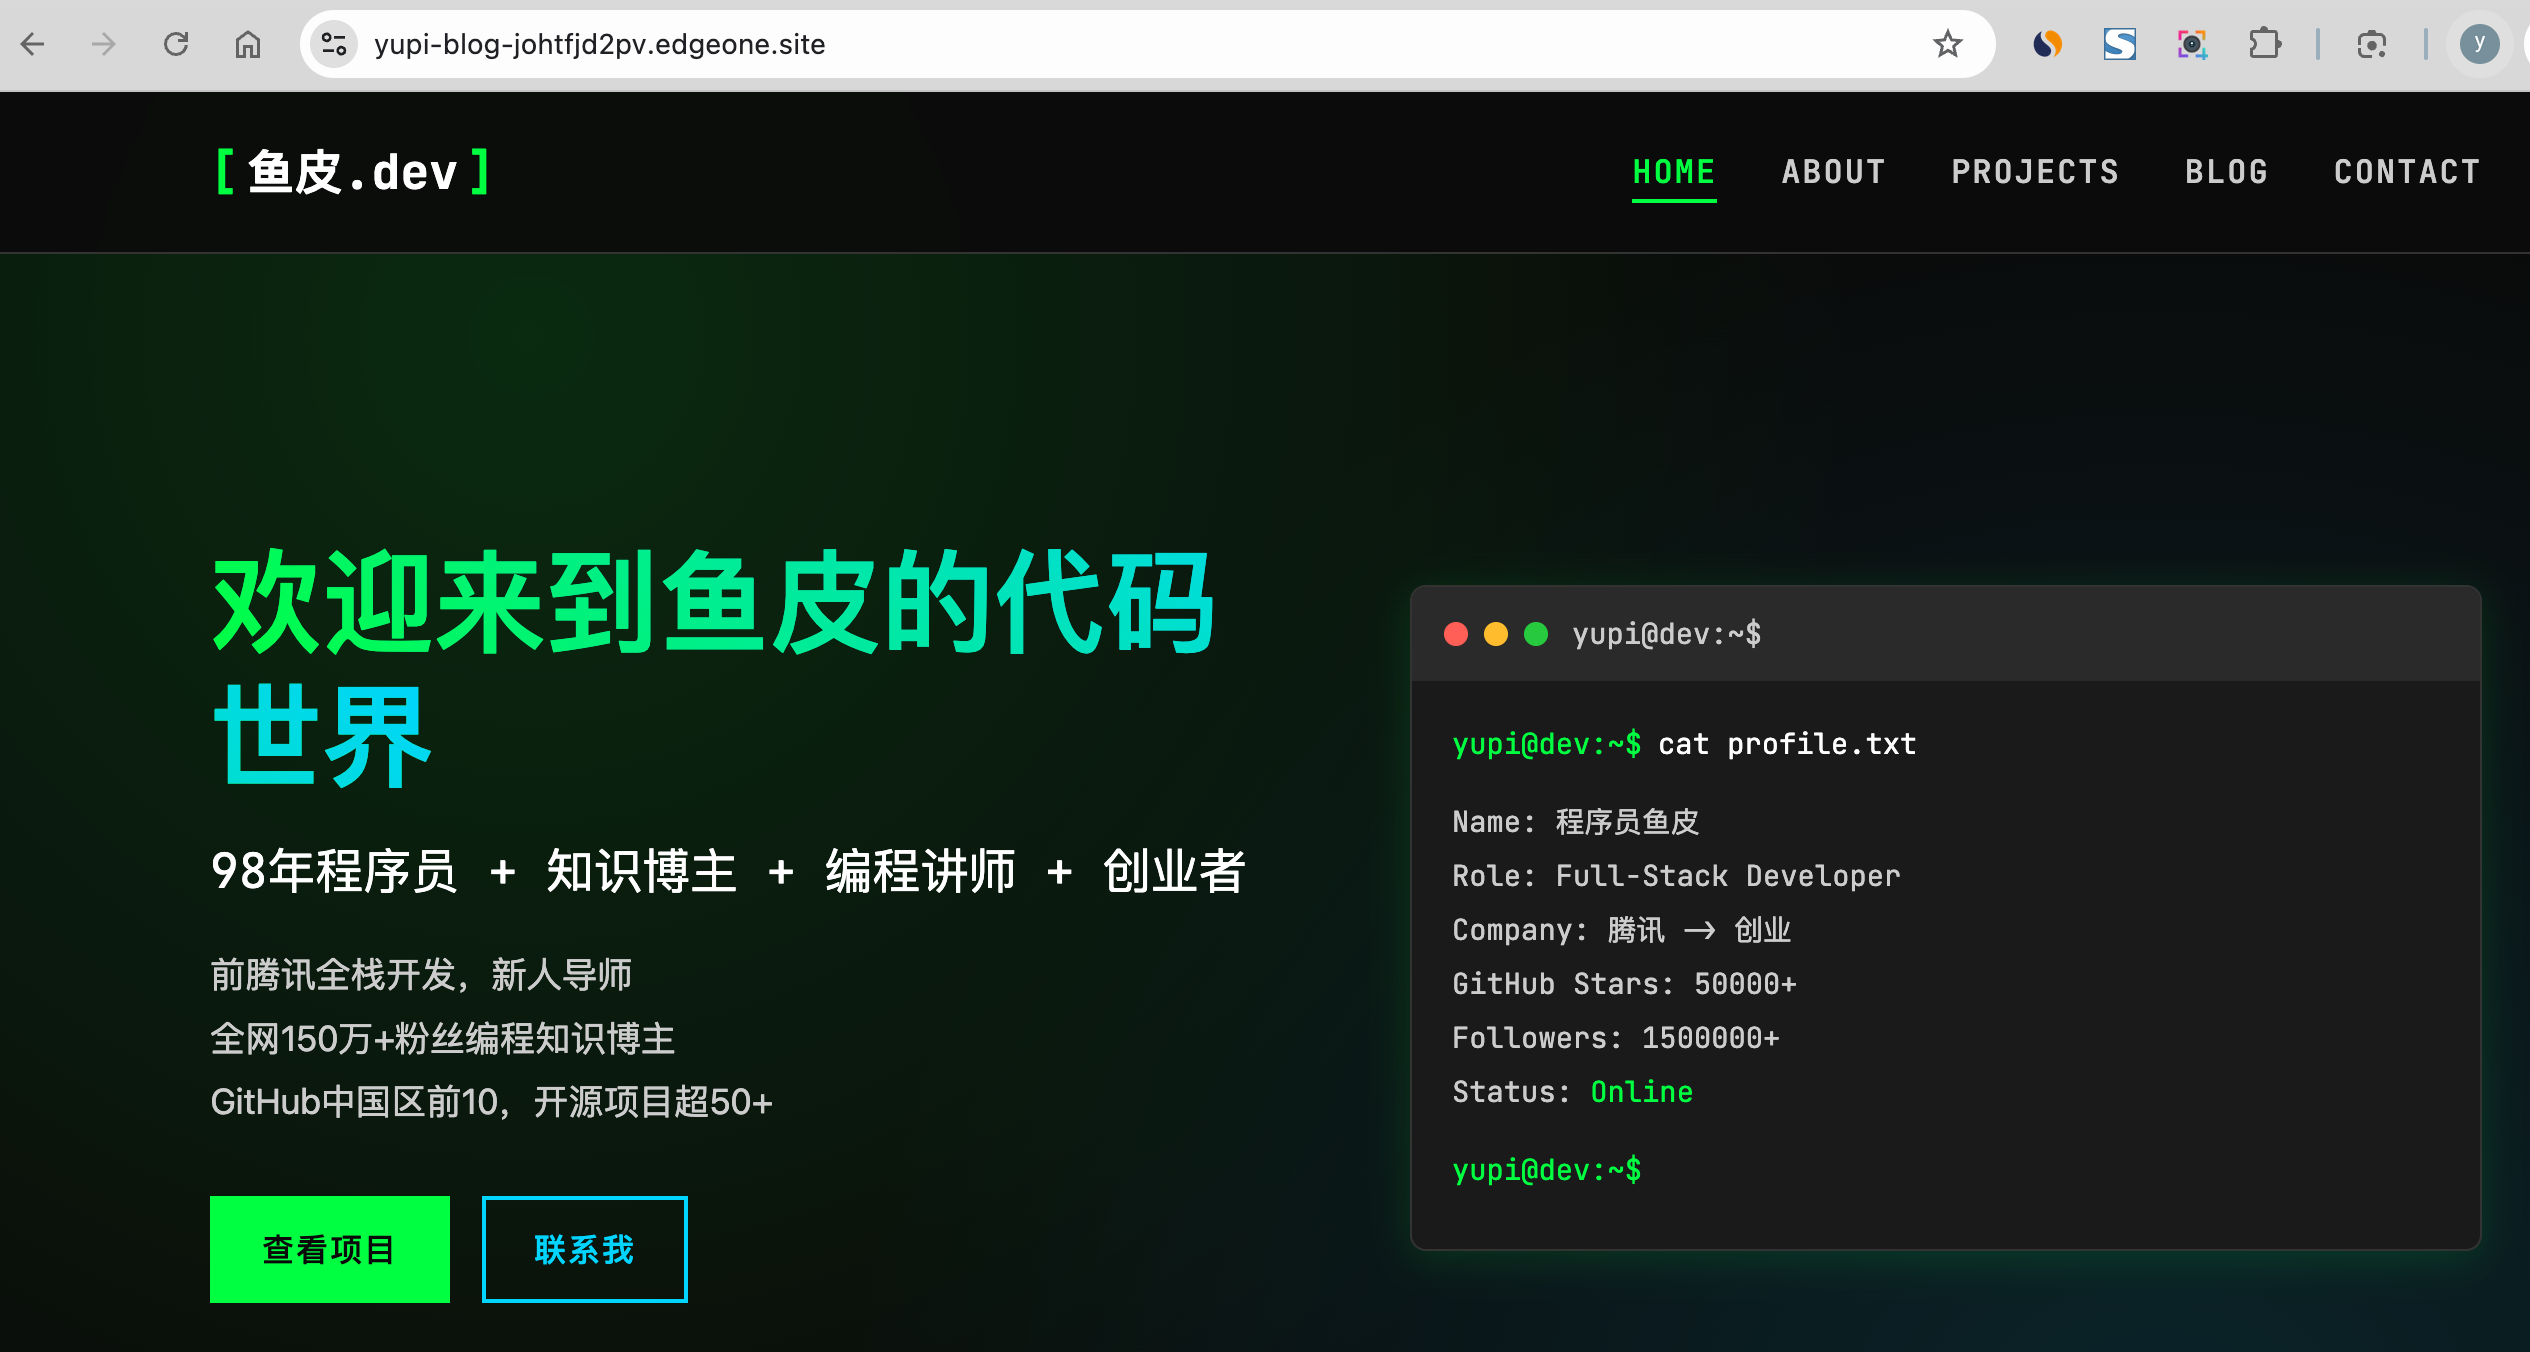
However, note that the generated website uses a temporary domain by default, which has a short validity period:
If you have a domain, it's recommended to configure a custom domain for unlimited access~
How about it? Isn't it simple? When MCP can be easily used on mobile phones, imagine this: you're walking on the street chatting with a friend, and your friend recommends a blogger — Programmer Yupi. You just need to say one sentence to AI, and 2 minutes later, you can give your friend access to a website introducing this blogger, like magic.

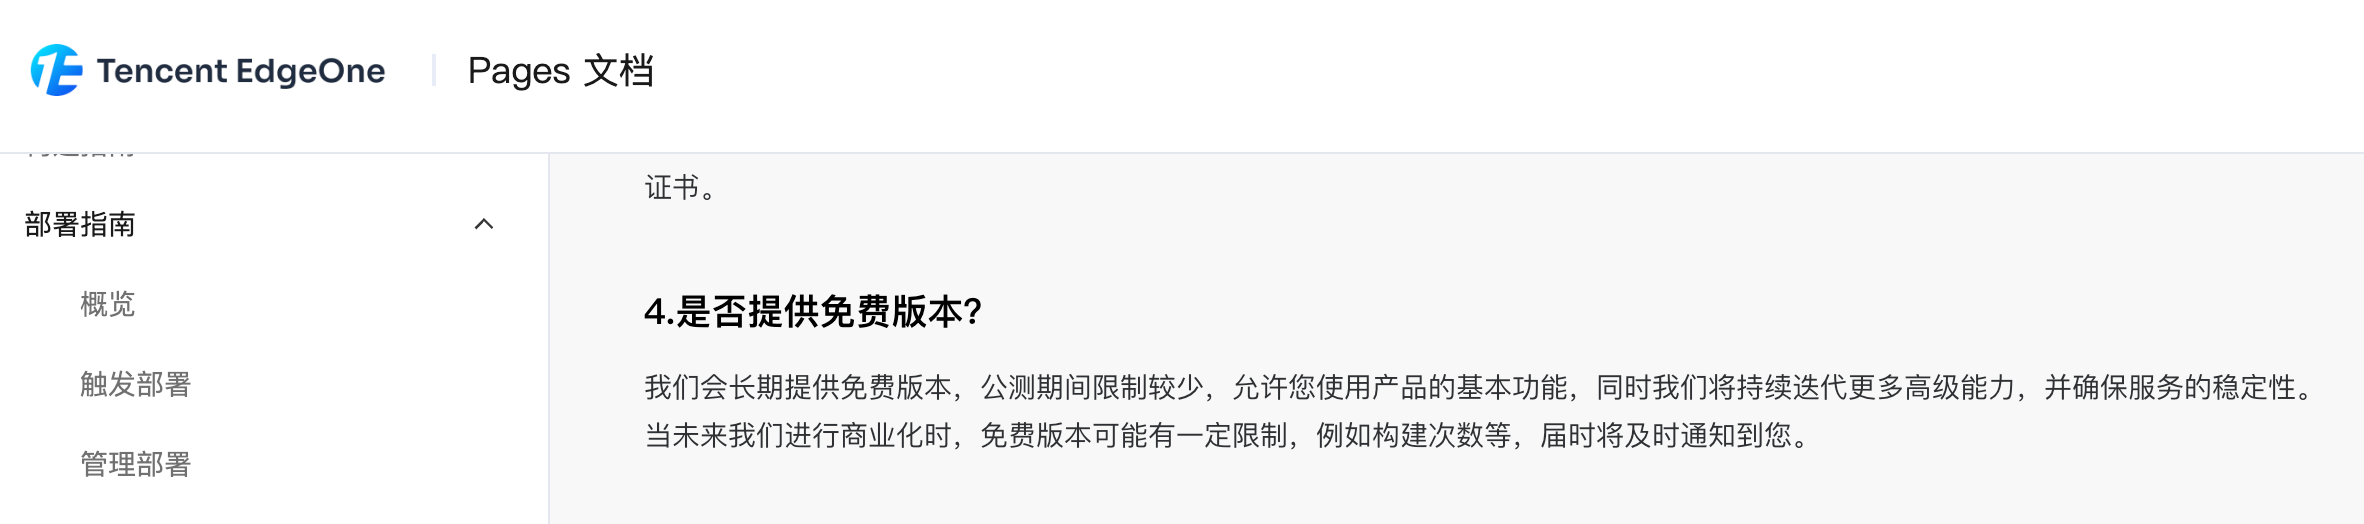
It's worth mentioning that EdgeOne Pages is currently free, which is awesome.
Vercel One-Click Deployment (Recommended)
Vercel is currently the most popular frontend deployment platform, especially suitable for React, Next.js, Vue, static websites, and other frontend projects.
The advantages of Vercel are that personal projects are completely free, deployment speed is extremely fast (usually 1 ~ 2 minutes), automatic HTTPS and CDN acceleration are configured; it also integrates deeply with GitHub, automatically deploying when you push code to a GitHub repository.
Usage Steps
-
First, visit the Vercel official website to register an account. It's recommended to use a GitHub account to register and log in.
-
Create a project, directly bind GitHub and select an already hosted project, then click the "Deploy" button:
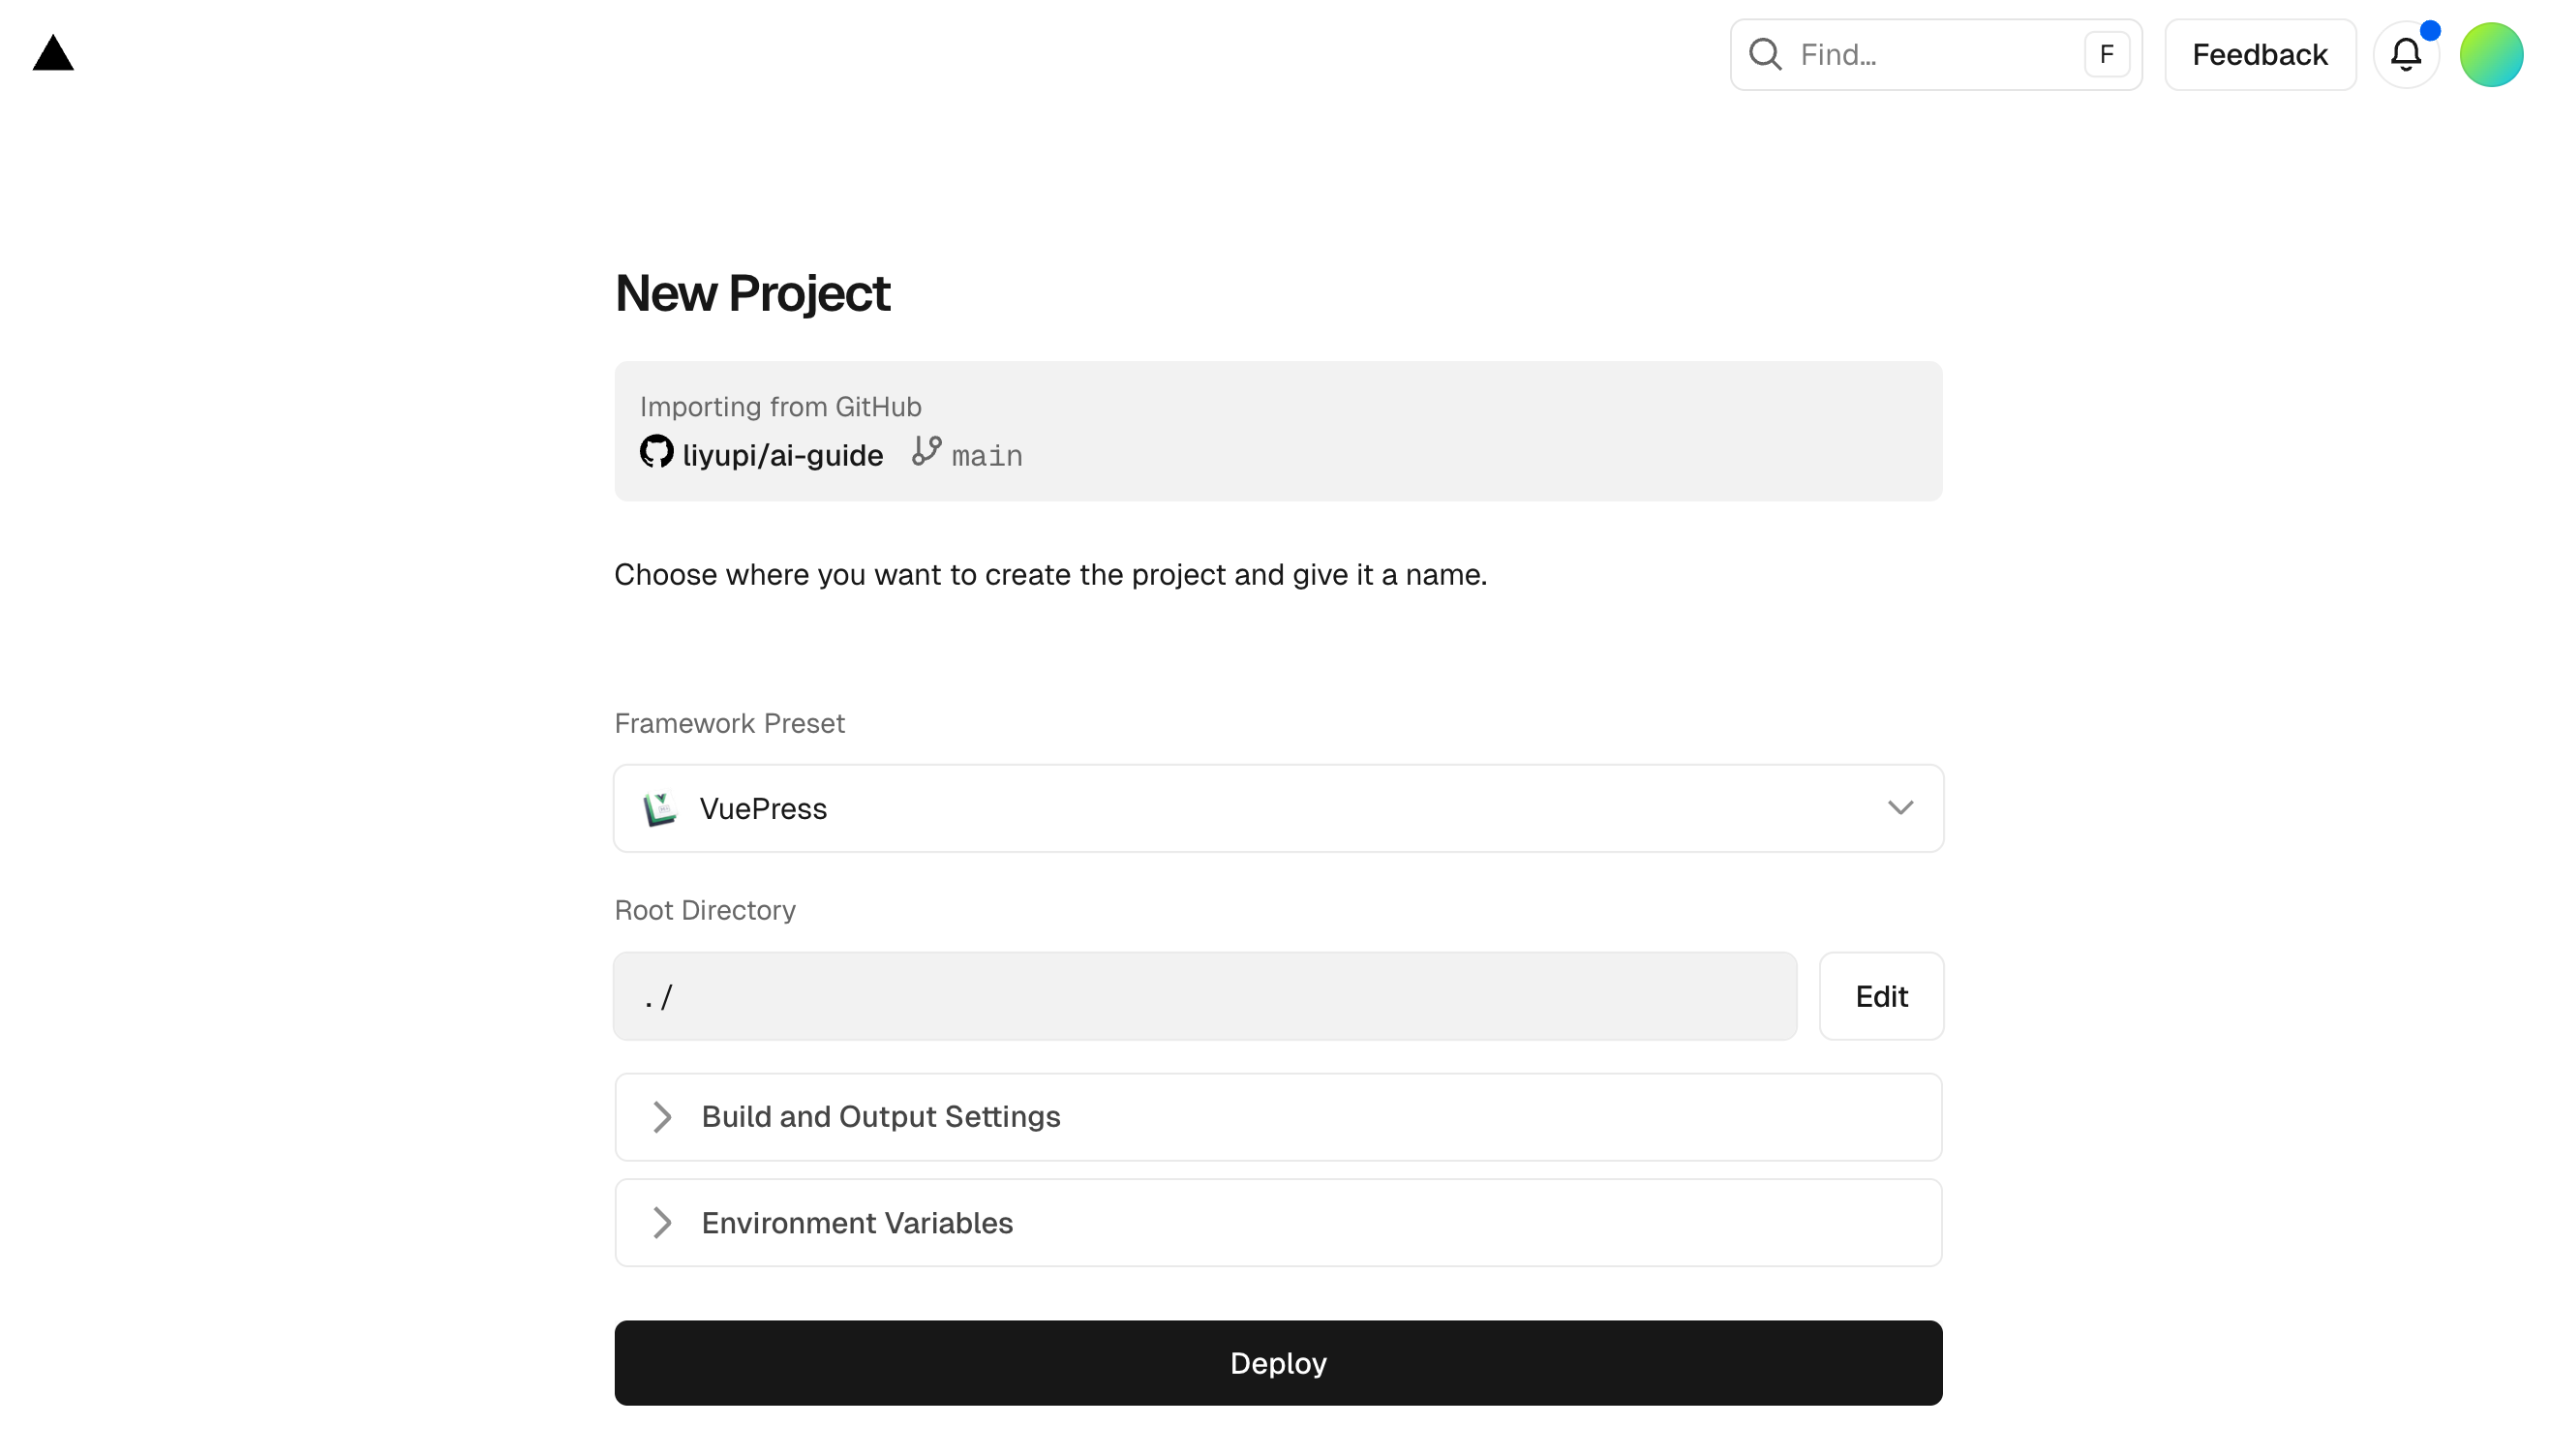
- Wait for 1 ~ 2 minutes, and the project is live!
After successful deployment, Vercel will automatically give you a domain, such as your-project.vercel.app. You can also bind your own domain. Moreover, every time you push code to GitHub, Vercel will automatically redeploy, requiring no manual operation.
Command Line Deployment
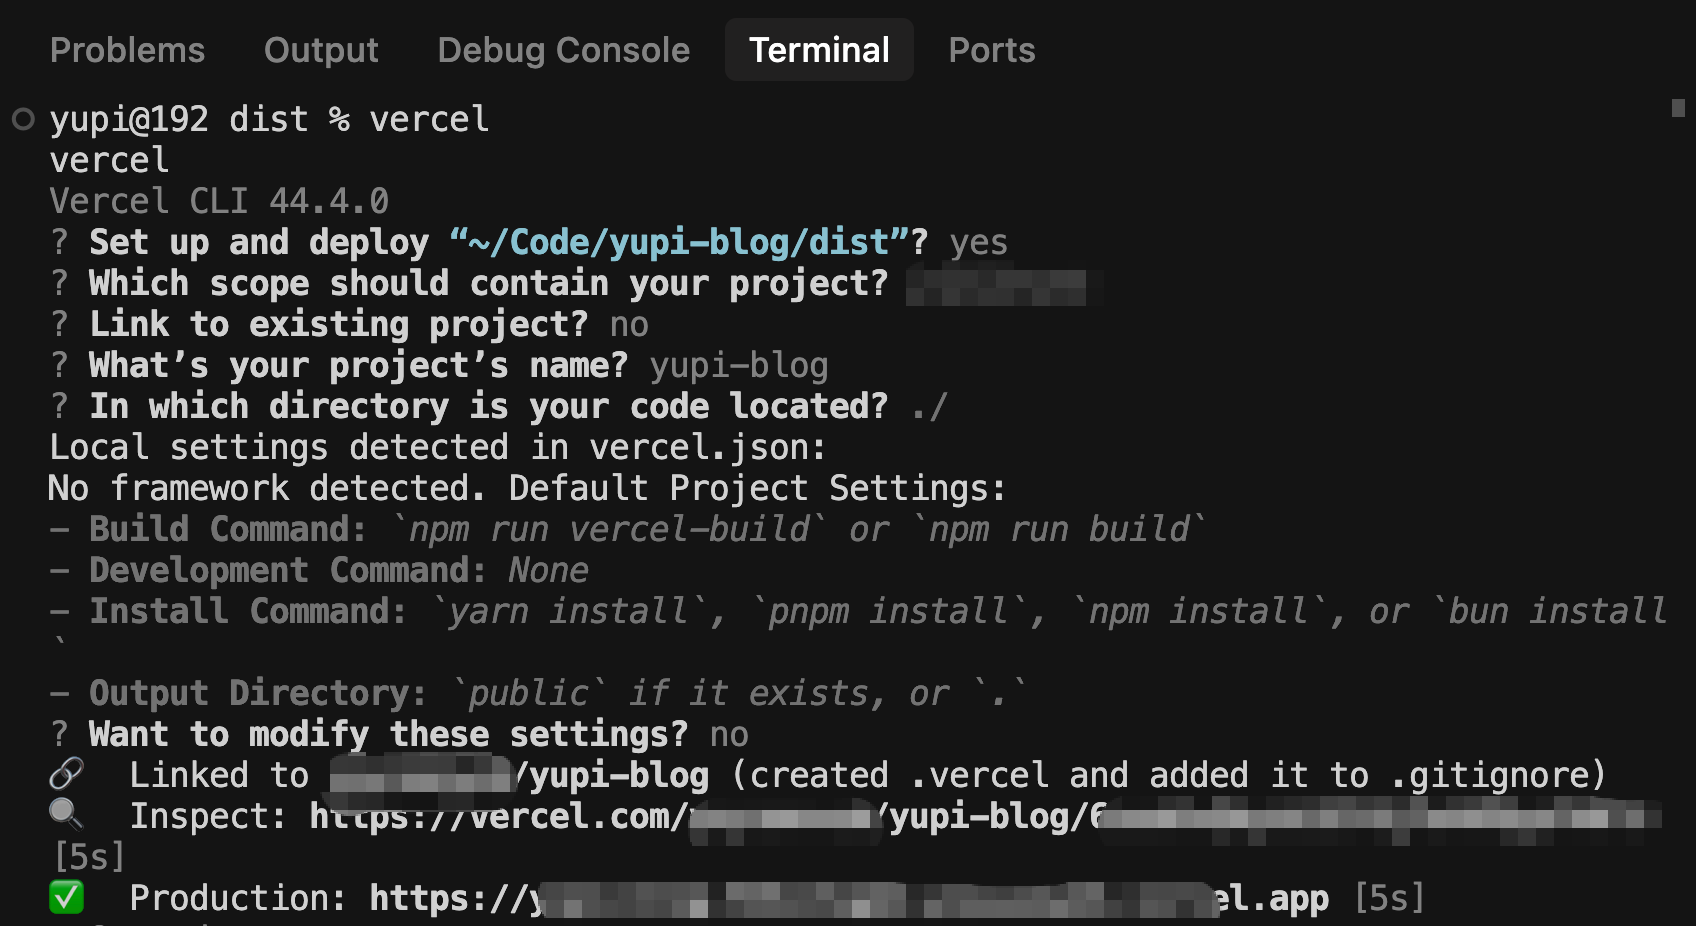
In addition to web operations, Vercel also provides a command-line tool, allowing us to deploy our projects to the platform with a single command. First, install the Vercel CLI tool using NPM:
npm i -g vercel@latest
Then, directly enter the vercel command in the project folder you want to deploy, and the current project will be deployed:
The method to let AI complete auto-deployment is also simple. You just need to tell AI in the prompt "You can use the vercel command-line tool to complete website deployment." Smart as it is, it will surely help you complete the task.
💡 For the specific process, you can watch Yupi's video tutorial: https://www.bilibili.com/video/BV1TV4y1j76t
Besides Vercel, there's also Netlify, a similar platform. Netlify and Vercel have similar functions, but Netlify is more comprehensive, supporting more frameworks and static site generators, with features like form processing, serverless functions, larger free quotas, and support for A/B testing and analysis. The usage method is similar to Vercel: register an account => connect GitHub => select a project => click deploy. If your project is not Next.js (Next.js is best used with Vercel), you can consider using Netlify.
GitHub Pages Deployment
GitHub Pages is a free static website hosting service provided by GitHub. The advantages are that it's completely free, has unlimited traffic, and integrates seamlessly with GitHub.
The usage method is extremely simple. After creating a repository on GitHub and uploading website files, directly enable GitHub Pages in the repository settings:
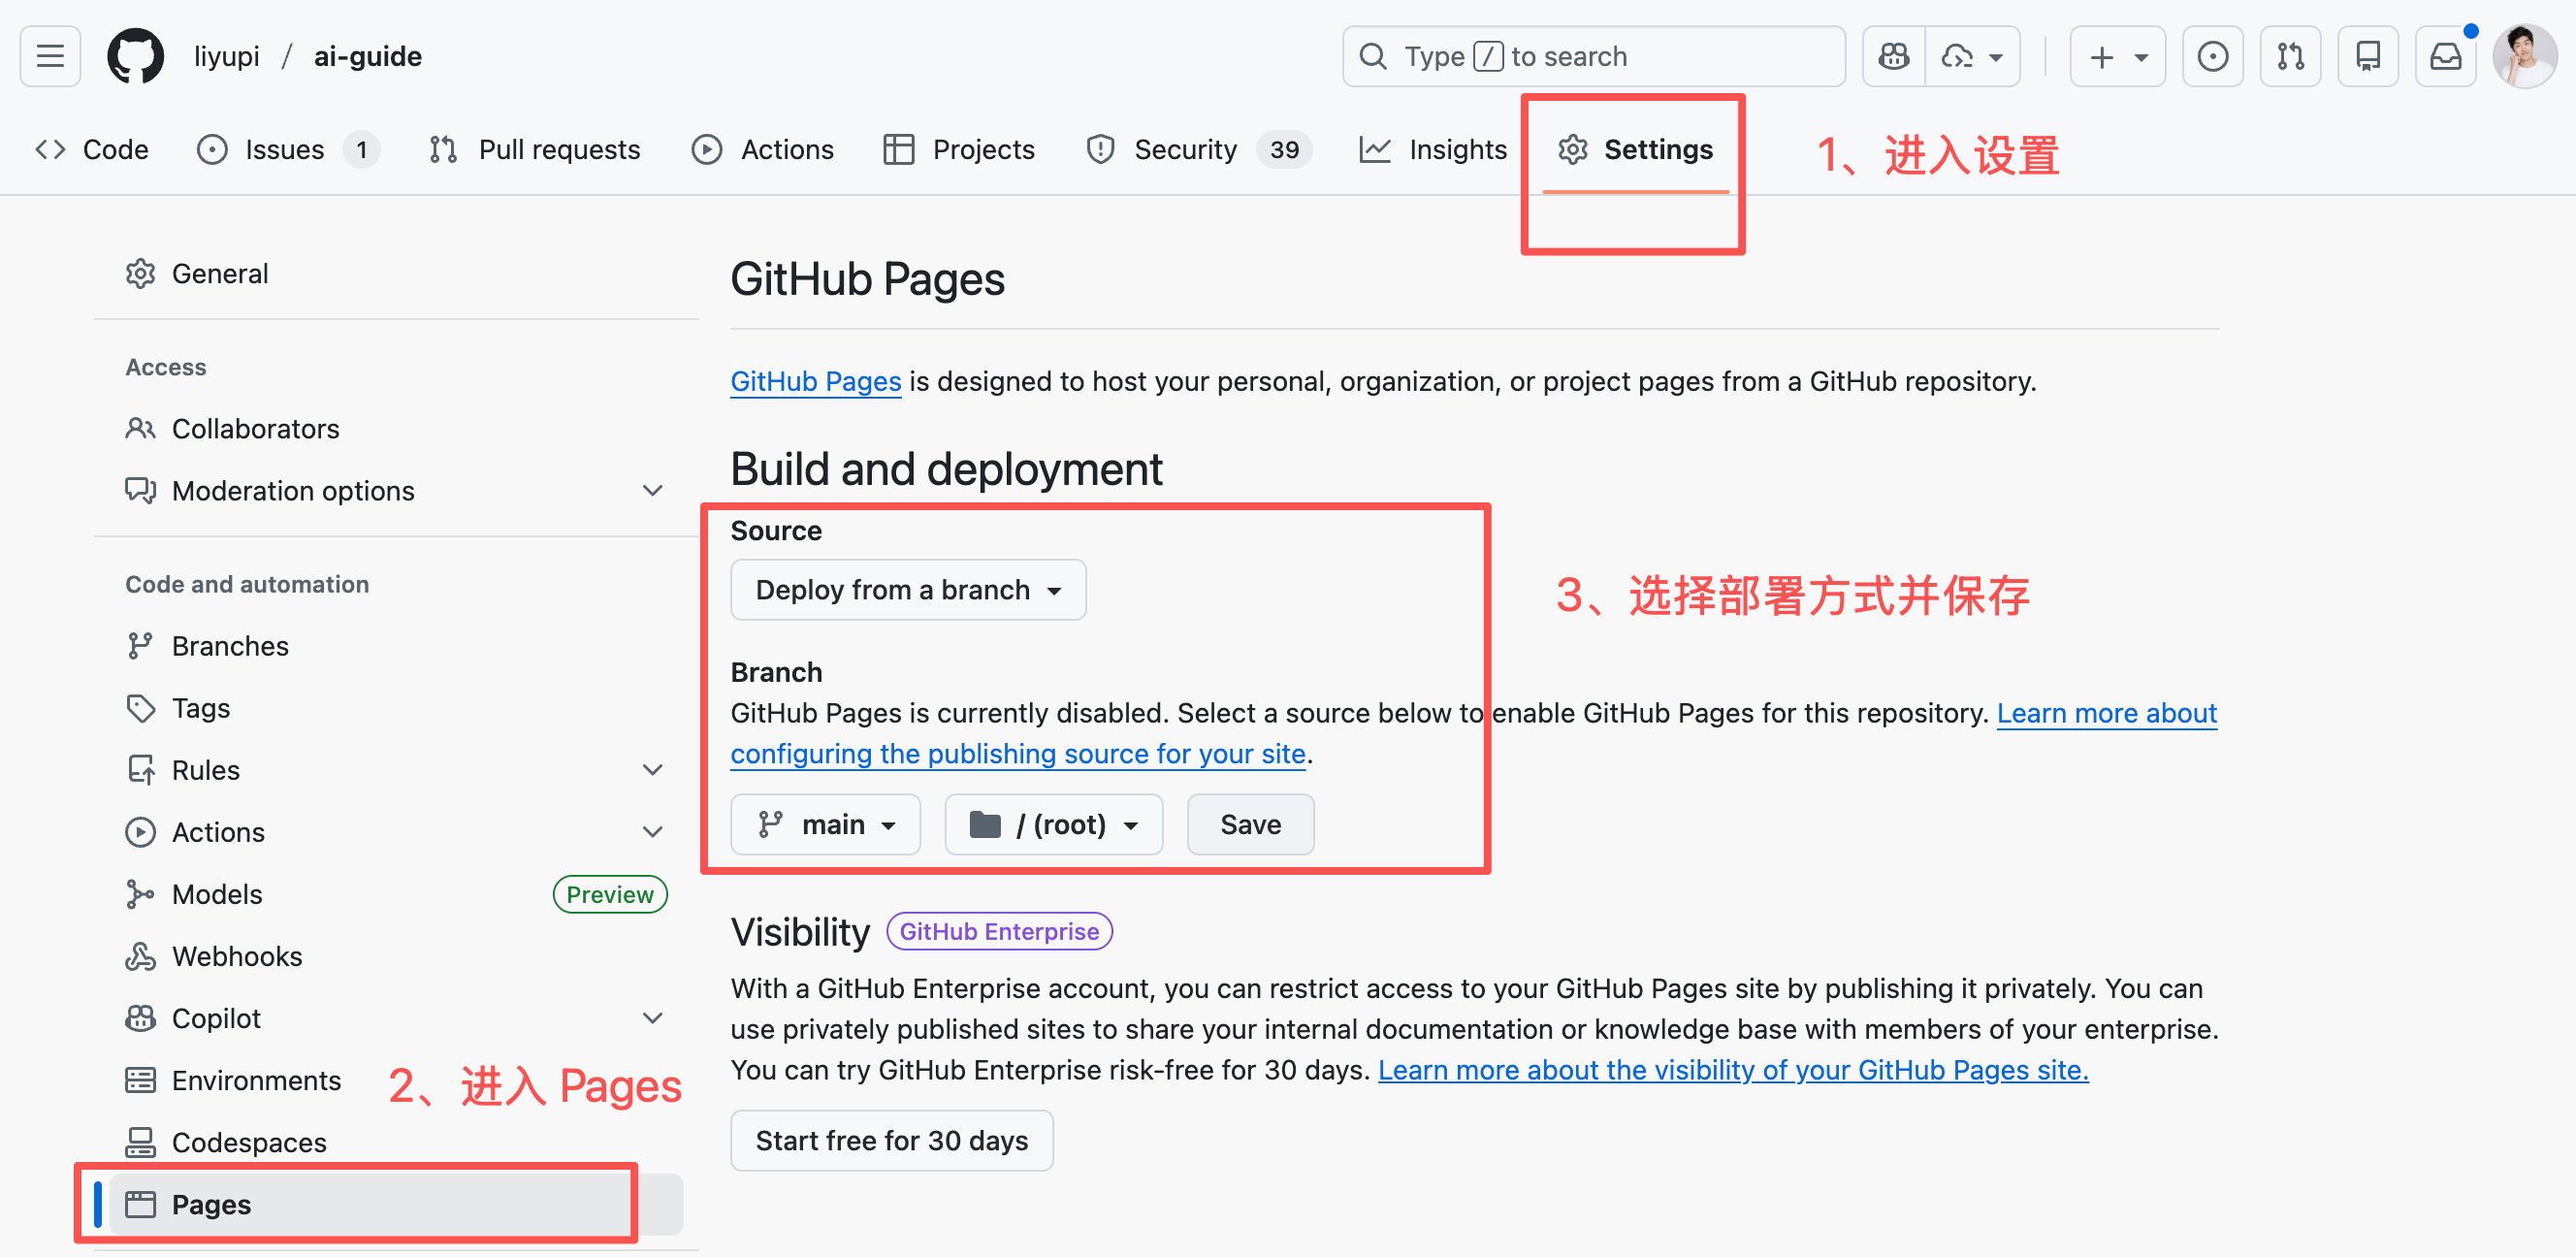
Then, you can access it via username.github.io/repo-name. It's suitable for personal homepages, project documentation, and simple static websites.
The limitation of GitHub Pages is that it can only deploy static websites and cannot run backend code. However, for pure frontend projects, it's completely sufficient. And it's completely free, with no need to worry about traffic limits.
Cloud Server Deployment
If you want more control, you can rent a cloud server and deploy the project yourself. Mainstream cloud service providers in China include Alibaba Cloud, Tencent Cloud, and Huawei Cloud.
The basic process of cloud server deployment:
-
Purchase a cloud server (recommended starting with a 2-core 4GB configuration, with new user discounts for first-time purchases)
-
Install the runtime environment, such as Node.js, Nginx, MySQL database, etc.
-
Upload code to the server
-
Configure Nginx reverse proxy
-
Configure domain and SSL certificate
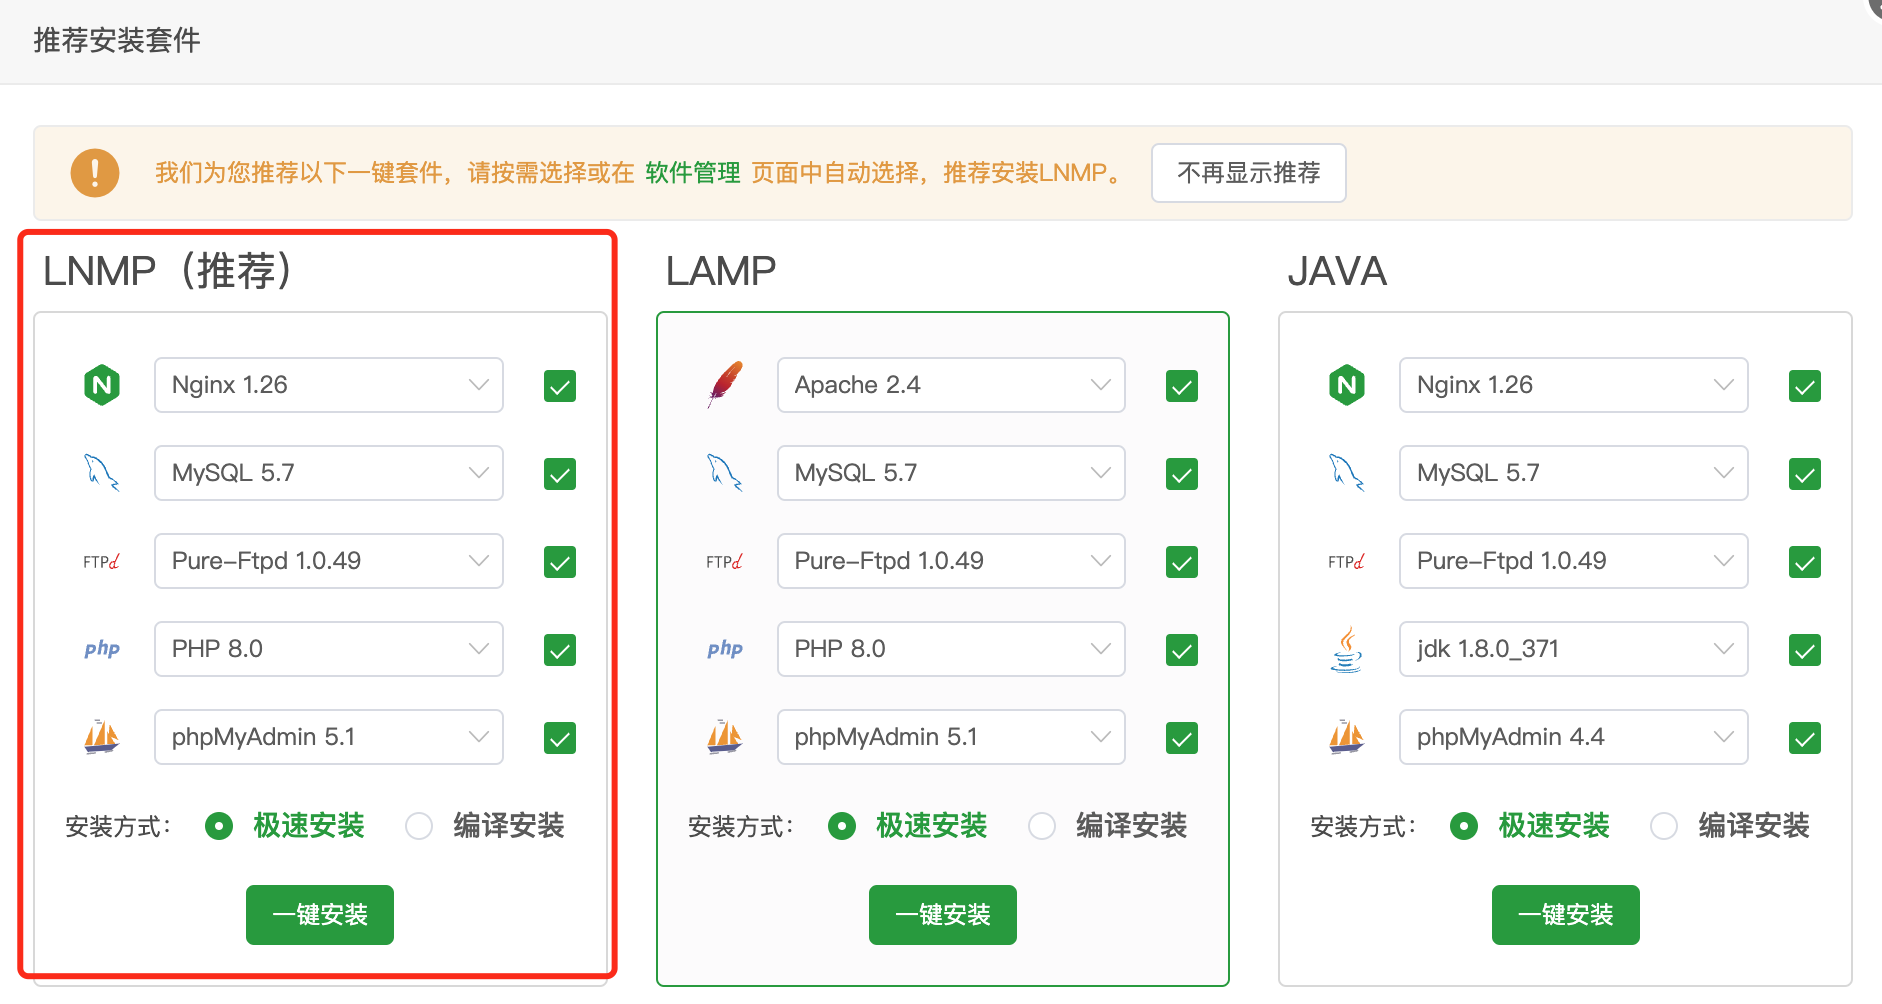
This process can be a bit complex for pure beginners, but you can use visual management tools like BT Panel or 1Panel to greatly simplify operations. These panels provide a graphical interface, eliminating the need to remember complex commands, and you can complete configurations with just a few clicks.
The advantage of cloud server deployment is