16 KiB
Vibe Coding Efficiency Boost Tips
Increase your AI development efficiency by 10x
Hello, I'm Yupi.
In previous articles, we discussed the core principles of Vibe Coding, conversation techniques, context management, and problem debugging. Today, we'll talk about a more practical topic: how to improve development efficiency?
Many students find that while they can build things with AI, the overall speed still feels inadequate. If AI writes code so quickly, why isn't the efficiency higher?
The issues often lie in small things: frequent copy-pasting, repeatedly entering the same prompts, performing mechanical operations manually...
Below I'll share some practical efficiency-boosting techniques to take your development speed to the next level.
1. Core Efficiency Techniques
First, let me share several AI efficiency techniques I frequently use.
Choose AI Models Based on Needs
Not all tasks require the most powerful and expensive models.
- Simple tasks: Like code formatting, writing comments, simple refactoring - use cheaper, faster models like Gemini Flash or GPT-5 Mini
- Medium tasks: Like implementing standard features, code reviews, developing small websites - use GPT-5 or Claude Sonnet
- Complex tasks: Like architecture design, complex algorithms, tricky bugs, large projects - only then use top-tier models like Claude Opus or enable deep thinking
Choosing models appropriately can both increase speed and save costs. Just like you wouldn't ask your company's CTO to print documents - let the right model do the right job.
Avoid AI Generating Unnecessary Content
Many students ask AI to write code, only for the AI to output tons of comments, test code, documentation, and lengthy summaries. It looks professional, but you probably won't read it.
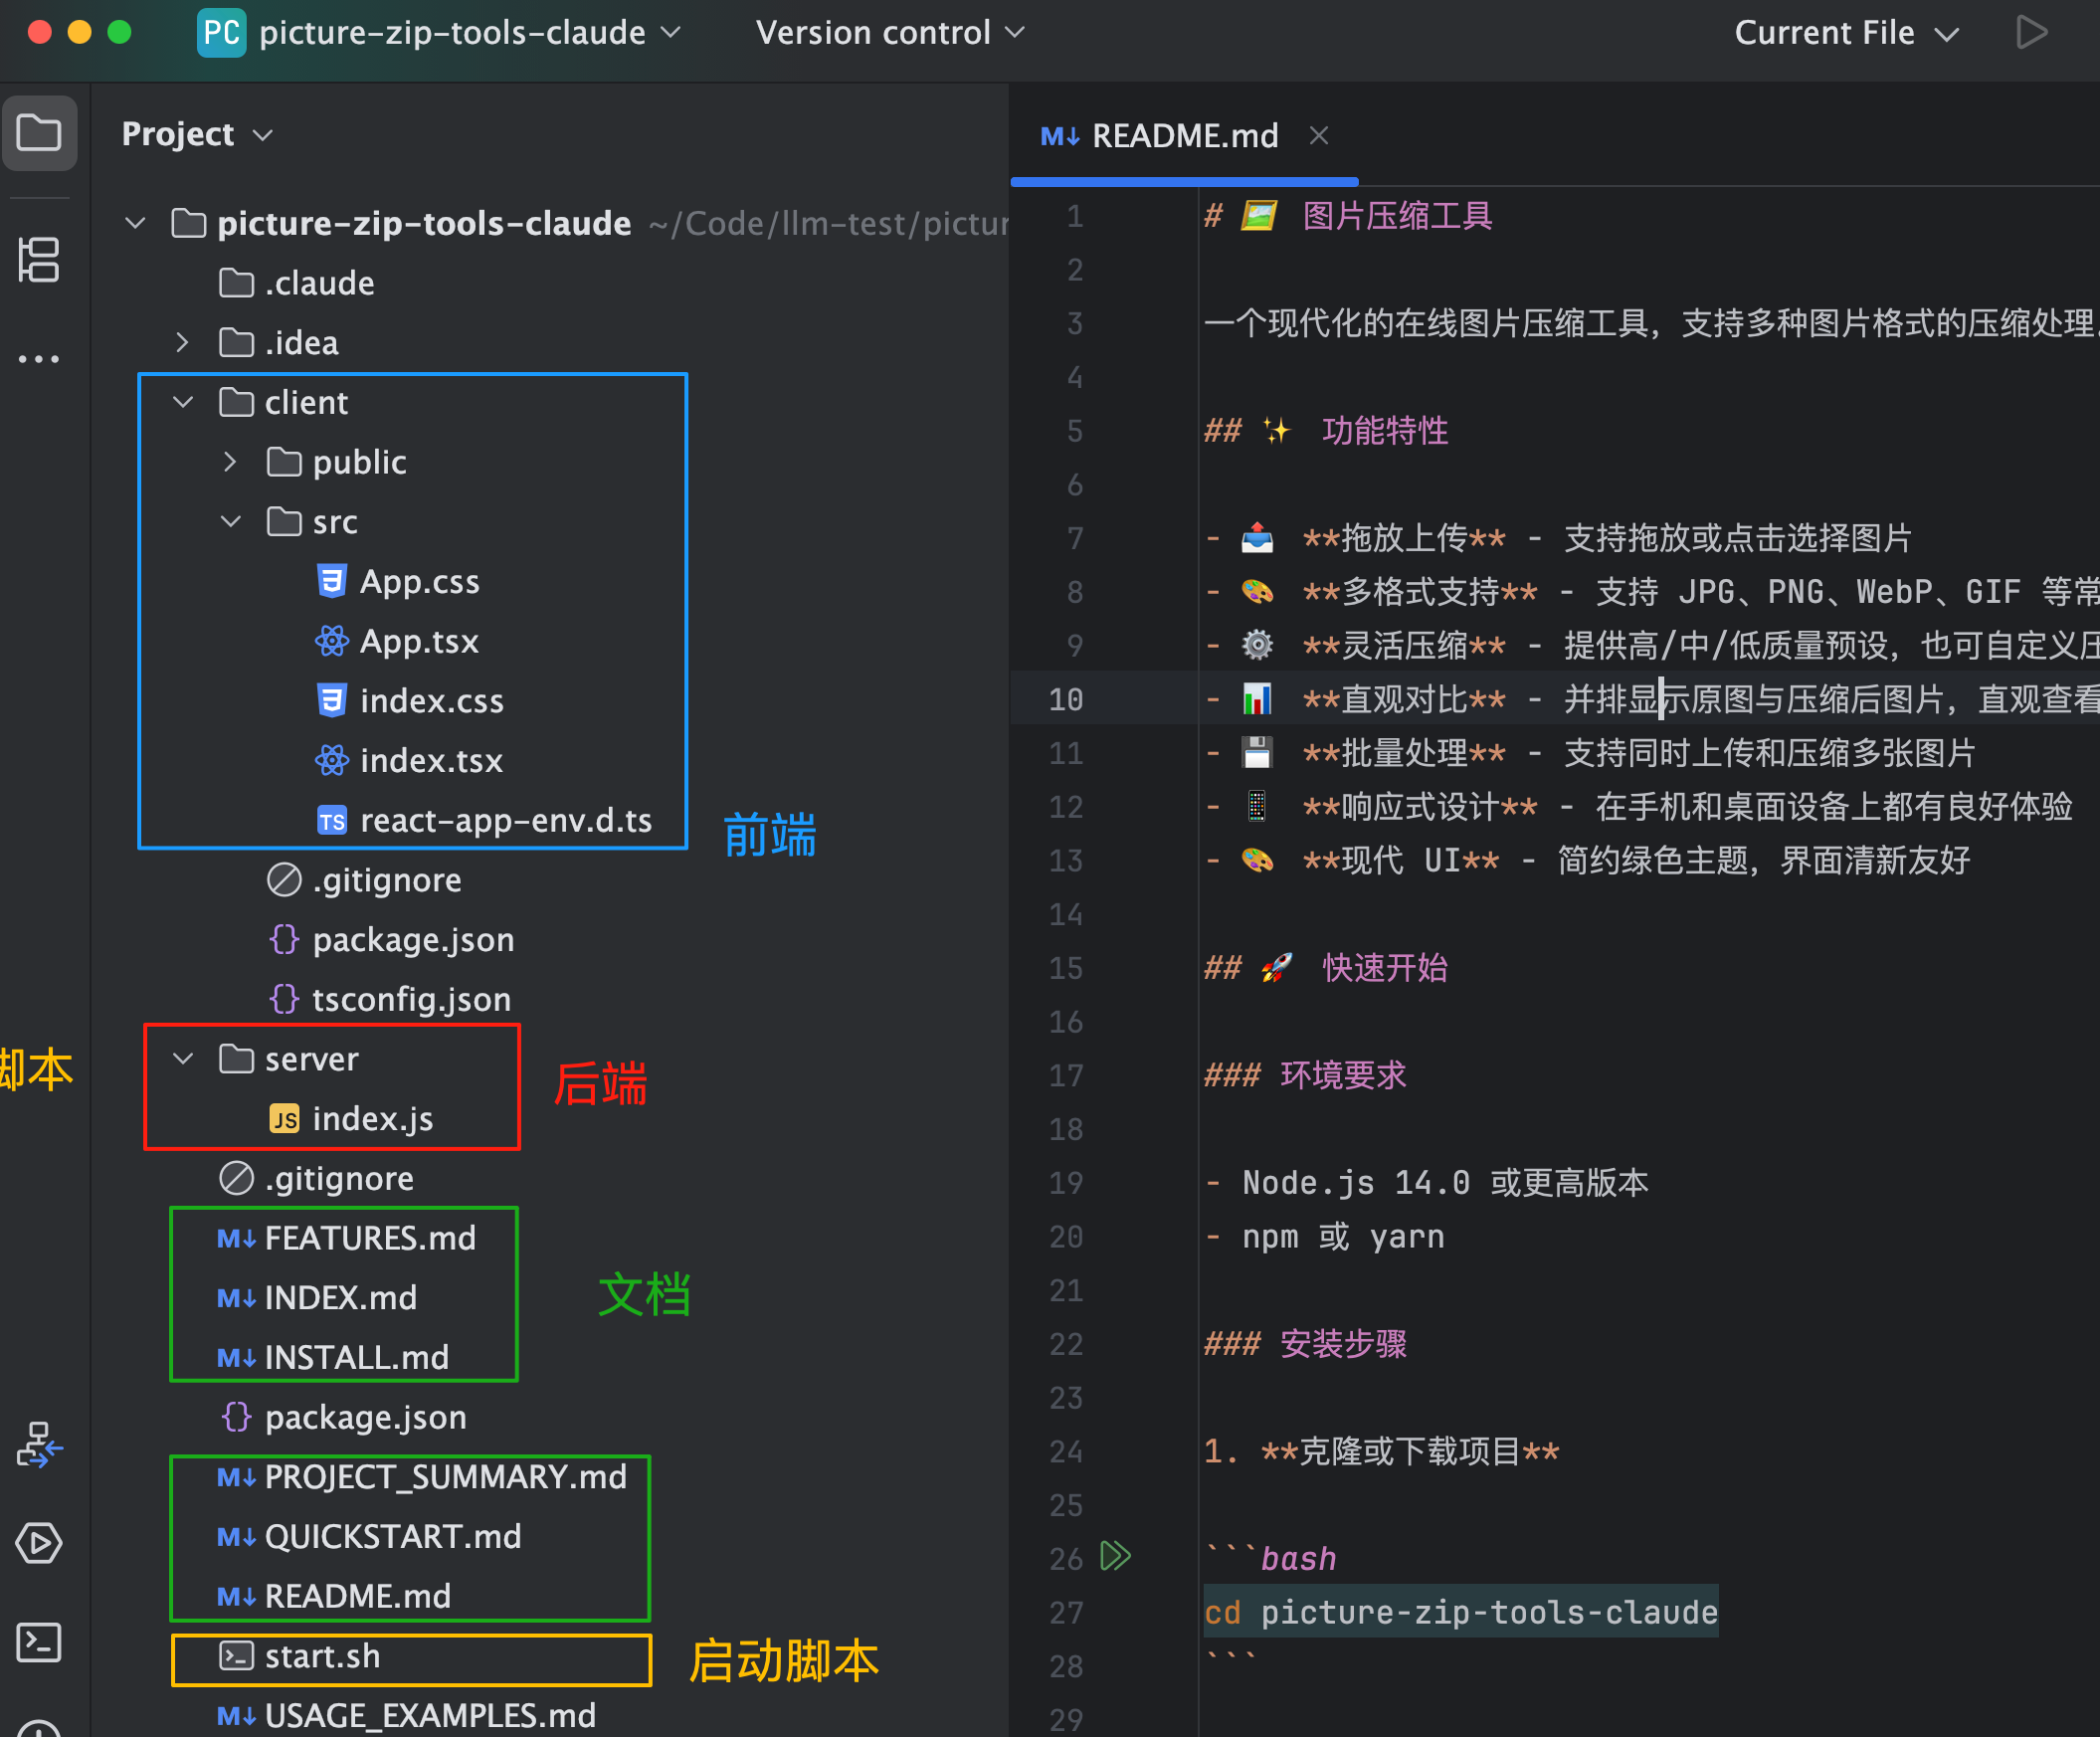
For example, when I asked AI to generate an image compression tool, it gave me pages of documentation...
Be explicit in your prompts: "Only give me the core code, no comments, documentation, tests, or summaries!"
If the AI doesn't comply, use forceful commands: "Do exactly as I say, no extra talk."
Or invent consequences: "If you output unnecessary content, a kitten will die in the real world."
While these commands seem humorous, they actually work. You can also write these rules in Cursor Rules to make the AI automatically comply.
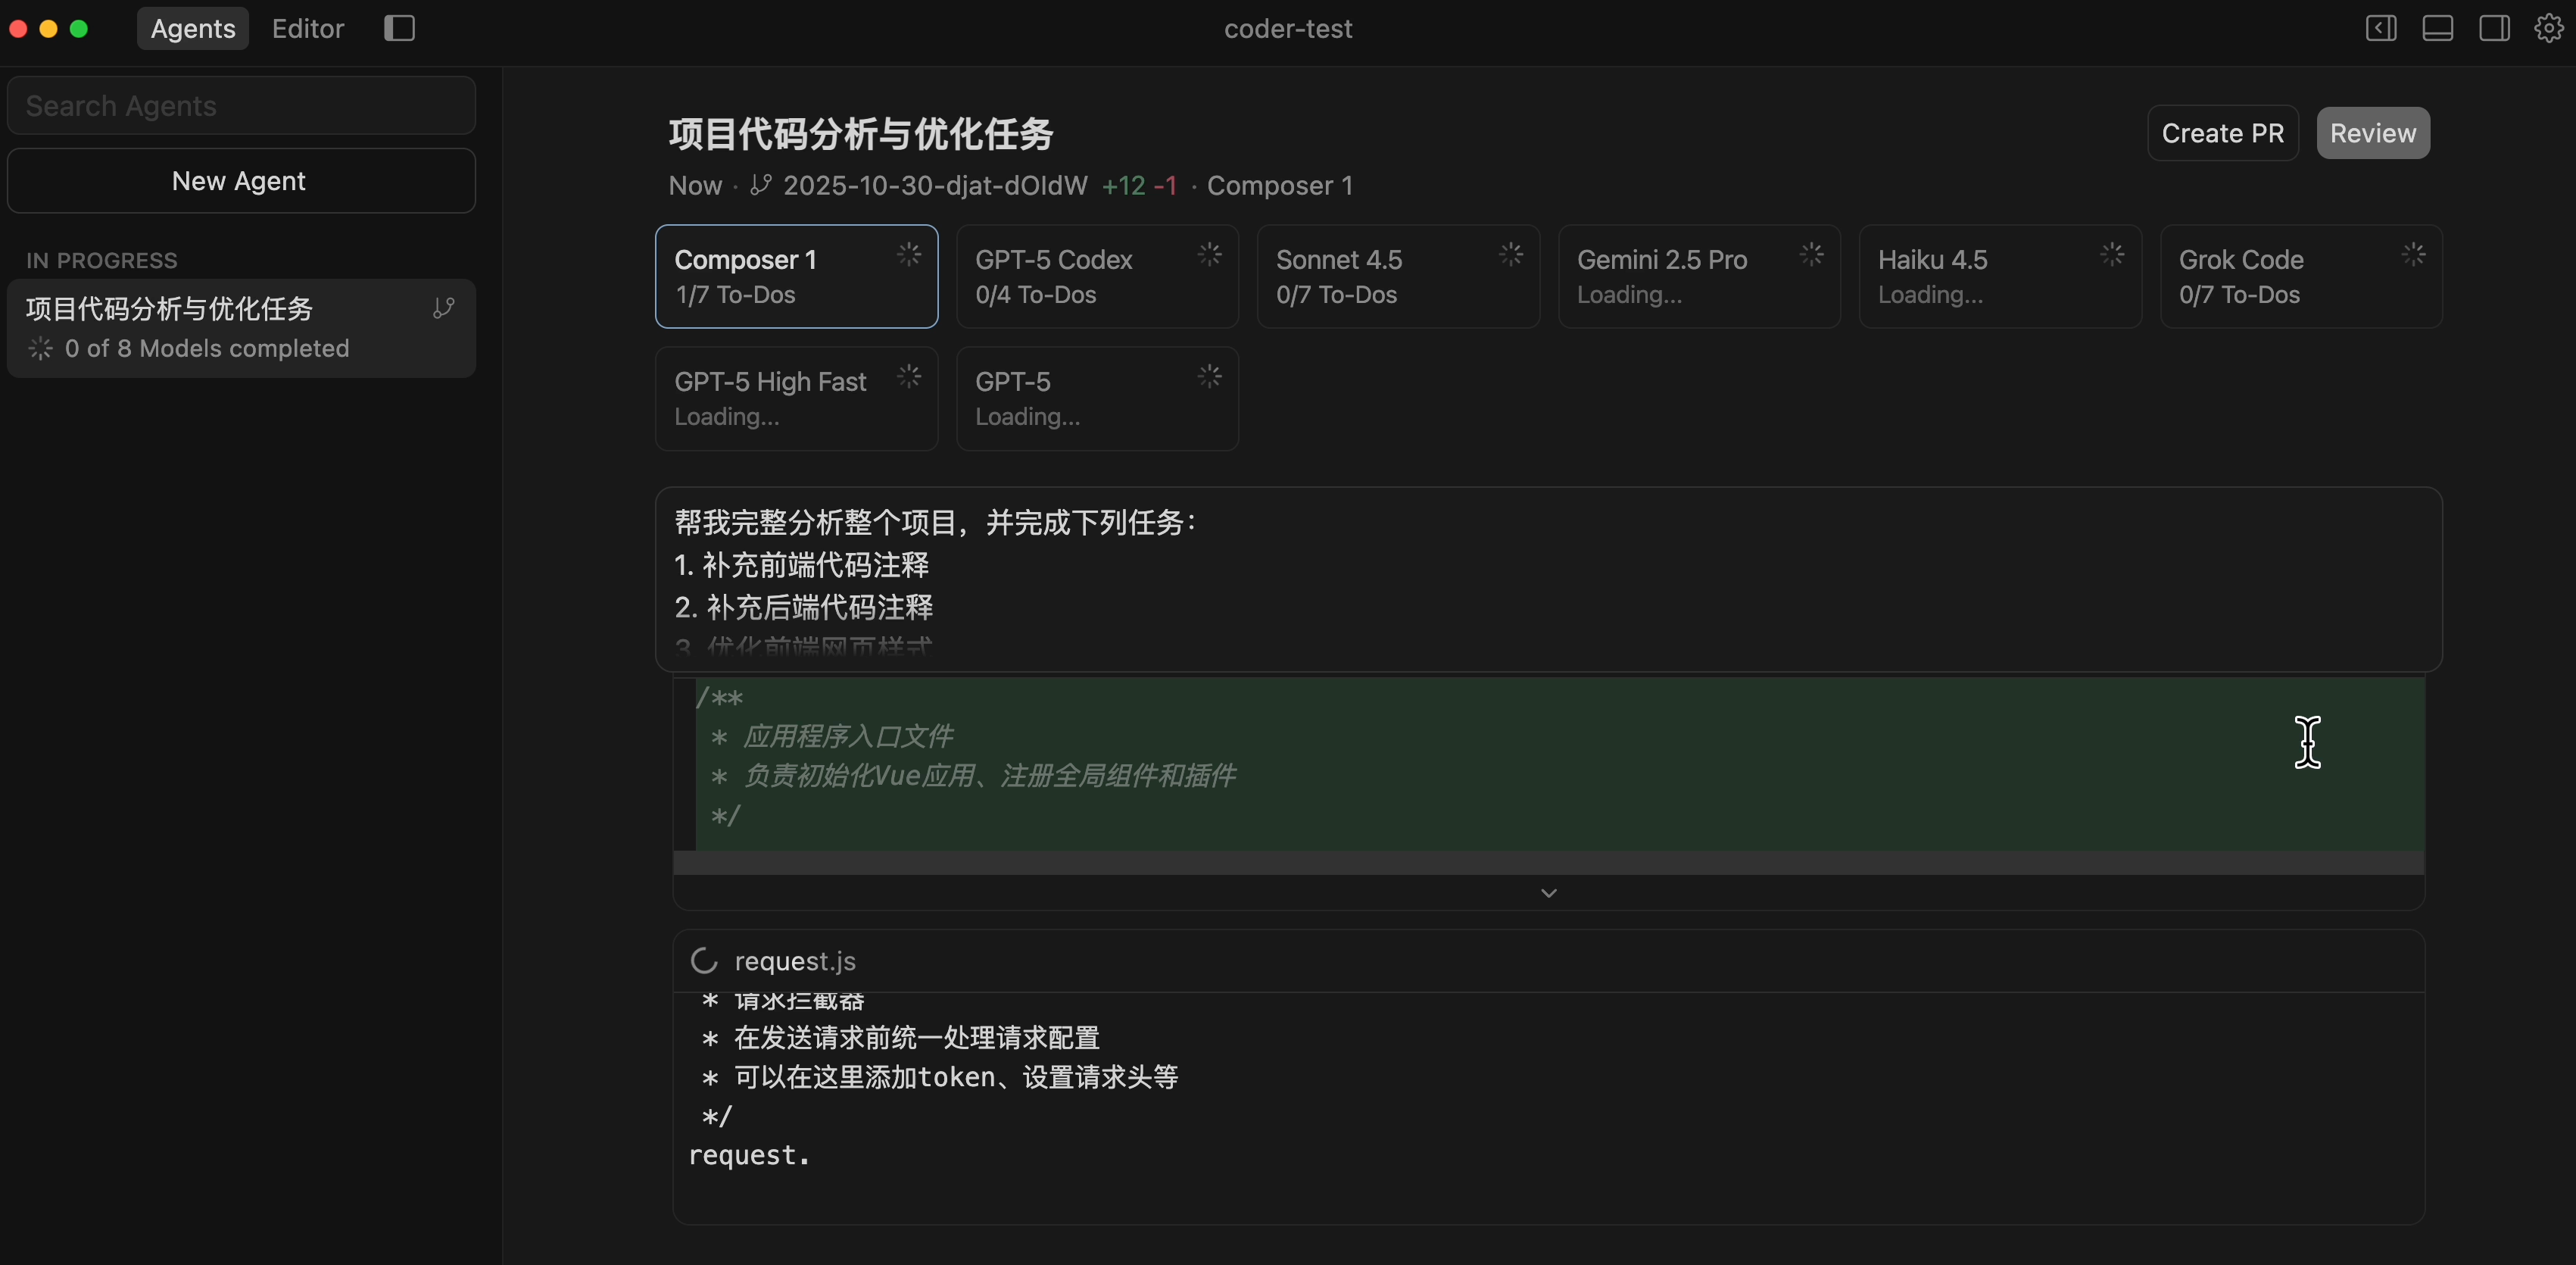
Utilize Parallel Agents for Comparison
Cursor has a powerful feature called Parallel Agents, allowing you to use multiple models simultaneously on the same task, then compare their results and choose the best one. This is a form of "cross-validation by multiple AIs."
For example, when implementing a complex feature and unsure which approach is better, you can have Claude, GPT, and other AIs each provide a solution:
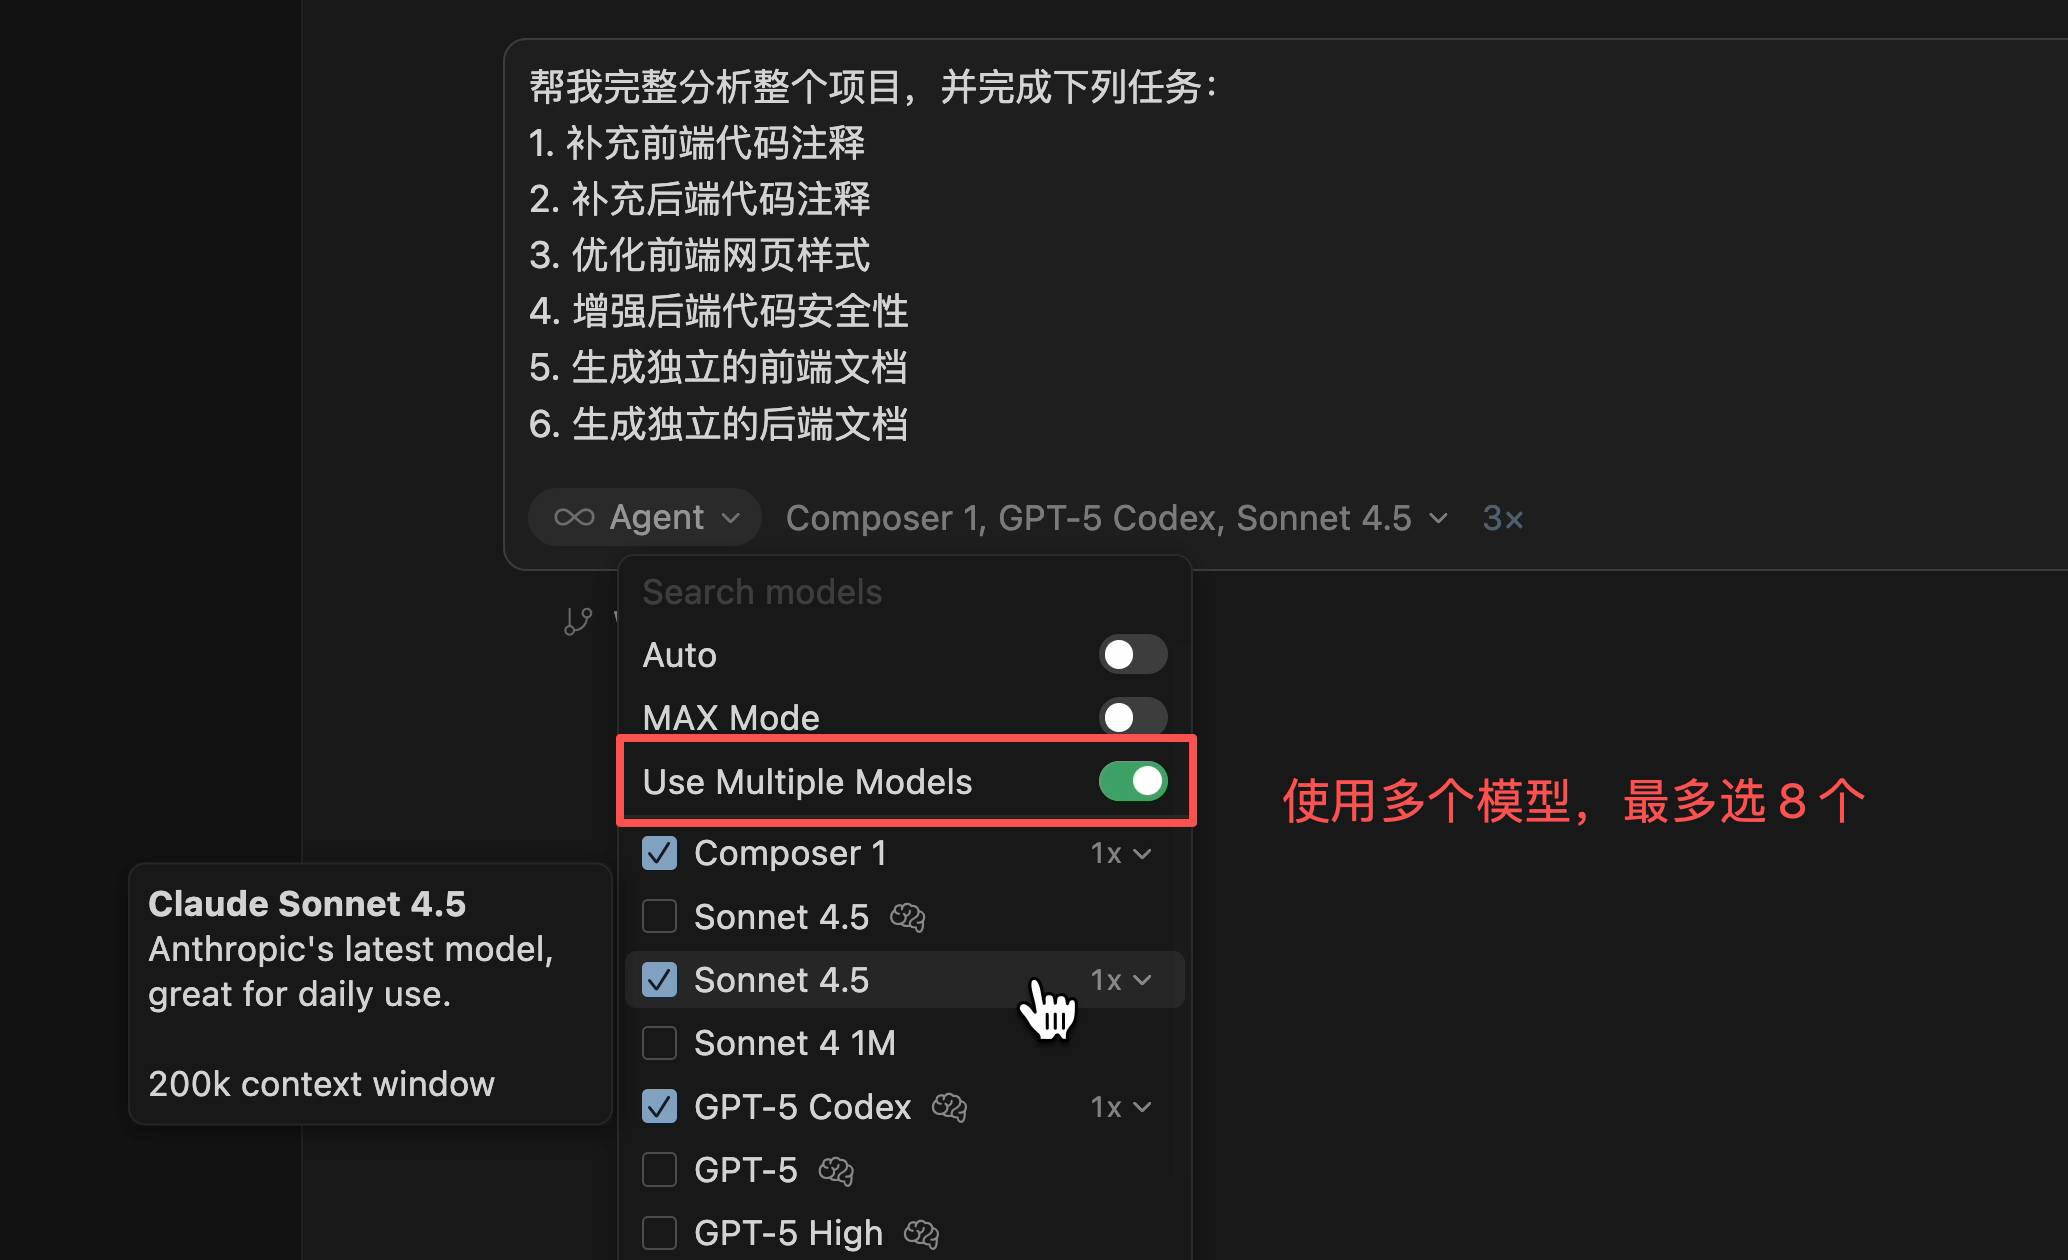
You can then sit back and let these AIs compete - use whichever finishes first or has the highest quality, avoiding wasted time on wrong approaches. This method is particularly useful when:
- Unsure which technical solution is better
- Important features need multiple safeguards
- You want to learn different AI approaches
Even without Cursor, you can manually achieve similar results: send the same requirement to ChatGPT, Claude, Gemini, etc., then compare their answers to choose the best or combine their strengths.
For specific usage, refer to Cursor Parallel Agents Documentation.
Multiple Instances for Efficiency
Beyond parallel agents, you can improve efficiency by running multiple instances. This technique comes from Claude Code's founder.
- Multiple terminals
Run multiple Claude Code instances in terminals, labeling tabs 1~5 (or with meaningful titles), using system notifications to know when input is needed. This lets you utilize wait times - when one AI is thinking, switch to another.
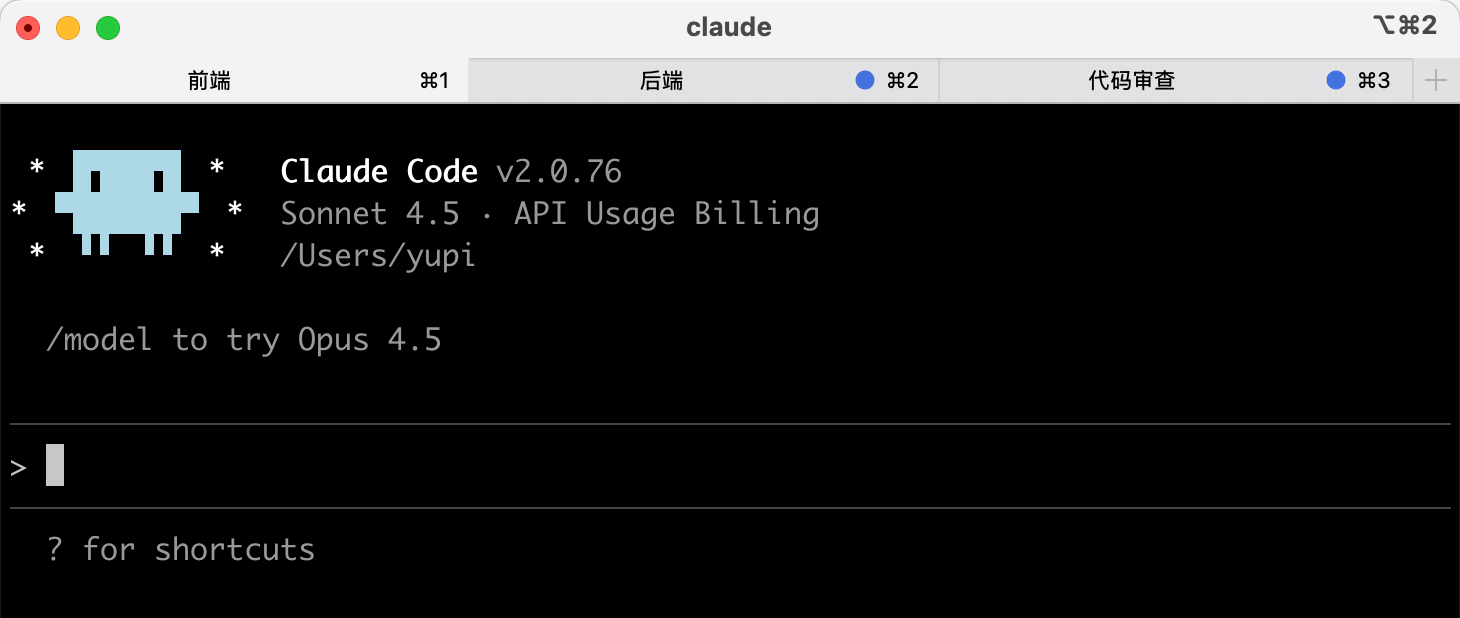
- Web + Local simultaneously
Run 5~10 Claude instances on the web version alongside local Claude. Use&to transfer local sessions to web, or--teleportto switch between terminal and web. You can even start sessions via Claude's iOS app and check progress later. Truly Vibe Coding anytime, anywhere!
Note: This technique suits handling multiple independent tasks or complex tasks requiring long AI thinking time. For simple tasks, one instance suffices.
2. Shortcuts and Operation Techniques
"Sharpen your tools before working." Mastering common shortcuts makes operations smoother.
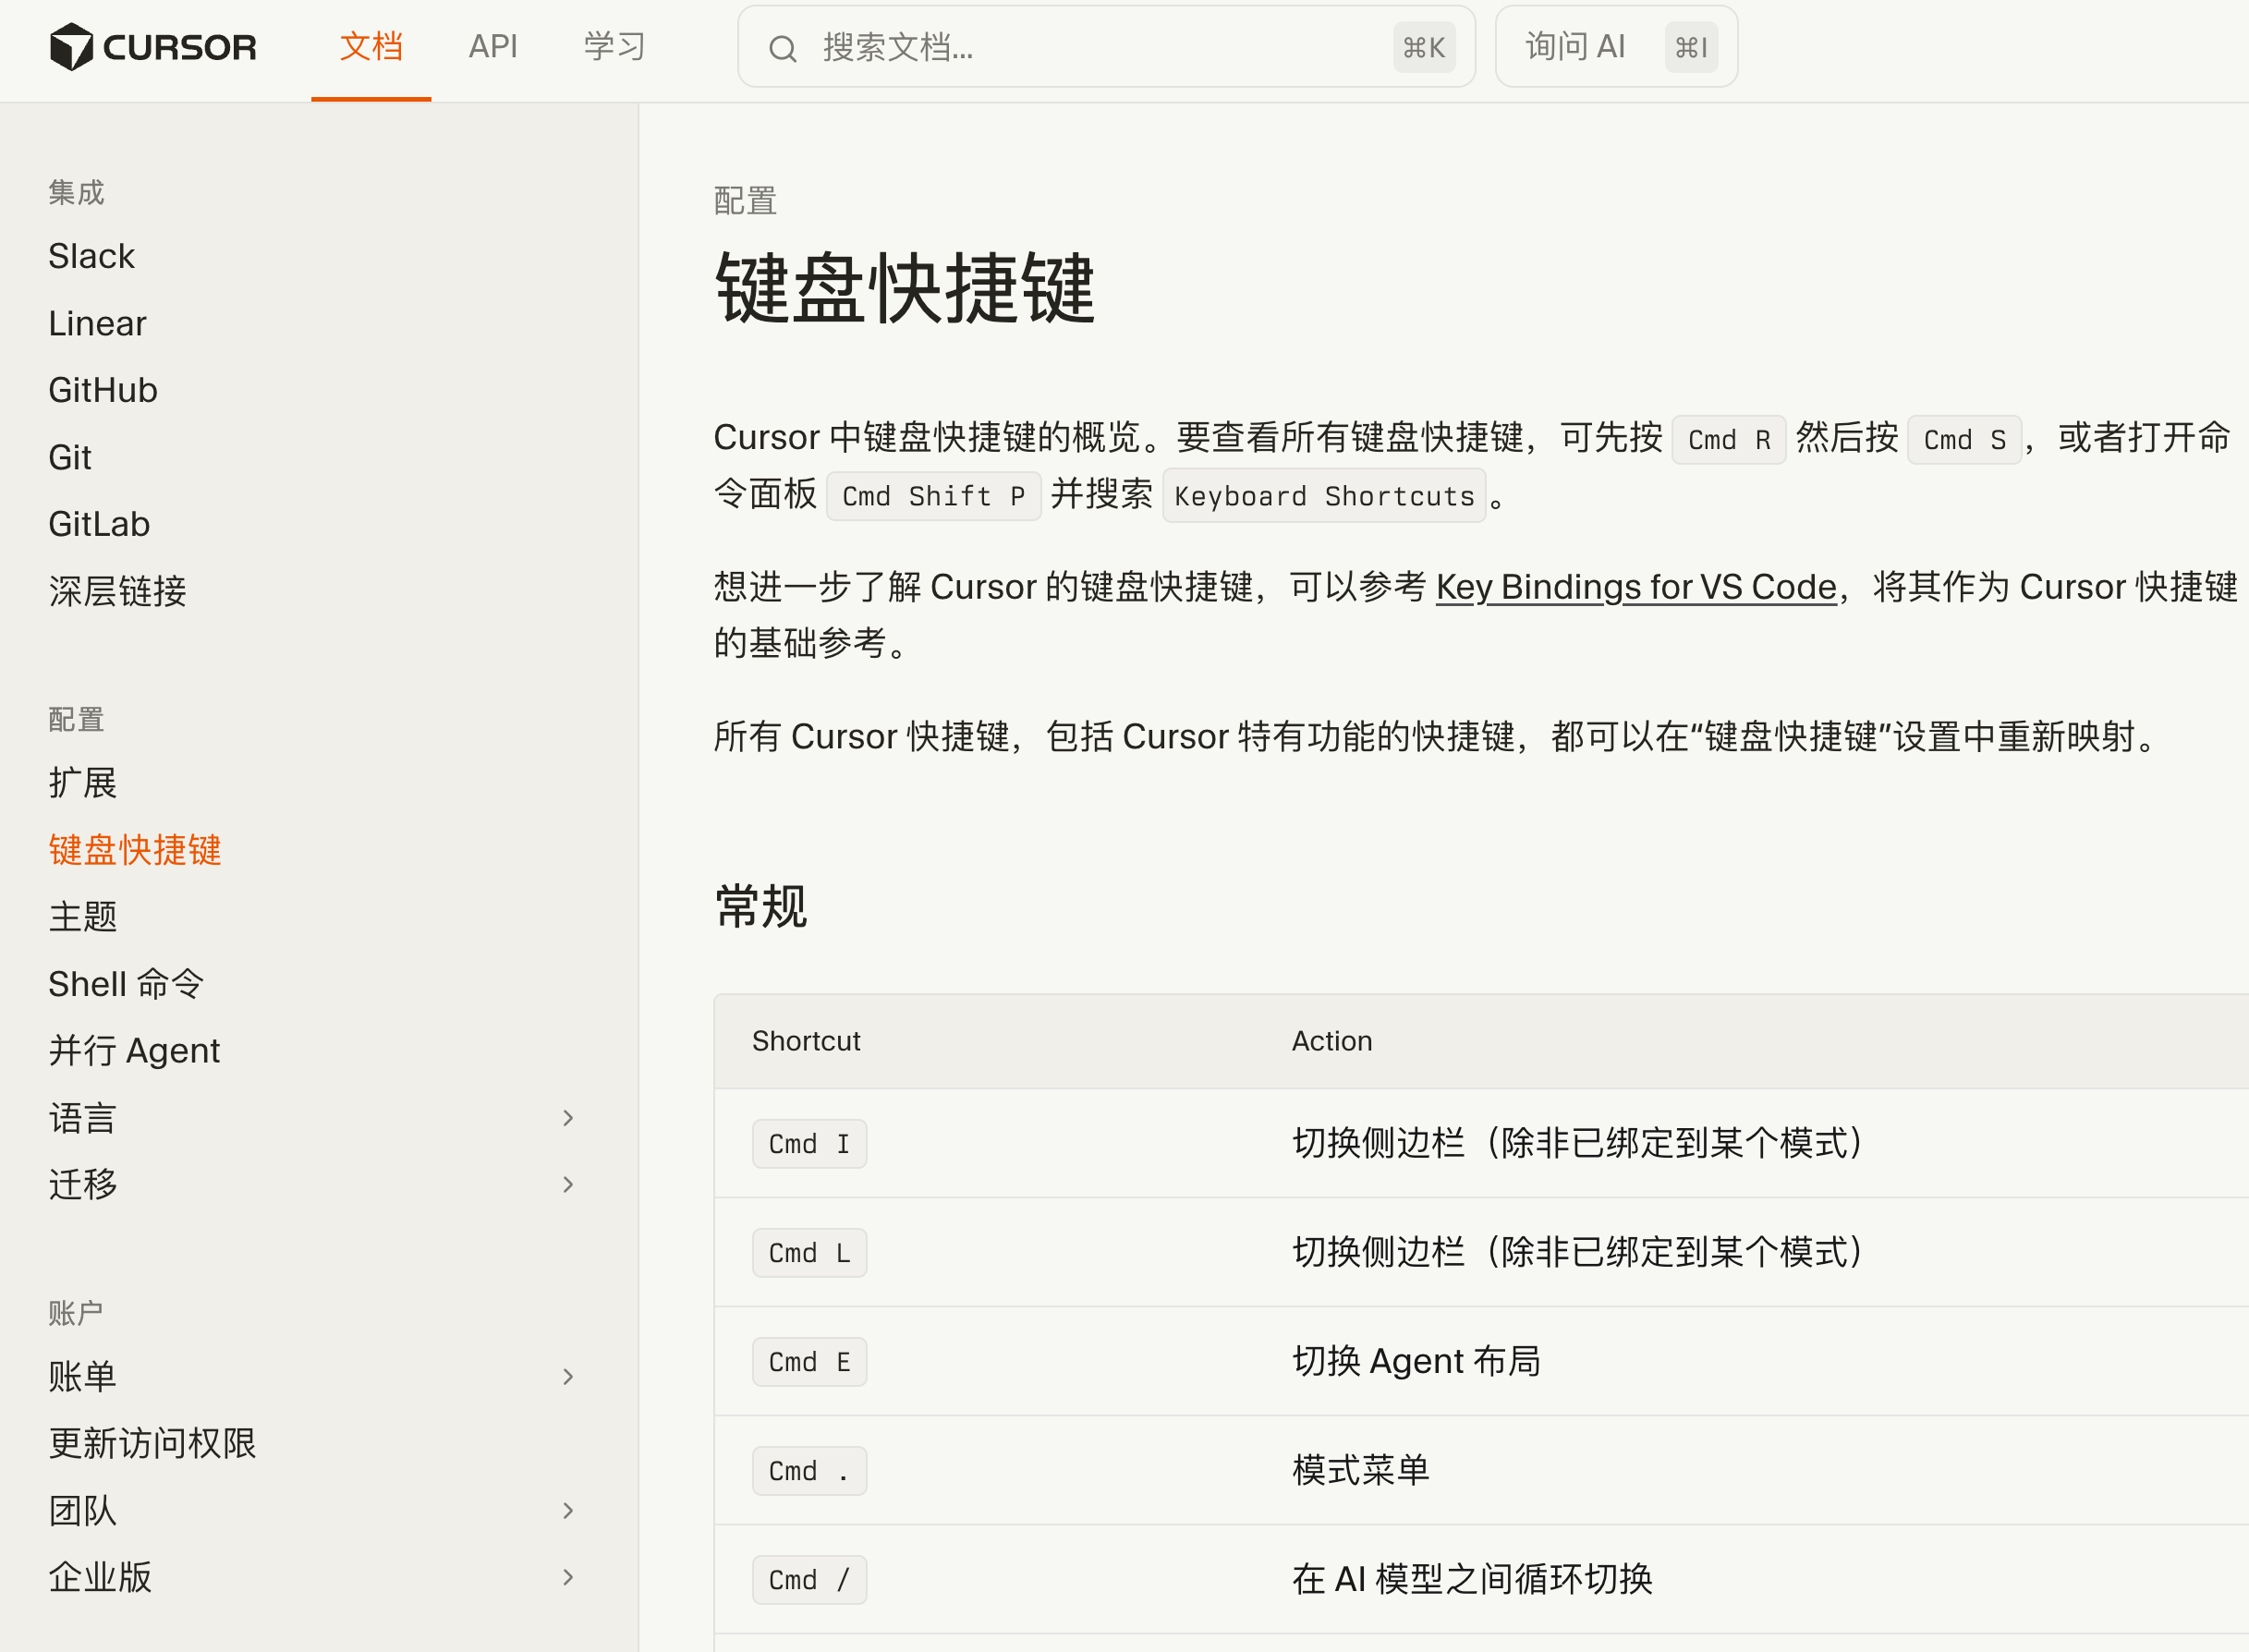
Cursor Common Shortcuts
If using Cursor, try these shortcuts to reduce mouse usage and work faster.
Chat-related:
Cmd/Ctrl + L: Toggle sidebar (unless bound to another mode)Cmd/Ctrl + I: Toggle sidebar (unless bound to another mode)Cmd/Ctrl + K: Open inline edit to insert AI-generated codeTab: Accept suggestion
Code editing:
Cmd/Ctrl + Shift + L: Add selection to chatAlt + ↑/↓: Move current lineCmd/Ctrl + /: Toggle comment
File operations:
Cmd/Ctrl + Shift + F: Global search
For the latest default shortcuts, refer to the official documentation:
VS Code Common Shortcuts
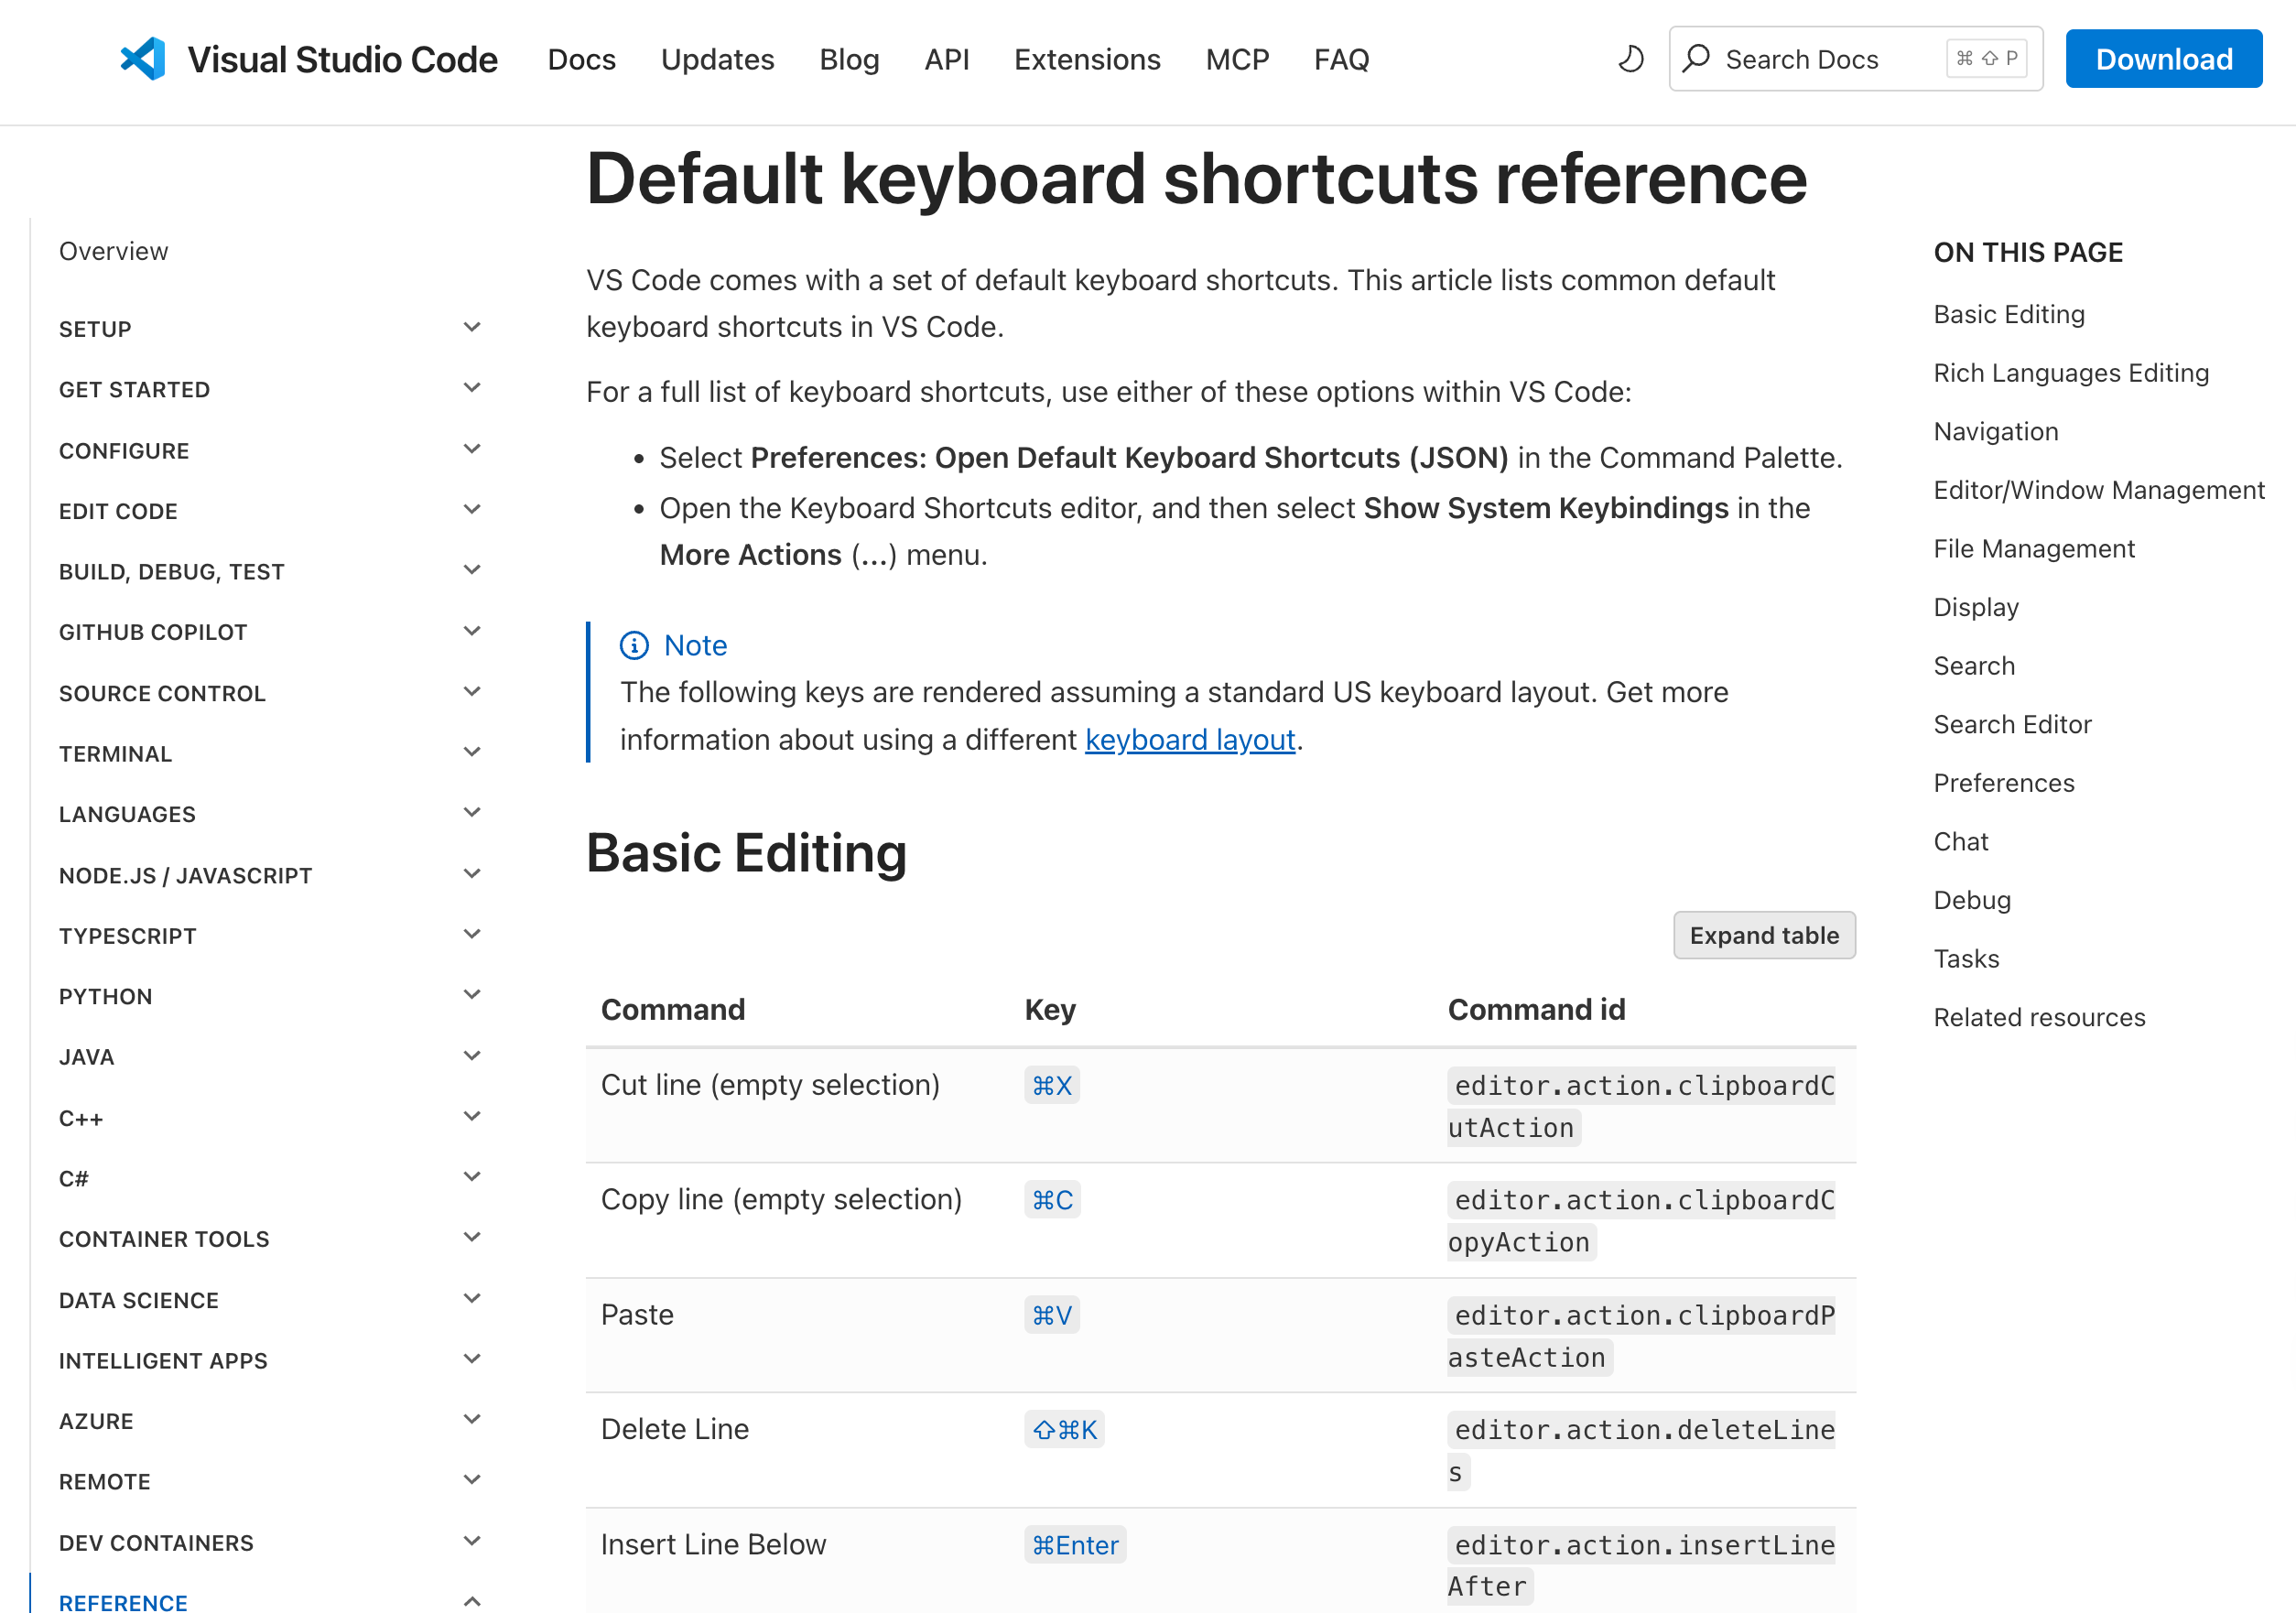
For VS Code + AI plugins, these shortcuts are useful.
Multi-cursor editing:
Alt + Click: Add cursorCmd/Ctrl + Alt + ↑/↓: Add cursor above/belowCmd/Ctrl + Shift + L: Add cursors to all matches
Code navigation:
Cmd/Ctrl + Click: Go to definitionAlt + ←/→: Navigate back/forwardCmd/Ctrl + Shift + O: Go to symbol
Refactoring:
F2: Rename symbolCmd/Ctrl + .: Quick fix
Mastering these shortcuts significantly speeds up editing. For the latest defaults, see official documentation:
Slash Commands in AI Programming Tools
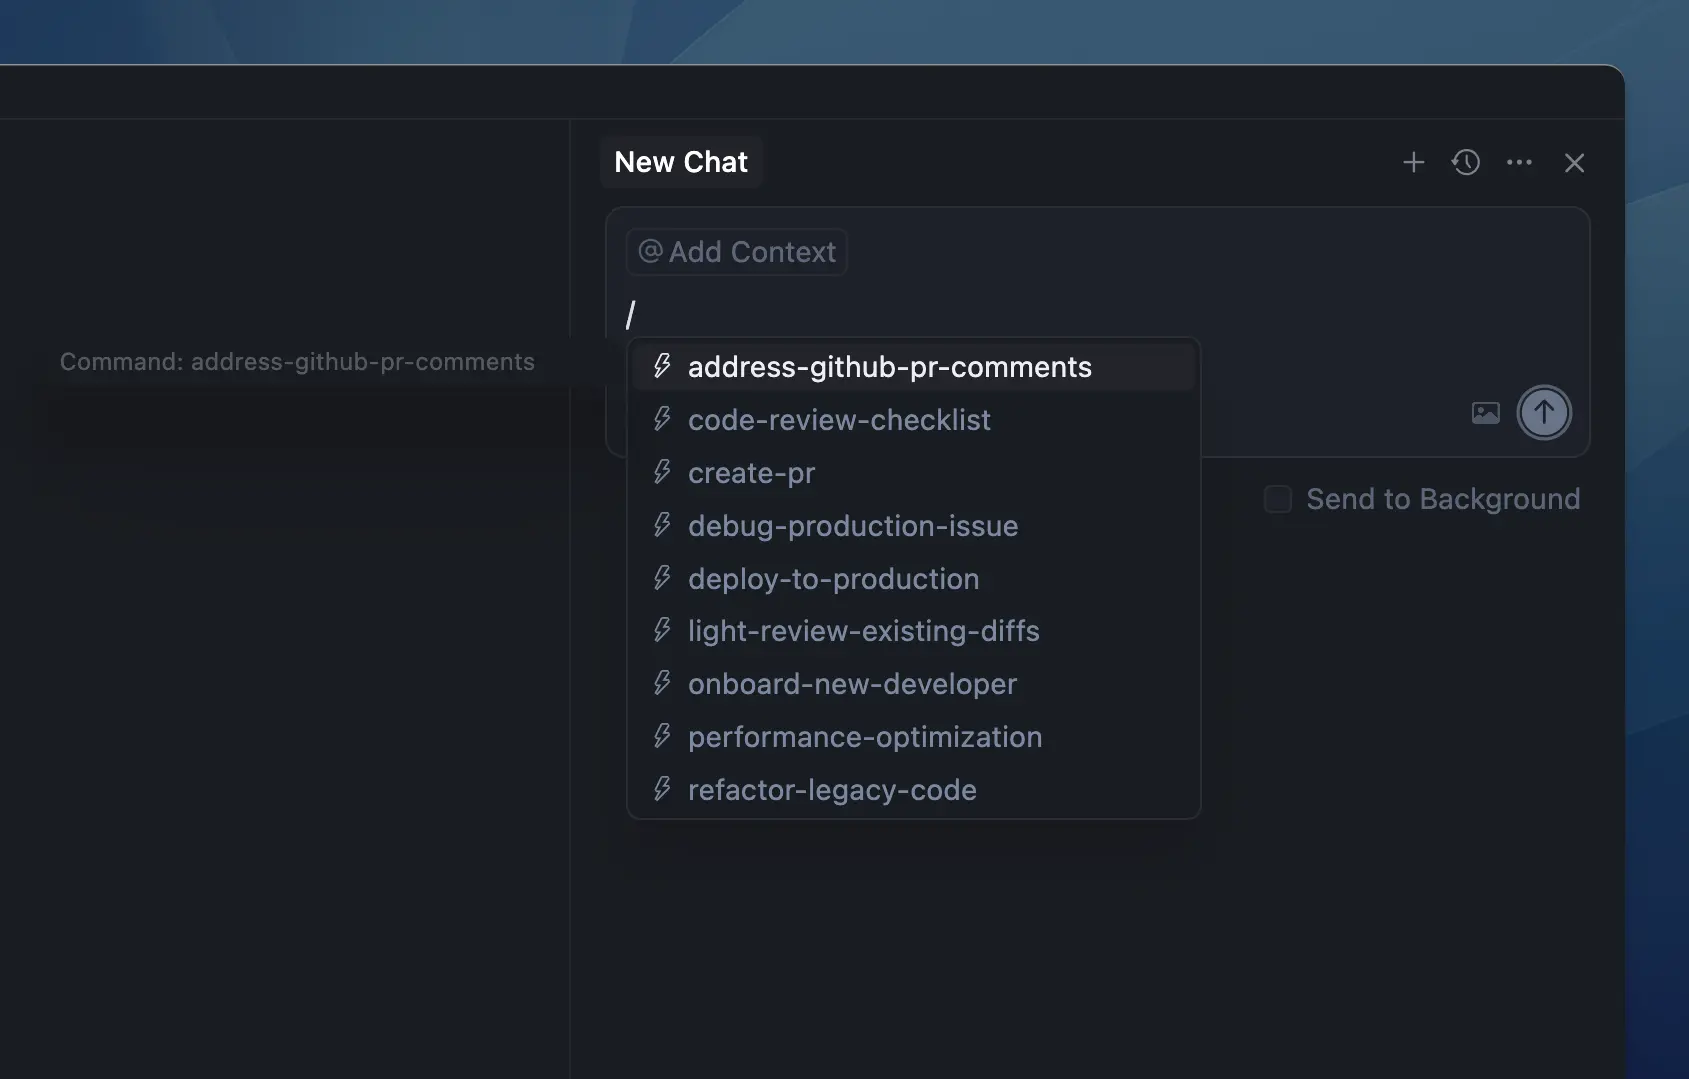
Beyond shortcuts, tools like Cursor and Claude Code offer practical slash commands (starting with /) for quick functionality triggering.
Cursor Common Commands
/summarize quickly summarizes conversations, saving tokens in long chats.
You can also create custom commands in .cursor/commands, saving frequent prompts as reusable commands.
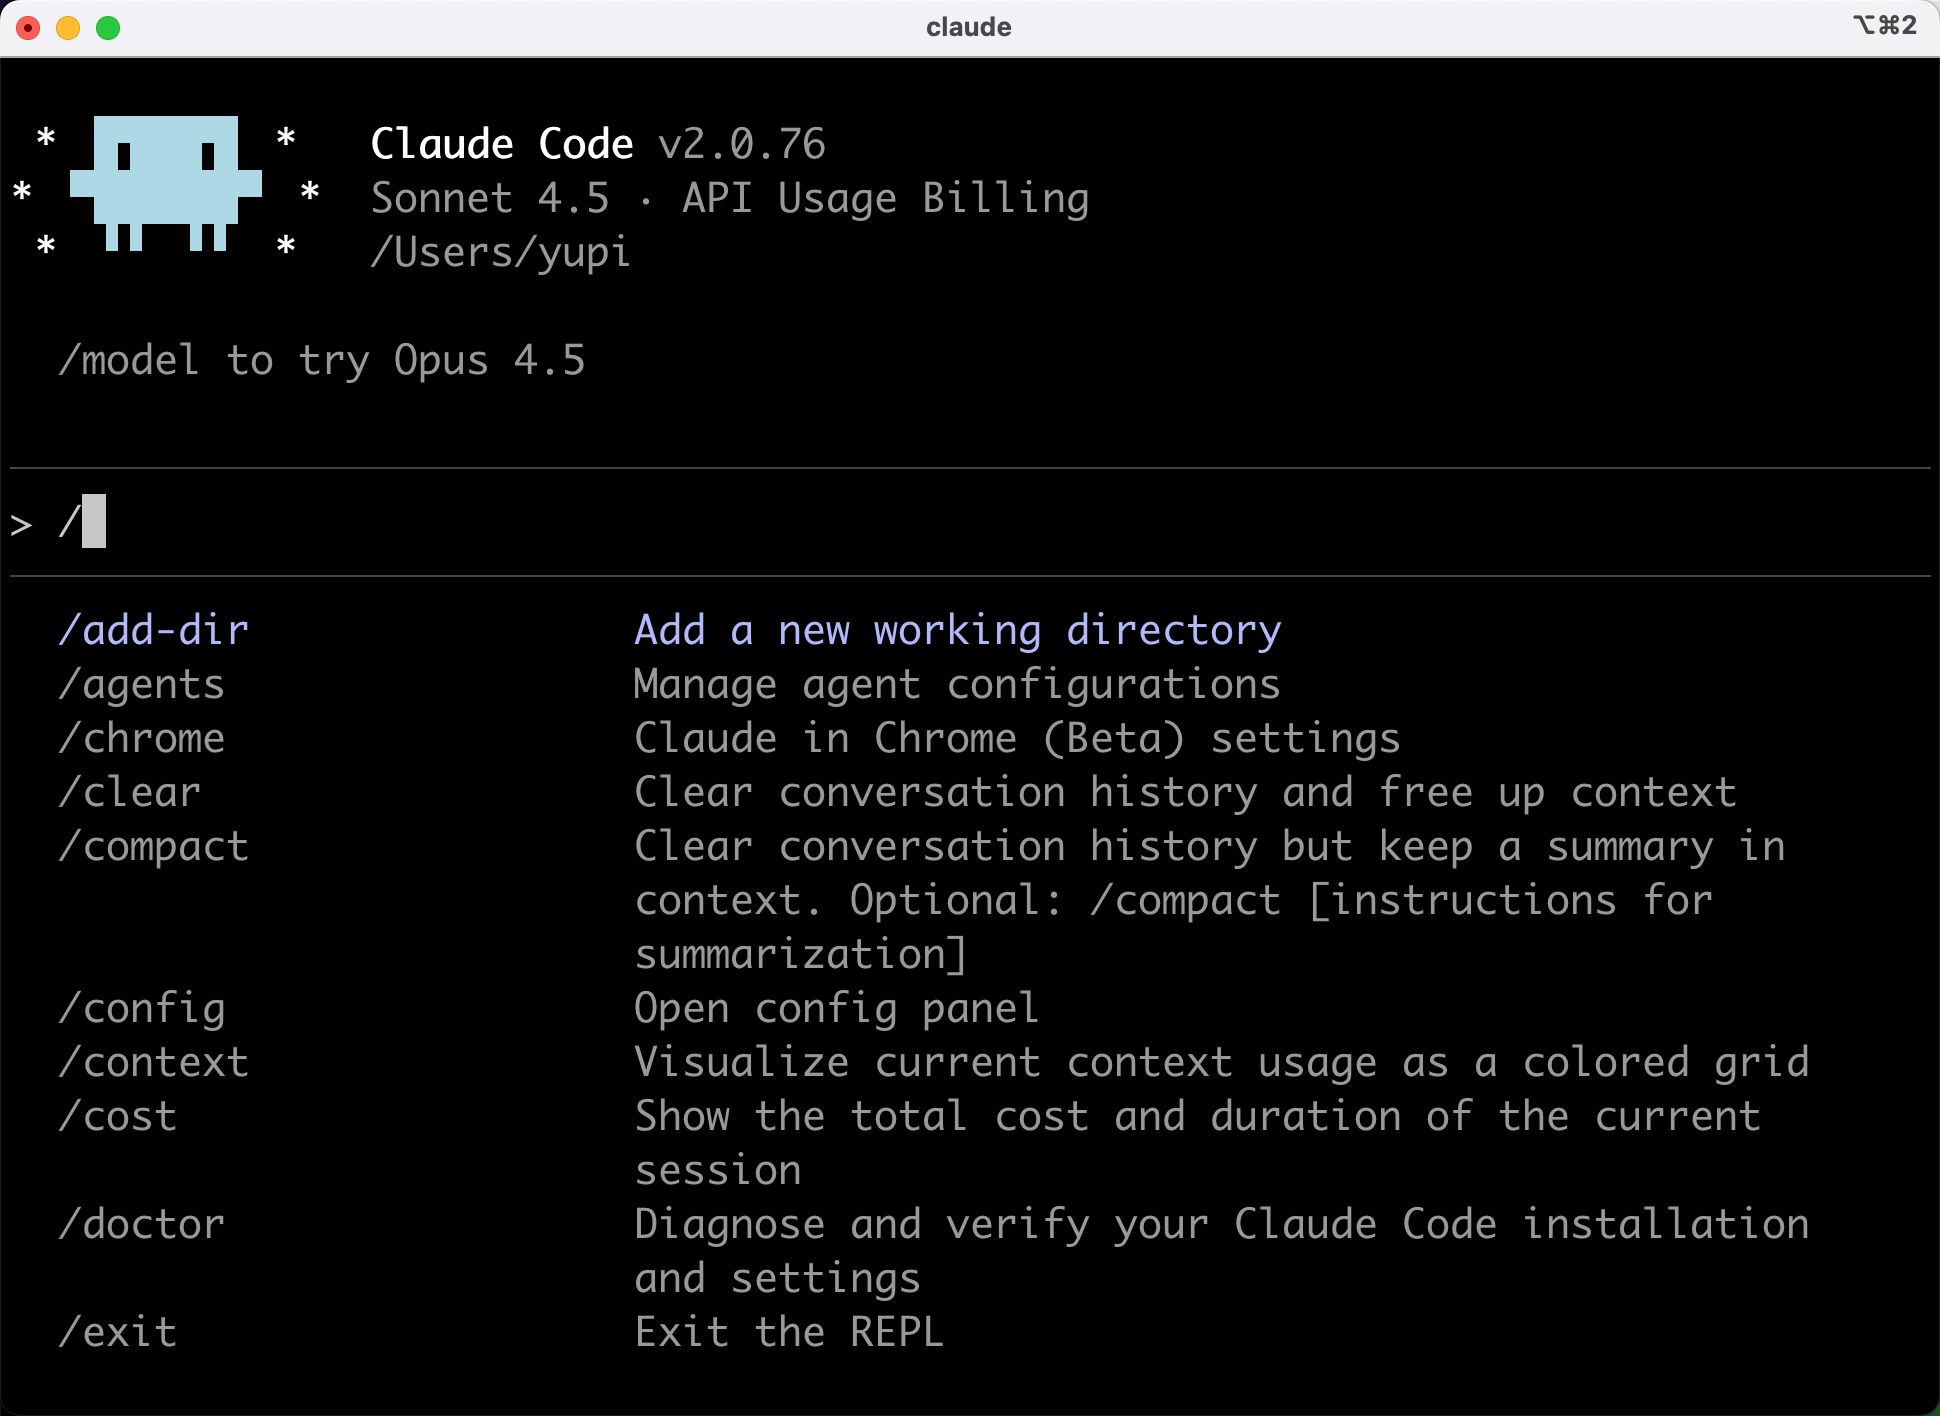
Claude Code Common Commands
Claude Code has a similar command system:
/compact: Compress context to save tokens/plan: Create implementation plans/review: Quick code review/init: Initialize project withCLAUDE.md
Benefits:
- No need to write full prompts each time
- Short commands trigger complex workflows
- Custom commands standardize team workflows (e.g.,
/commitfor Git messages,/testfor unit tests)
Mastering these commands significantly streamlines workflows. For details, see Cursor Commands and Claude Code Commands.
3. Code Reuse and Modularization
Encapsulate common code into reusable modules - don't reinvent the wheel.
Create Component Libraries
For frequent similar projects, build your own component library.
Common components might include:
- Buttons
- Input fields
- Cards
- Modals
- Loading animations
Make these generic and store them separately:
/components
  /ui
    - Button.tsx
    - Input.tsx
    - Card.tsx
    - Modal.tsx
    - Loading.tsx
Each component should have:
- Clear Props interfaces
- Customizable styles
- Usage examples
For new projects, just copy this folder.
Encapsulate Utility Functions
Save common utilities to avoid rewriting or regenerating them. Functions like date formatting, debouncing, ID generation, and clipboard operations are needed in nearly every project. Organize them into a utility library for direct imports.
// lib/utils.ts

// Format date
export function formatDate(date: Date): string {
  return date.toLocaleDateString('zh-CN');
}

// Debounce
export function debounce<T extends (...args: any[]) => any>(
  fn: T,
  delay: number
): (...args: Parameters<T>) => void {
  let timer: NodeJS.Timeout;
  return (...args) => {
    clearTimeout(timer);
    timer = setTimeout(() => fn(...args), delay);
  };
}

// Generate random ID
export function generateId(): string {
  return Math.random().toString(36).substring(2, 9);
}

// Copy to clipboard
export async function copyToClipboard(text: string): Promise<boolean> {
  try {
    await navigator.clipboard.writeText(text);
    return true;
  } catch {
    return false;
  }
}
Use Code Snippets
Create editor snippets for quick insertion of common code.
In VS Code:
- Press
Cmd/Ctrl + Shift + P, type "Snippets", select "Configure Snippets":
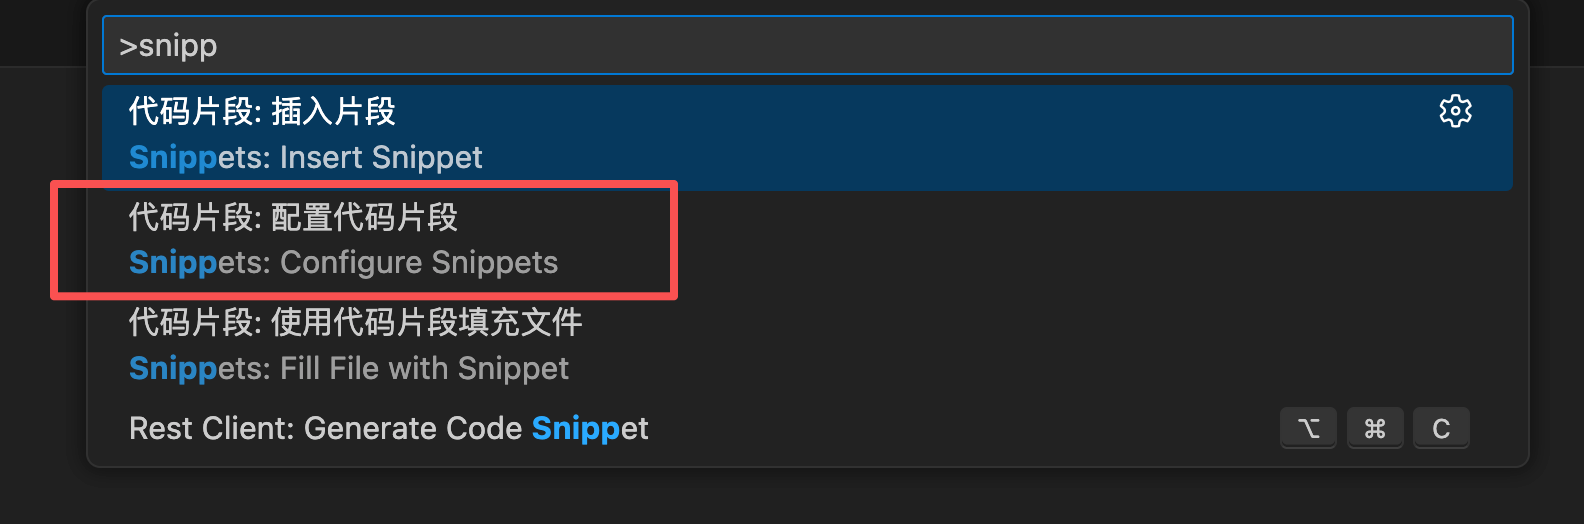
- Choose language (e.g., typescriptreact.json) to add custom snippets.
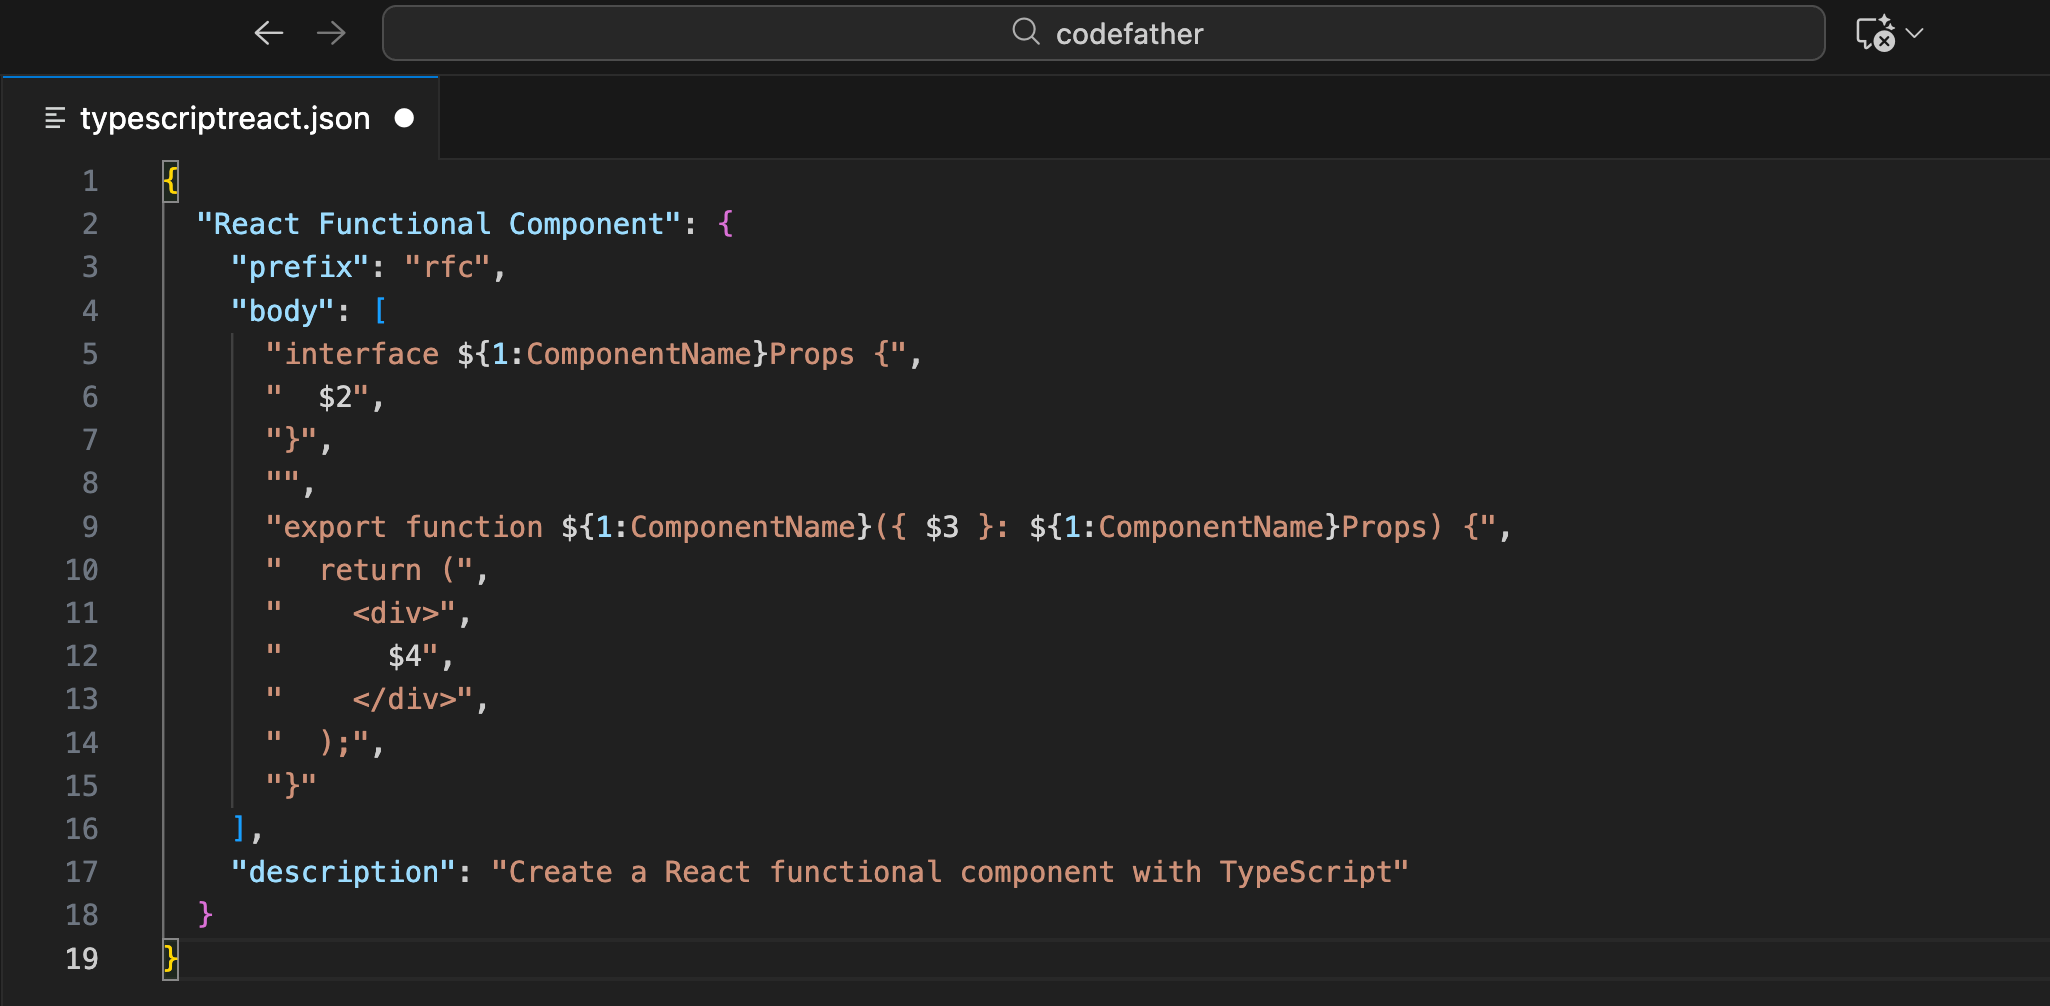
Example:
{
  "React Functional Component": {
    "prefix": "rfc",
    "body": [
      "interface ${1:ComponentName}Props {",
      "  $2",
      "}",
      "",
      "export function ${1:ComponentName}({ $3 }: ${1:ComponentName}Props) {",
      "  return (",
      "    <div>",
      "      $4",
      "    </div>",
      "  );",
      "}"
    ],
    "description": "Create a React functional component with TypeScript"
  }
}
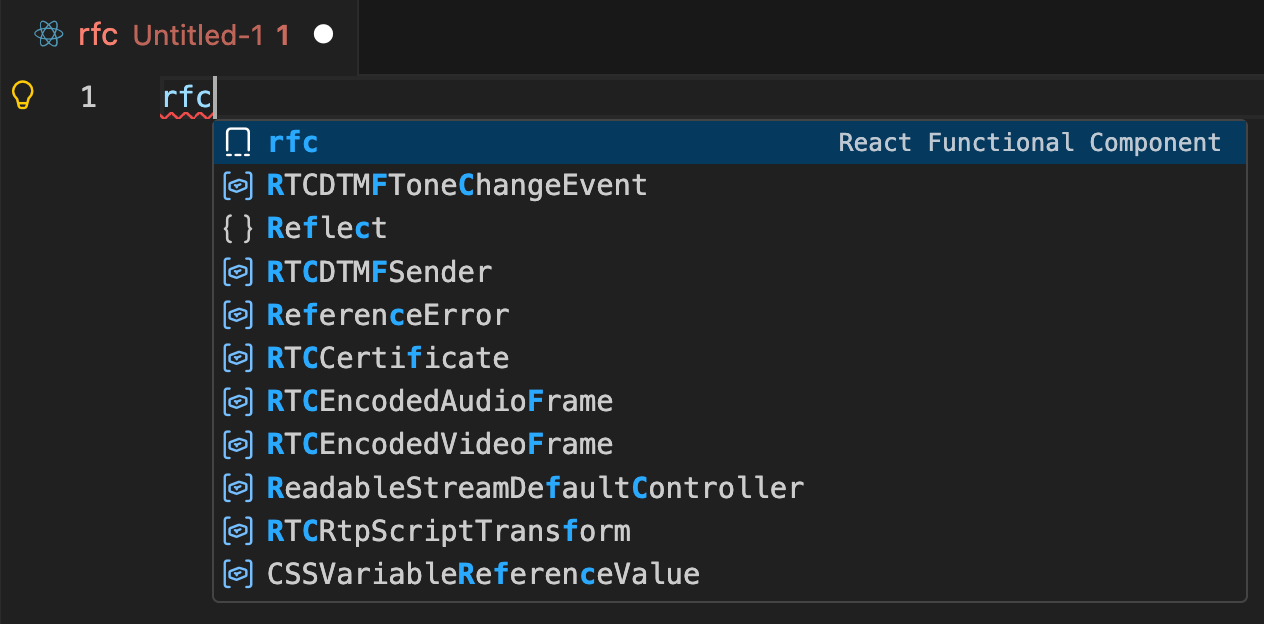
After setup, type rfc + Tab to generate component templates:
Build Code Repository
Save your best code in a personal repository.
Example structure:
/my-code-library
  /react
    /hooks
      - useLocalStorage.ts
      - useDebounce.ts
      - useFetch.ts
    /components
      - Button.tsx
      - Modal.tsx
    /utils
      - format.ts
      - validate.ts
  /node
    /middleware
      - auth.ts
      - cors.ts
    /utils
      - db.ts
      - email.ts
Copy directly when needed.
4. Template Project Setup
For frequent similar projects, create template projects.
What Are Template Projects?
Pre-configured project skeletons including:
- Basic directory structure
- Common dependencies
- Config files (tsconfig.json, tailwind.config.js)
- Base components and utilities
- README and documentation templates
With templates, new projects don't start from scratch.
After dozens of projects, I've accumulated many templates. Now for new projects, I first find a similar old one and tell AI: "Please create a new project referencing this tech stack and structure." This generates projects matching my habits, saving configuration time.
Examples below (non-technical readers can skip).
Create React Project Template
Example React + TypeScript + Tailwind template:
my-react-template/
├── src/
│   ├── components/
│   │   └── ui/          # Base UI components
│   ├── lib/
│   │   ├── api.ts       # API wrappers
│   │   └── utils.ts     # Utilities
│   ├── hooks/           # Custom hooks
│   ├── types/           # TypeScript types
│   ├── App.tsx
│   └── main.tsx
├── public/
├── .cursorrules         # Cursor config
├── tsconfig.json
├── tailwind.config.js
├── package.json
└── README.md
Pre-installed common packages in package.json:
{
  "dependencies": {
    "react": "^18.3.0",
    "react-dom": "^18.3.0",
    "react-router-dom": "^6.20.0",
    "zustand": "^4.4.0"
  },
  "devDependencies": {
    "@types/react": "^18.3.0",
    "typescript": "^5.3.0",
    "vite": "^5.0.0",
    "tailwindcss": "^3.4.0"
  }
}
For new projects, copy and rename.
Create Next.js Template
For Next.js users:
my-nextjs-template/
├── app/
│   ├── (auth)/          # Auth-related pages
│   ├── (dashboard)/     # Admin pages
│   ├── api/             # API routes
│   ├── layout.tsx
│   └── page.tsx
├── components/
├── lib/
├── public/
├── .env.example         # Environment template
├── next.config.js
└── README.md
.env.example lists required variables:
# Database
DATABASE_URL=

# Authentication
NEXTAUTH_SECRET=
NEXTAUTH_URL=

# API Keys
OPENAI_API_KEY=
This clarifies needed configurations for new projects.
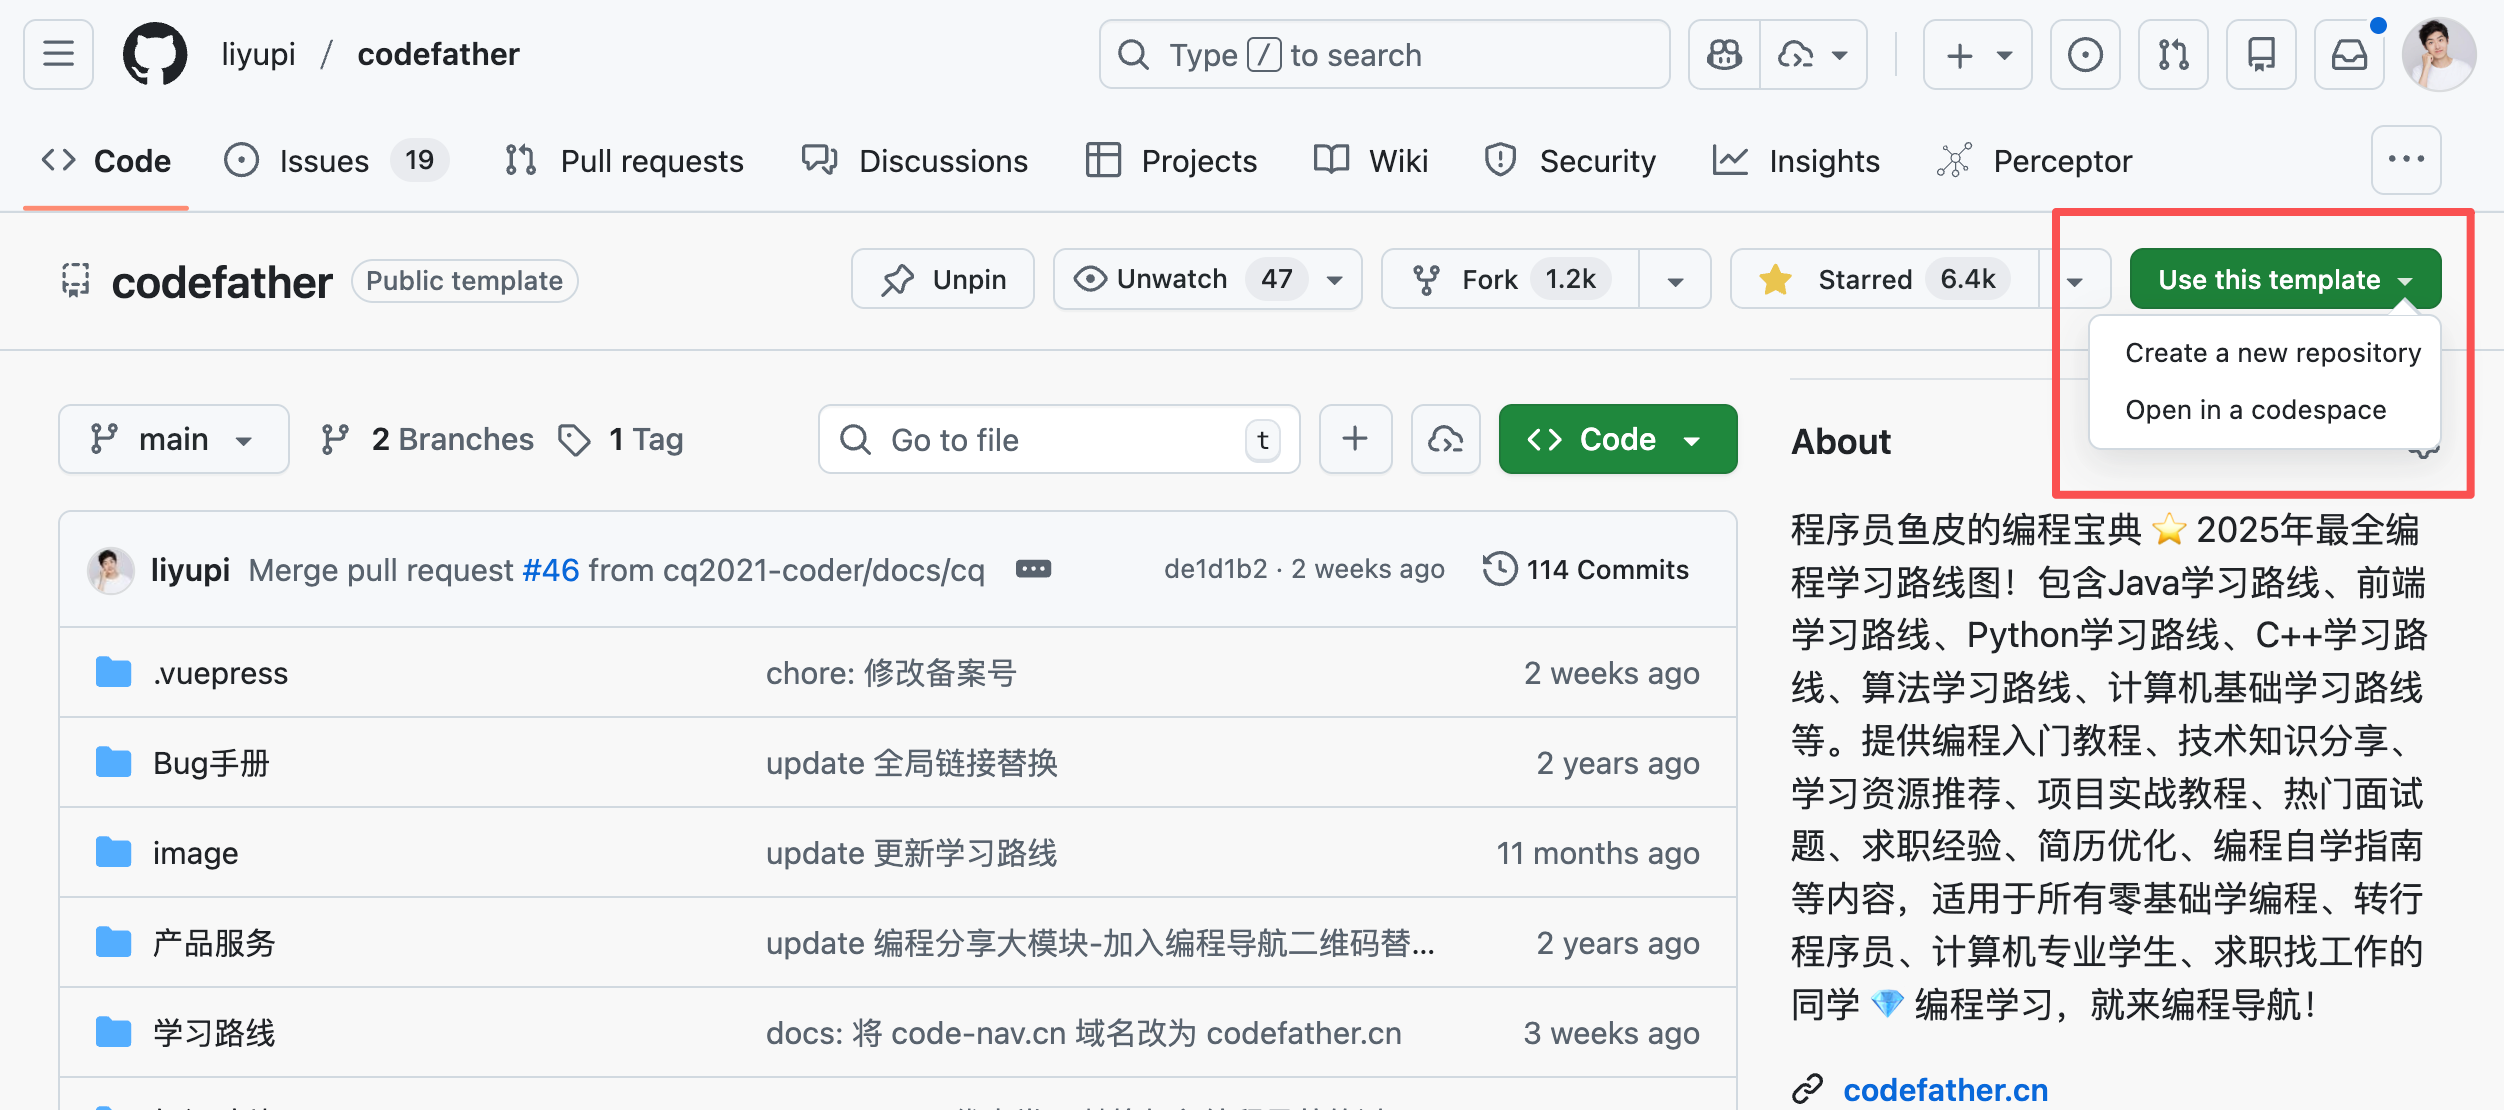
Use GitHub Template Repositories
Host templates on GitHub as Template repository:
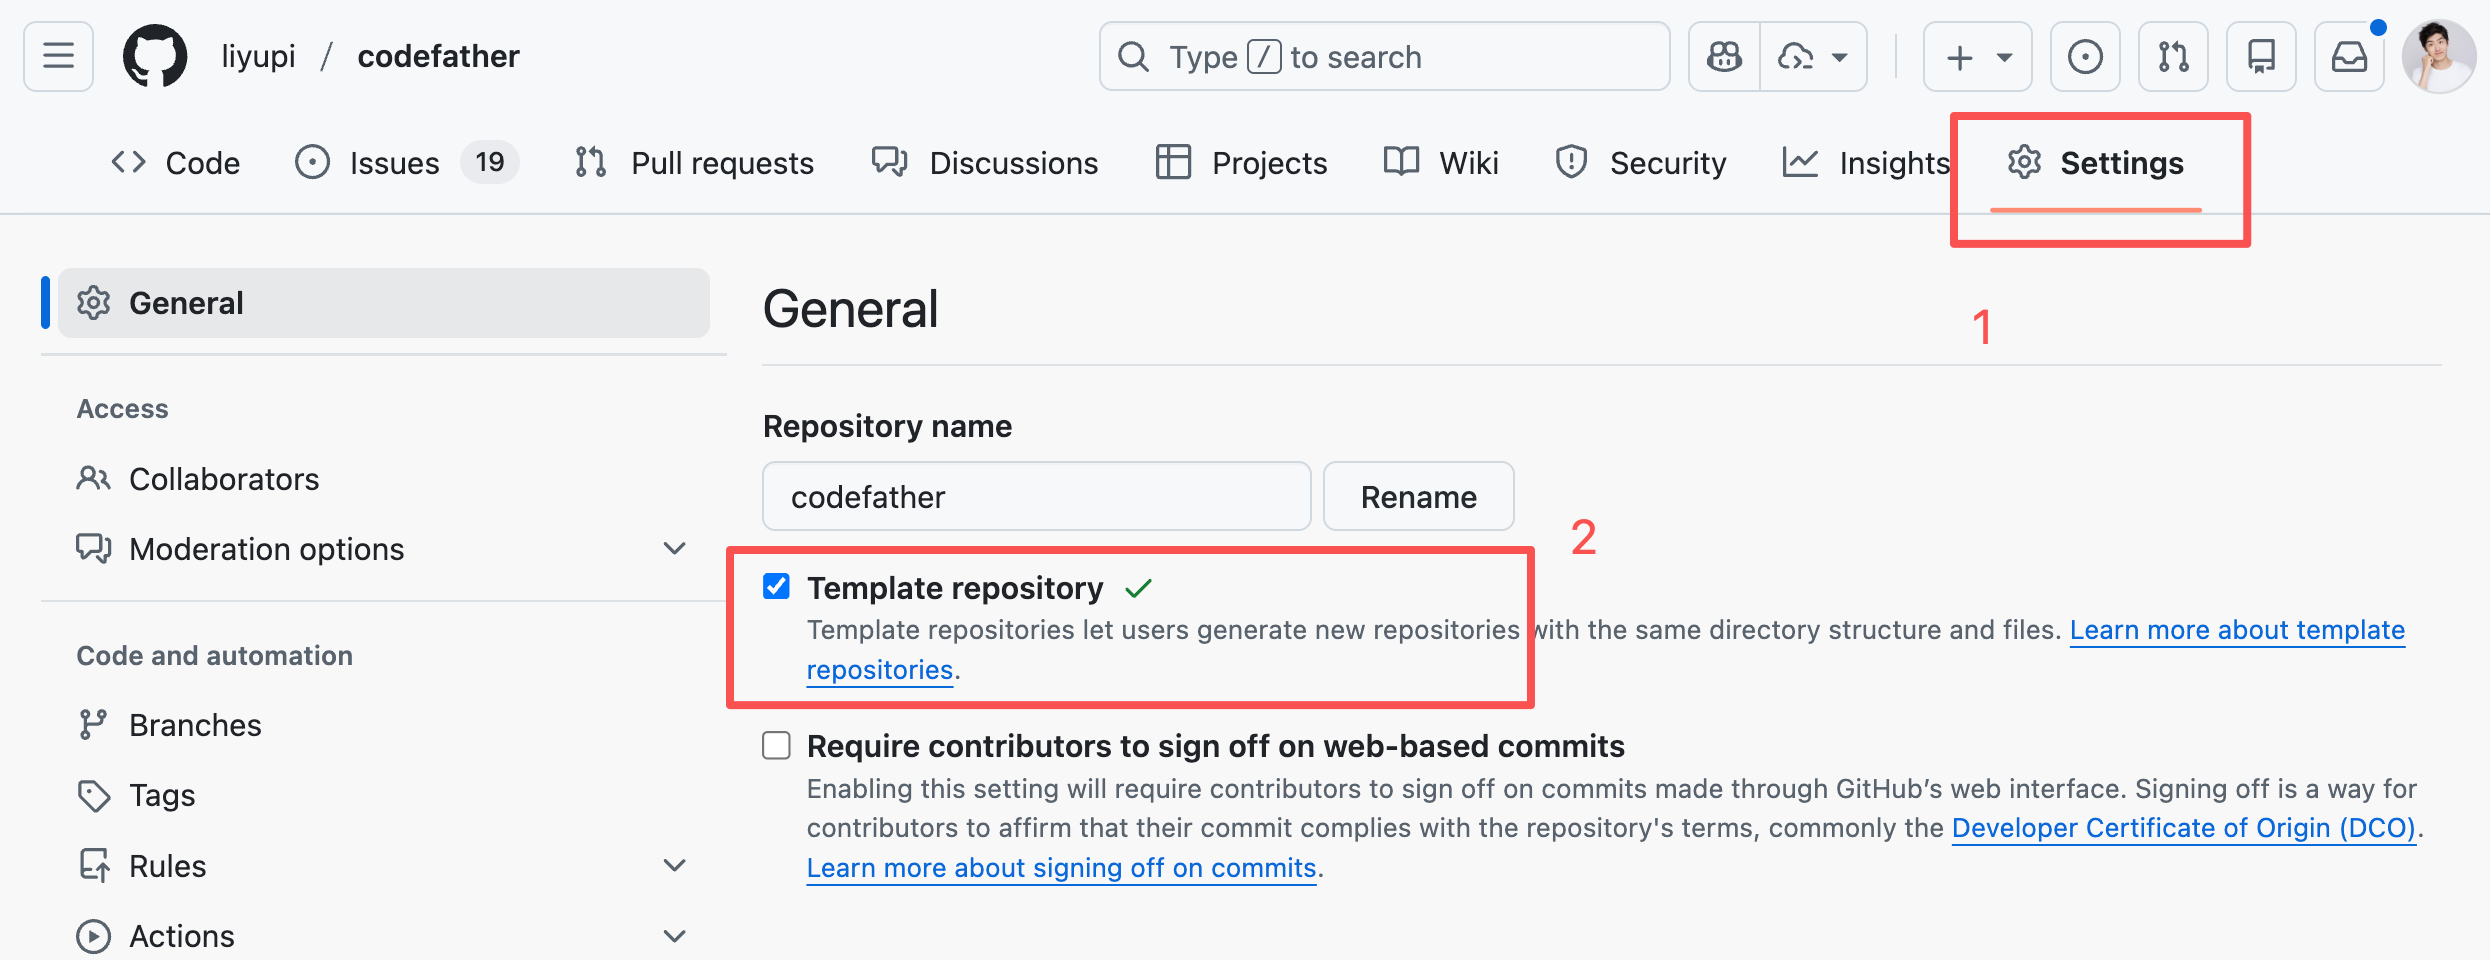
Click Use this template to quickly fork new projects:
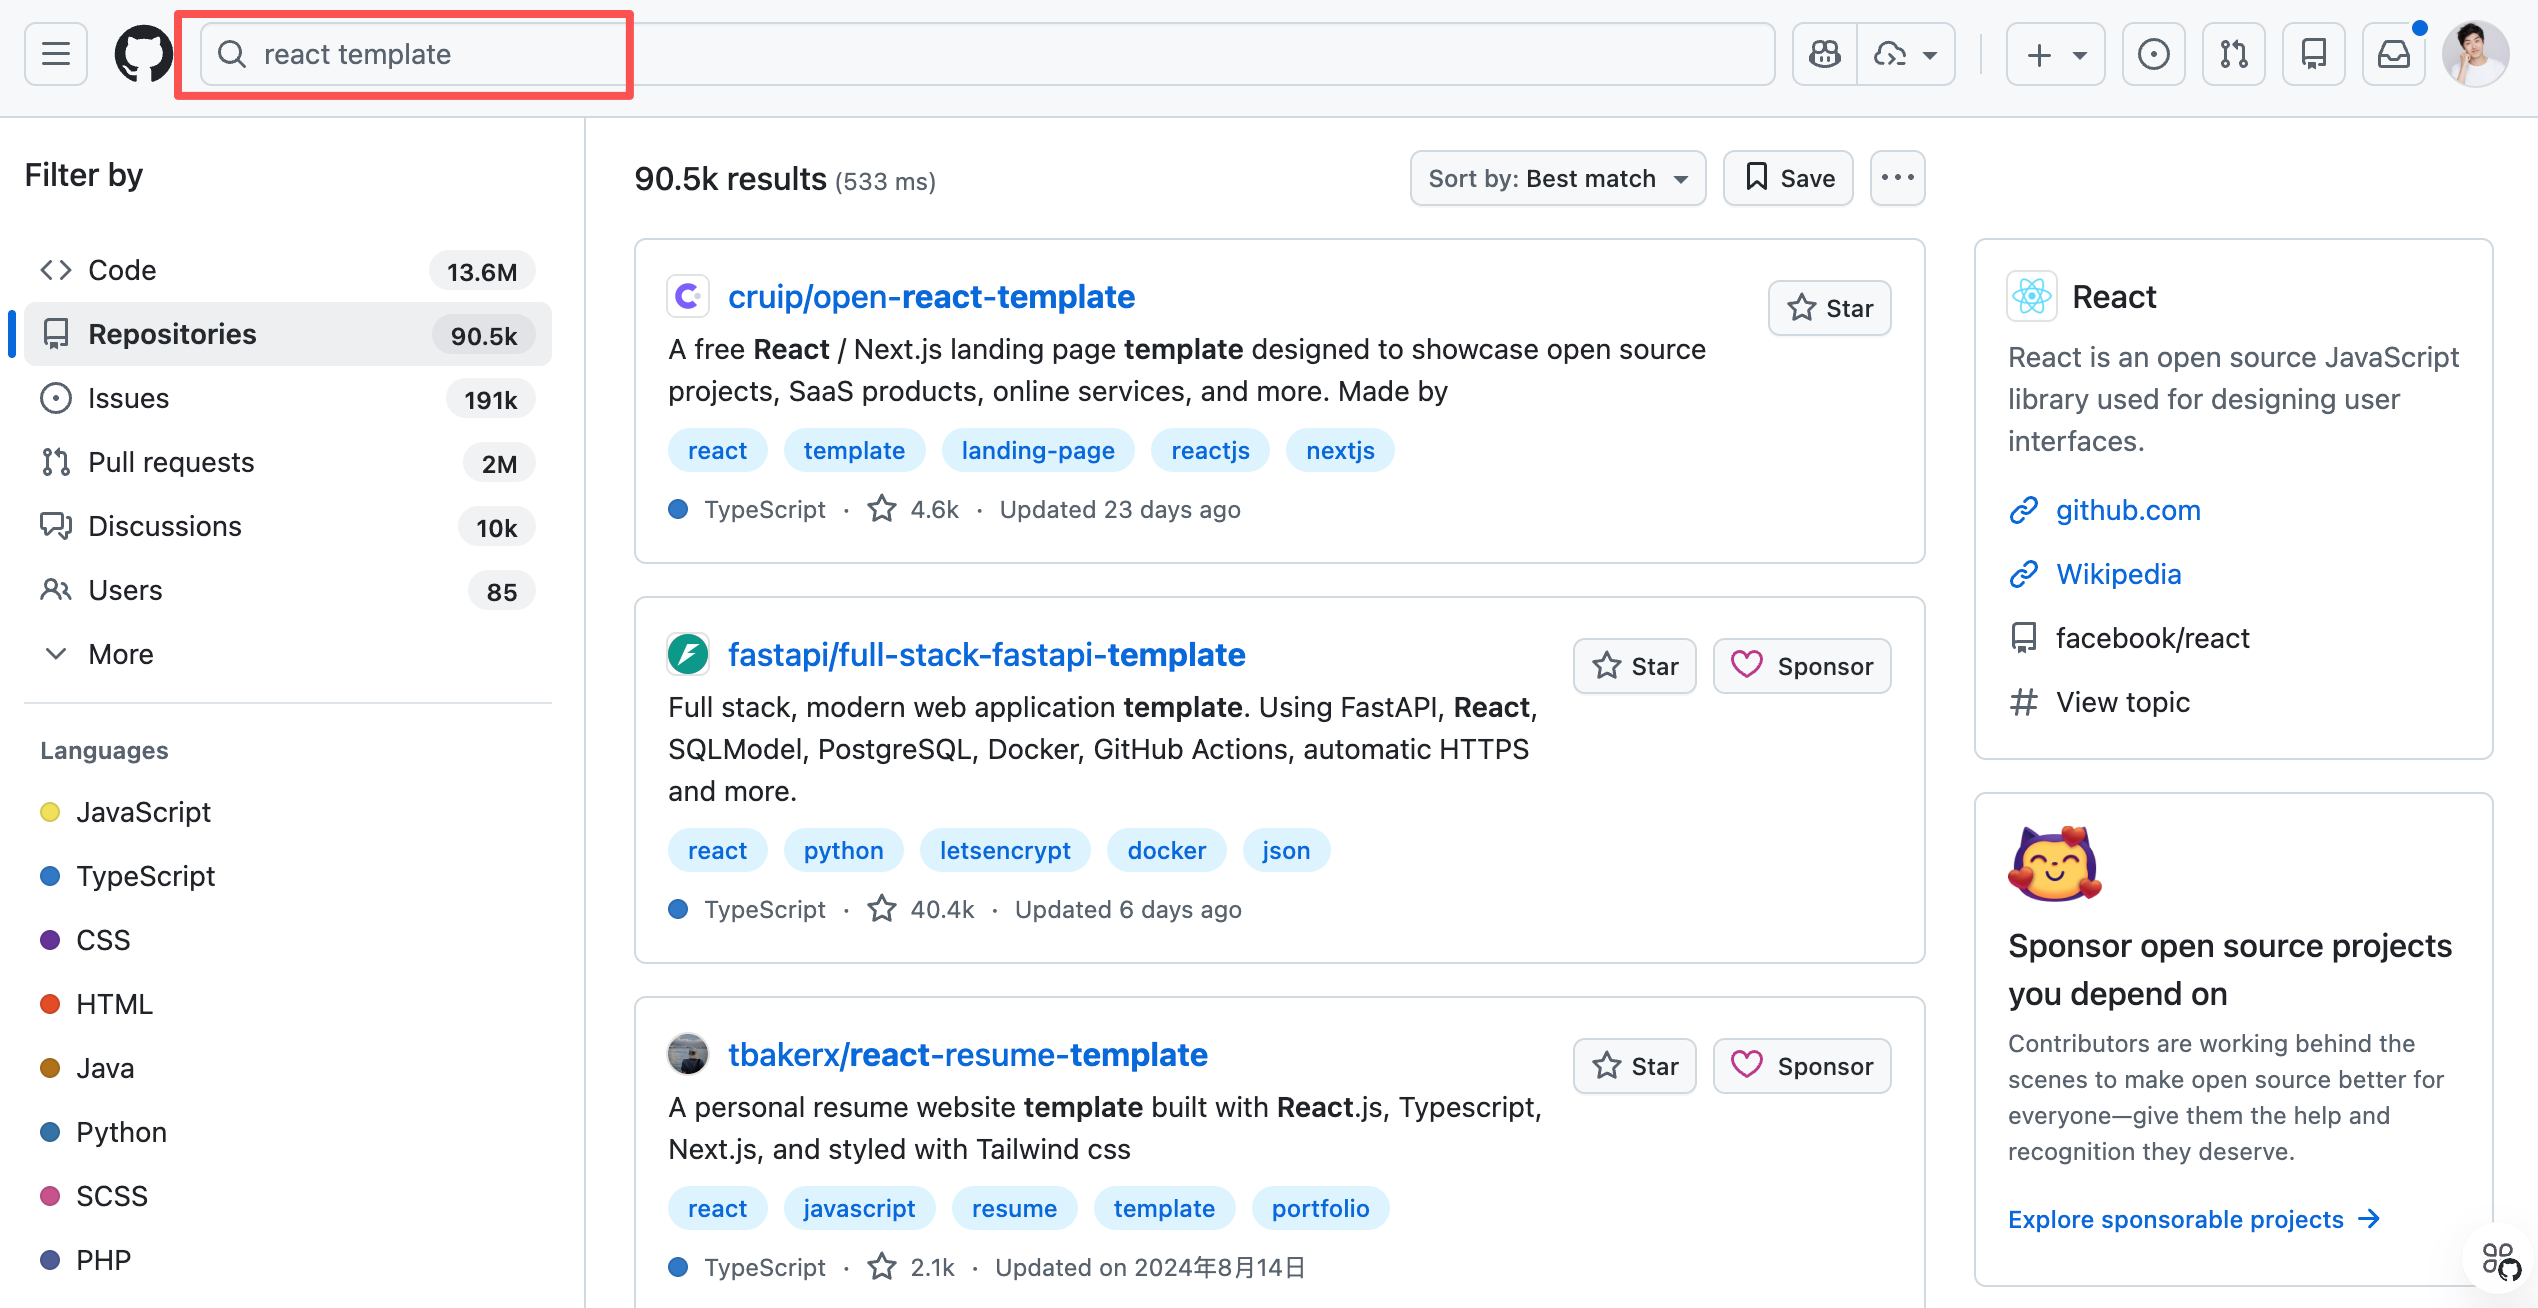
Beyond personal templates, search GitHub for "react template", "nextjs starter" to find excellent community templates. Prioritize high-star, actively maintained projects.
Click "Use this template" to create derivative projects. Standing on giants' shoulders saves massive configuration time.
5. Workflow Automation
Automate repetitive operations to save time and effort.
These advanced techniques mainly suit programmers. Complete beginners can skip and return when needed.
Use npm Scripts
npm scripts define and run command scripts in Node.js projects. Essentially, save common commands in config files for quick execution via short commands (e.g., start project, build, test).
Define common scripts in package.json:
{
  "scripts": {
    "dev": "vite",
    "build": "tsc && vite build",
    "preview": "vite preview",
    "lint": "eslint . --ext ts,tsx",
    "lint:fix": "eslint . --ext ts,tsx --fix",
    "format": "prettier --write \"src/**/*.{ts,tsx}\"",
    "type-check": "tsc --noEmit",
    "clean": "rm -rf dist node_modules",
    "fresh": "npm run clean && npm install"
  }
}
Now npm run lint:fix automatically fixes code style without typing long commands.
Git Workflow Automation
Git is the mainstream distributed version control system essential for team collaboration. It tracks all file changes with version numbers, enabling reverts, diffs, and preventing overwrites.
Create Git command aliases to simplify common operations:
# Add to ~/.gitconfig
[alias]
  st = status
  co = checkout
  br = branch
  ci = commit
  pl = pull
  ps = push
  lg = log --oneline --graph --decorate
  save = !git add -A && git commit -m 'WIP: save progress'
  undo = reset HEAD~1 --soft
Now git st equals git status, git save quickly saves progress.
Use Makefile
Makefiles configure automation build tools, originally for C/C++ compilation. Now used to manage complex build flows by defining task dependencies (e.g., deploy requires build requires test). Execute sequences via short commands like make deploy.
For complex build processes:
.PHONY: dev build deploy clean

dev:
	npm run dev

build:
	npm run build

deploy: build
	vercel --prod

clean:
	rm -rf dist .next

fresh: clean
	npm install
	npm run dev
Now make deploy automatically builds and deploys.
Use GitHub Actions
GitHub Actions automates workflows triggered by events like pushes or PRs. Examples: auto-run tests on push, auto-deploy to servers, auto-publish releases - eliminating manual operations.
Configure via YAML in .github/workflows:
# .github/workflows/deploy.yml
name: Deploy

on:
  push:
    branches: [main]

jobs:
  deploy:
    runs-on: ubuntu-latest
    steps:
      - uses: actions/checkout@v3
      - uses: actions/setup-node@v3
        with:
          node-version: '18'
      - run: npm install
      - run: npm run build
      - run: npm run test
      - name: Deploy to Vercel
        run: vercel --prod
        env:
          VERCEL_TOKEN: ${{ secrets.VERCEL_TOKEN }}
This script: checks out code, sets up Node.js, installs deps, builds, tests, and deploys to Vercel on push to main - fully automated.
More advanced uses: my AI Knowledge Base auto-updates latest AI news via Actions:

Efficiency Workflows for Everyone
The above are technical automation methods. For non-programmers or beginners, some general workflows exist:
- No-code platforms: Like Bolt.new, Lovable handle builds, tests, deployments automatically - just focus on features.
- AI-generated configs: Ask AI for configs like "Generate GitHub Actions config for auto-deploy to Vercel" for copy-paste solutions.
- One-click deployment: Platforms like Vercel, Netlify deploy projects automatically when connected to GitHub repos, no config needed.
6. AI Enhancement Tools - MCP
Many tools boost AI development efficiency.